
Propagation
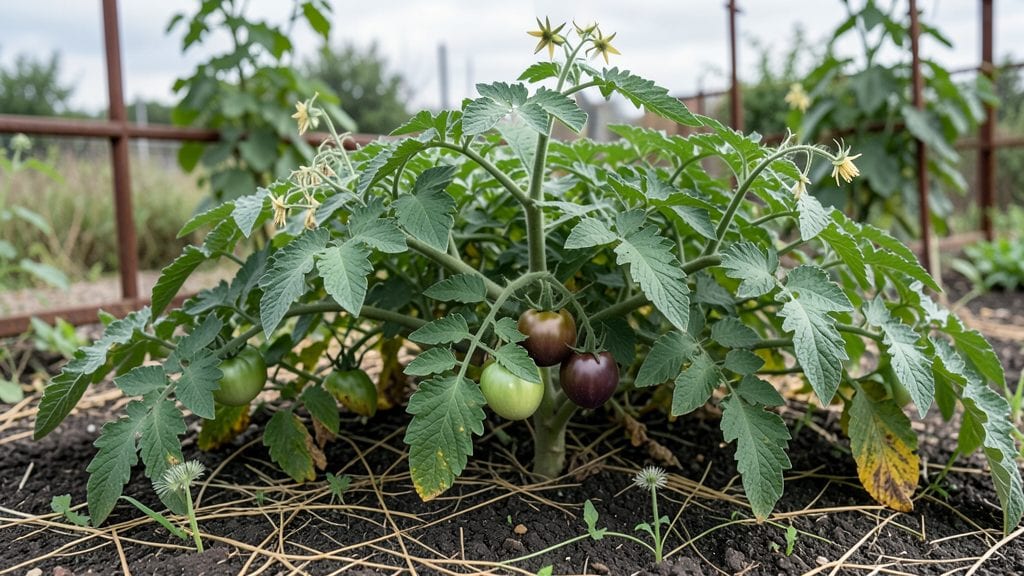
Growing American heirloom seeds connects you to a living history—each packet holds stories of farmers, flavors lost to time, and plants that thrive exactly where they evolved. 🌱 My first tomato from a 1920s seed was so sweet it made my neighbor ask where I bought it (I just grinned and said "from my great-grandfather’s garden").
These seeds aren’t just plants; they’re biodiversity insurance, adapted to local climates and resistant to the pests that wipe out modern hybrids.
You’ll need just three things to start: a sunny spot, good soil, and patience—heirlooms grow slower but pack deeper flavor and color. Many varieties, like Cherokee Purple tomatoes or Missouri Golden cantaloupes, perform best in their native regions, but even in other zones, they outshine hybrids with their hardiness.
The real magic happens when you save seeds from your best plants, ensuring their traits stay true for generations.
Imagine biting into a tomato so rich it tastes like summer in a jar, or watching your children discover the same beans their ancestors grew. Heirlooms reward you with unmatched diversity—each seed a piece of agricultural heritage.
Plus, they’re perfect for organic gardens since they’re not bred for chemical dependency. Start with a few varieties, let them thrive, and soon you’ll have seeds to trade with fellow gardeners.
Fair warning: these seeds won’t grow overnight. But the payoff—bold flavors, vibrant colors, and a garden that feels like home—is worth every extra week. Whether you’re reviving family traditions or simply craving better-tasting produce, heirlooms deliver. Let’s get those seeds in the ground!
📚 In This Guide
- What you need
- Instructions
- Tips and common mistakes
- Wrapping up and next steps
What you need
- ● Heirloom seeds: Choose 3–5 varieties (e.g., Brandywine tomatoes, Black Krim, or Cherokee Purple—check seed packets for open-pollinated labels!). Start with 10–20 seeds per variety for a small garden.
- ● Seed-starting trays or pots: 2–4 biodegradable or reusable trays (2–4" deep) with drainage holes, or 4–6 individual pots.
- ● Seed-starting mix: 1–2 bags of sterile, lightweight potting soil (avoid garden soil—it’s too dense!). Look for mixes labeled "organic" or "seed-starting blend."
- ● Watering can or spray bottle: A gentle spray nozzle prevents disturbing seeds.
- ● Grow lights or sunny windowsill: A 4–6" LED grow light (or a south-facing window with 6+ hours of sunlight daily).
- ● Labels and markers: Small plant tags or popsicle sticks + a permanent marker to track varieties.
- ○ Fertilizer (optional but helpful): A balanced, water-soluble fertilizer (e.g., 5-5-5 or fish emulsion) for seedlings after 2–3 weeks.
- ● Trowel or small shovel: For transplanting seedlings into the garden later.
- ● Gloves: A pair of gardening gloves to protect your hands.
- ● Pruning shears: For trimming leggy seedlings or harvesting.
- ○ Garden journal or notebook: To log planting dates, varieties, and growth notes (optional but highly recommended!).
- ● Access to outdoor space: A garden bed, raised bed, or containers (6"+ deep for root crops like carrots). Ensure it gets 6–8 hours of sunlight daily.
- ○ Mulch (optional): Straw or shredded leaves to retain moisture and suppress weeds.
Step-by-Step guide to cultivating American heirloom seed varieties
Here’s how to bring these historic plants to life in your garden—just follow these simple steps!
🌱 Step 1: Select and Prepare Your Seed Varieties
Start by choosing 4 diverse heirloom varieties—think Cherokee Purple tomatoes, Black Krim eggplants, or Mammoth Melting cantaloupes—each with a rich history and unique flavor. I always pick seeds from reputable sources like Seed Savers Exchange or Baker Creek Heirloom Seeds to ensure authenticity and vigor.
Before planting, soak seeds overnight in lukewarm water to soften their outer coats. This speeds up germination and gives you a head start. Use a small bowl or jar, cover loosely with a damp paper towel, and place it in a warm spot—like on top of the fridge—where the temperature stays around 70-75°F. You’ll see the seeds plump up noticeably by morning.
🌿 Step 2: Plant in Well-Draining, Fertile Soil
Heirloom seeds thrive in loose, nutrient-rich soil with plenty of organic matter. Mix 3 gallons of compost into the top 6 inches of your garden bed or container soil to give roots the space they need to spread. Avoid compacted or clay-heavy soil—heirlooms often have larger, more delicate root systems than hybrids.
Plant seeds at the depth recommended on the packet—usually twice the seed’s diameter—but never deeper than 1 inch. For example, Cherokee Purple tomato seeds go ¼ inch deep, while Black Krim eggplant seeds can handle ½ inch. Space seeds 12-18 inches apart for vegetables and 6-12 inches apart for herbs, giving them room to mature without competition.
☀️ Step 3: Provide Consistent Light and Water
Heirloom plants love full sun (6-8 hours daily), but they’re tougher than hybrids when it comes to heat and drought once established. Water deeply once a week after germination, aiming for 1 inch of water per week—more if your area is particularly dry. I use a soaker hose to deliver moisture directly to the roots, which keeps foliage dry and reduces disease risk.
Watch for first true leaves (not the initial seed leaves) as your signal that germination is complete. This usually happens within 7-14 days, depending on the variety and weather. Once leaves appear, thin seedlings to the strongest one per spot, snipping weaker stems at the base with clean scissors to avoid disturbing roots.
✂️ Step 4: Support and Maintain for Maximum Yield
Many heirloom varieties—like Mammoth Melting cantaloupes or Brandywine beans—need sturdy trellises or cages to support their weight. Install 5-foot-tall tomato cages or bamboo stakes early to prevent root disturbance later. Prune suckers (the small shoots in the joint between the stem and branches) regularly to direct energy into fruit production.
Fertilize lightly with balanced organic fertilizer (10-10-10) every 4-6 weeks after planting. Heirlooms often produce fewer fruits than hybrids, so they appreciate a little extra care. Harvest when fruits reach full color and firmness—don’t wait too long, or flavors can turn bitter. Save seeds from your best plants to preserve their unique traits for next year!
Tips & tricks for perfect American heirloom seed cultivation
Here's how to transform your garden into a thriving heirloom treasure trove with these game-changing strategies!
Seed Preparation Secret: That overnight soak in lukewarm water (around 75°F) is your germination game-changer! I've found adding a drop of hydrogen peroxide (3%) to the soaking water helps prevent mold while softening those tough seed coats. Just 1 teaspoon per quart of water does the trick—it's like giving your seeds a spa treatment before planting.
Soil Science: Don't just add compost—create a powerhouse mix! For container gardening, blend the 3 gallons of compost with equal parts coconut coir and perlite to improve drainage. Heirloom roots need that air circulation to prevent rot, especially with varieties like Mammoth Melting cantaloupes that develop extensive root systems. I always test my soil pH too—aim for 6.0-7.0 for most vegetables.
Thinning Technique: When it's time to thin seedlings in Step 3, I use a pair of clean scissors to snip at the base rather than pulling. This prevents disturbing the roots of your keepers. For extra care, I water the area well first—moist soil makes the cutting cleaner and reduces stress on the remaining plants. Watch those first true leaves appear within that 7-14 day window—they're your signal to start thinning!
Fertilizer Timing: That 4-6 week fertilization schedule is perfect, but here's my pro move: I alternate between the 10-10-10 organic fertilizer and a fish emulsion (5-1-1) every other feeding. The fish emulsion gives a nitrogen boost that heirlooms love, especially during their fruiting phase. Just remember—less is more with heirlooms! They produce fewer fruits than hybrids, so you don't want to overfeed.
Pro Tips for American Heirloom Seeds
- Here's how to transform your garden into a thriving heirloom treasure trove with these game-changing strategies!
- Seed Preparation Secret: That overnight soak in lukewarm water (around 75°F) is your germination game-changer!
- Soil Science: Don't just add compost—create a powerhouse mix!
Frequently asked questions
Got questions about growing American heirloom seeds? You’re not alone! Here are answers to the most common queries—from beginners to seasoned gardeners—to help you cultivate a thriving legacy of flavors and traditions.
What’s the difference between heirloom seeds and hybrid seeds?
Heirloom seeds are open-pollinated, meaning you can save and replant them year after year while maintaining the same traits. Hybrids are crossbred for specific traits (like disease resistance) but don’t produce true-to-type seeds. Heirlooms offer diverse flavors, colors, and textures—think striped tomatoes or purple carrots!
When is the best time to plant heirloom seeds?
Timing depends on your climate and crop! Cool-season veggies (like lettuce or peas) thrive in early spring or fall, while warm-season plants (tomatoes, peppers) need soil temps above 60°F. Check your seed packet for days to maturity and local frost dates. Pro tip: Start indoors 6–8 weeks before the last frost for a head start!
Are heirloom seeds more expensive than regular seeds?
Sometimes! Heirloom seeds often cost more due to limited availability, hand-harvesting, or specialty varieties. However, they’re a long-term investment—once you save seeds from your own plants, you’ll never need to buy them again. Budget-friendly tip: Start with a few affordable varieties (like beans or squash) to test the waters!
How do I prevent cross-pollination if I’m growing multiple heirloom varieties?
Cross-pollination is natural, but to preserve purity, isolate plants by at least 10–20 feet (check seed packets for specifics). For wind-pollinated crops (like corn), space varieties further apart. Hand-pollinate delicate flowers (e.g., tomatoes) with a paintbrush for control. Embrace experimentation—some cross-pollinated hybrids create unique surprises!
What if my heirloom seeds don’t germinate?
Don’t panic! Try these fixes:
- Test viability by soaking seeds in water—sinkers are good, floaters may be old.
- Adjust moisture (keep soil damp but not soggy) and warmth (use a heat mat if needed).
- Check seed age—most heirlooms last 2–5 years if stored dry and cool.
- Scarify hard-coated seeds (like peas) with sandpaper to encourage sprouting.
Wrapping up and next steps
American heirloom seeds are more than just a gardening trend—they’re a living piece of history, packed with flavor, resilience, and stories waiting to be grown. Whether you’re preserving biodiversity, reviving family traditions, or simply craving that perfect tomato, these seeds offer a rewarding journey for gardeners of all levels.
Ready to plant your legacy? Start small—try a few varieties this season, save your seeds, and watch your garden (and heritage) flourish. Your future harvests—and future gardeners—will thank you! 🌱✨