
Vegetables
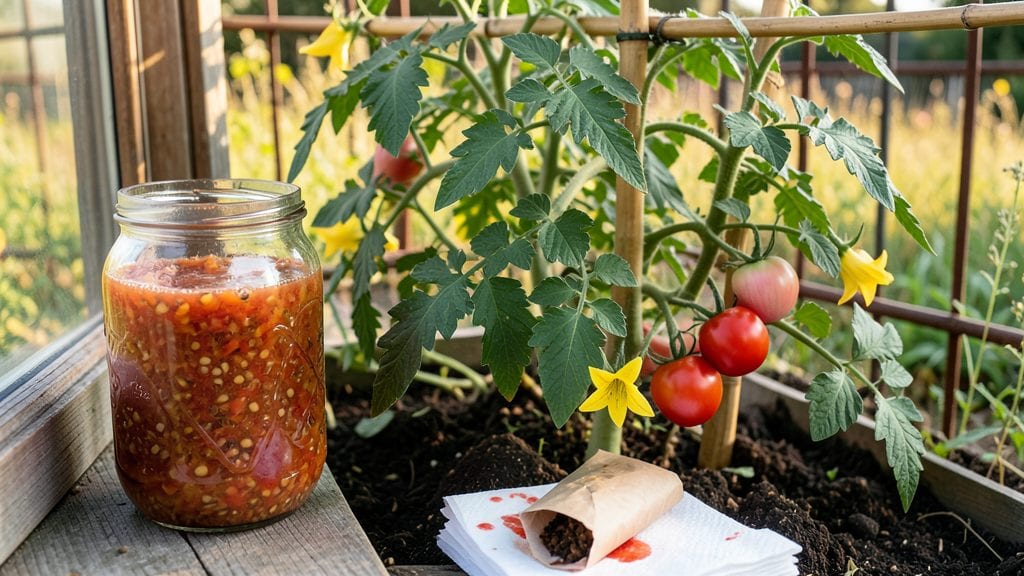
Preserving heirloom tomato seeds isn’t just about saving a few seeds—it’s about keeping alive the unique flavors and histories of varieties you can’t buy at stores. 🌱 I’ve saved seeds from my prized ‘Brandywine’ and ‘Cherokee Purple’ tomatoes for years, and the fermentation trick makes the difference between viable seeds and a sad pile of mush.
The process starts with ripe tomatoes, a clean jar, and a little patience. You’ll mash the pulp, add water, and let nature do the work for a few days while mold and bad seeds get weeded out.
Most people skip the fermentation step, but it’s what separates good seeds from great ones—removing gel coatings and ensuring strong germination rates. No fancy equipment needed, just a jar and a warm spot.
By the time you’re done, you’ll have clean, dry seeds ready to plant next spring. The best part? You’ll know exactly what grows in your garden—no surprises, just the flavors you love.
Plus, you’ll save money and reduce waste by not buying new plants every season. Here’s how to do it right the first time.
Works for any heirloom tomato, from beefsteaks to tiny cherry varieties. The same method applies whether you’re saving seeds for your first garden or your tenth. Let’s get those seeds ready for next year’s harvest!
📚 In This Guide
- What you need
- Instructions
- Tips and common mistakes
- Wrapping up and next steps
What you need
- ● Mature heirloom tomatoes: 3–5 ripe (but not overripe) tomatoes per variety. Choose firm, healthy ones with fully developed seeds inside.
- ● Small bowl or jar: A 16–32 oz glass or ceramic container (wide-mouth works best for easy scraping later).
- ● Water: Distilled or dechlorinated water (tap water left out for 24 hours or boiled and cooled works too).
- ● Spoon or butter knife: For scooping out seeds and gel.
- ● Fine-mesh strainer or cheesecloth: A small colander (¼-inch mesh) or a piece of cheesecloth (cut to fit your container).
- ● Paper towels or coffee filters: 2–3 sheets for drying seeds.
- ● Small envelope or seed packet: Paper or breathable fabric (like a muslin bag) for storage. Label with variety name and date!
- ● Permanent marker or labels: To mark your seed packets clearly.
- ● Fermentation aid: A splash of non-chlorine bleach (¼ tsp per quart of water) to prevent mold if your tomatoes are mold-prone.
- ● Seed drying tray: A mesh screen or baking sheet lined with parchment paper for even drying.
- ● Humidity pack: A silica gel packet or damp paper towel in your seed packet to maintain moisture levels during storage.
- ● Notebook: To log seed varieties, germination rates, and harvest dates for future reference.
Step-by-step instructions for preserving heirloom tomato seeds
Here’s the foolproof fermentation method I’ve used for years to save seeds that sprout strong and true.
🌱 Step 1: Scoop and Rinse the Seeds
Cut open 4-6 ripe heirloom tomatoes (pick ones that are fully colored and slightly soft to the touch). Scoop out the gel and seeds into a clean bowl. The gel contains enzymes that help break down the seed coat—this is the key to good germination later.
Add 1 cup of water and stir gently. Let the mixture sit for 2-3 days at room temperature. You’ll see the seeds separate from the gel—good seeds will sink to the bottom, while bad ones float. Skim off any debris or moldy bits that rise to the surface.
💧 Step 2: Ferment for 2-3 Days
Leave the bowl uncovered in a warm spot (around 70-75°F) for 2-3 days. You’ll notice bubbles forming—this is fermentation at work! The seeds will smell slightly sour, but don’t worry, this is normal. Fermentation helps kill weak seeds and diseases.
Stir the mixture once a day to keep the seeds moving and prevent mold. After 2-3 days, the good seeds will sink, while bad seeds and debris will float. Pour off the water and floating material, leaving only the settled seeds in the bowl.
☀️ Step 3: Rinse and Dry the Seeds
Rinse the remaining seeds with clean water to remove any leftover gel. Spread them out on a paper towel or seed drying screen in a single layer. Let them air-dry in a warm, dry place (around 75-80°F) for 1-2 weeks. They’re ready when they’re completely dry and brittle to the touch.
To test dryness, pick up a seed—it should crumble slightly if pressed gently. Store the dried seeds in a paper envelope or small glass jar in a cool, dark place. Label them with the tomato variety and date. Properly stored seeds stay viable for 3-5 years!
⏰ Step 4: Test Germination (Optional but Recommended)
Before planting, test a few seeds to confirm viability. Moisten a paper towel, place 10 seeds on it, and fold it over. Keep it in a warm spot (around 75°F) for 7-10 days. If 80% or more sprout, your seeds are ready to plant. If fewer than half sprout, try storing them longer or check for mold.
This simple test saves time and ensures you’re not wasting good garden space on weak seeds. Once confirmed, plant your heirloom seeds in well-draining soil and watch them grow into thriving plants!
Tips & tricks for perfect heirloom tomato seed preservation
These little tricks will help you maximize seed viability and save your favorite heirloom varieties for next season.
Tomato Selection Matters: Choose tomatoes that are fully ripe but not overripe—they should yield easily when gently squeezed. Overripe tomatoes have more fermented gel, which can complicate the process. I always pick tomatoes that are slightly soft to the touch but still firm enough to hold their shape. This balance ensures you get the best separation between seeds and gel during fermentation.
Fermentation Temperature Control: Maintain that 70-75°F range during the 2-3 day fermentation by placing your bowl in a warm spot like near a sunny window or on top of your fridge. If your kitchen is cooler, you might need to extend the fermentation time slightly—just watch for bubbles and that telltale sour smell. Too cold, and fermentation slows; too hot, and you risk mold growth.
Drying Technique Upgrade: For even drying in Step 3, place your seed drying screen or paper towel on a baking rack inside a shallow pan. This allows air to circulate on all sides, preventing any seeds from sticking together. I like to place the setup in a warm, dry spot with indirect sunlight—direct sun can overheat and potentially damage the seeds. The goal is 1-2 weeks of gentle drying until they're completely brittle.
Storage Strategy: Once your seeds are perfectly dry, store them in small, labeled envelopes or jars with silica gel packets to absorb moisture. I keep mine in a cool, dark place like a pantry or basement. The key is to prevent moisture buildup—condensation can ruin seeds faster than anything. Label each envelope with the tomato variety and date to track viability over time.
Pro Tips for Preserve Heirloom Tomato Seeds
- These little tricks will help you maximize seed viability and save your favorite heirloom varieties for next season.
- Tomato Selection Matters: Choose tomatoes that are fully ripe but not overripe—they should yield easily when gently squeezed.
- Fermentation Temperature Control: Maintain that 70-75°F range during the 2-3 day fermentation by placing your bowl in a warm spot like near a sunny window or on top of your fridge.
Frequently asked questions
How long can I store preserved tomato seeds before they lose viability?
Properly dried and stored heirloom tomato seeds can last 3–5 years or even longer if kept in a cool, dark place with low humidity (below 30%). For best results, store them in airtight containers or sealed envelopes in the freezer for up to 10+ years.
Do I need to ferment seeds if I’m saving them for next year?
Yes! Fermentation helps separate viable seeds from the gel and removes inhibitors that could prevent germination. Skip this step only if you’re using a dry-down method (like letting seeds air-dry on paper towels), but fermentation is the most reliable way to ensure strong, healthy seeds.
What if my seeds don’t ferment properly—will they still work?
If fermentation stalls (e.g., mold grows or the water smells bad), rinse the seeds thoroughly with clean water and dry them ASAP. While some seeds may still germinate, proper fermentation boosts viability. If in doubt, test a few seeds on damp paper towels to check germination rates before planting.
Can I save seeds from hybrid tomatoes?
No—hybrid tomatoes (marked "F1" or "hybrid") produce seeds that won’t grow true to type. Stick to heirloom or open-pollinated varieties for consistent, flavorful tomatoes. Look for seeds labeled "heirloom," "organic," or "non-GMO" to ensure reliability.
How should I label my saved seeds?
Use a permanent marker or printed labels with:
- Variety name (e.g., "Brandywine," "Sungold")
- Year saved (to track freshness)
- Germination date (if tested)
- Special notes (e.g., "needs trellis," "heat-loving")
Wrapping up and next steps
Preserving heirloom tomato seeds is a rewarding way to keep your garden’s legacy alive—no fancy tools or complicated steps required! With just a little patience and the fermentation trick, you’ll unlock seeds ready to plant next season.
Whether you’re a seasoned gardener or a curious beginner, this method ensures you’ll always have a stash of heirloom treasures to grow.
Now that you’re armed with the know-how, why not try it today? Grab a ripe tomato, follow the steps, and experience the joy of saving seeds that carry stories from your garden’s past. Happy growing! 🌱✨