Vegetables
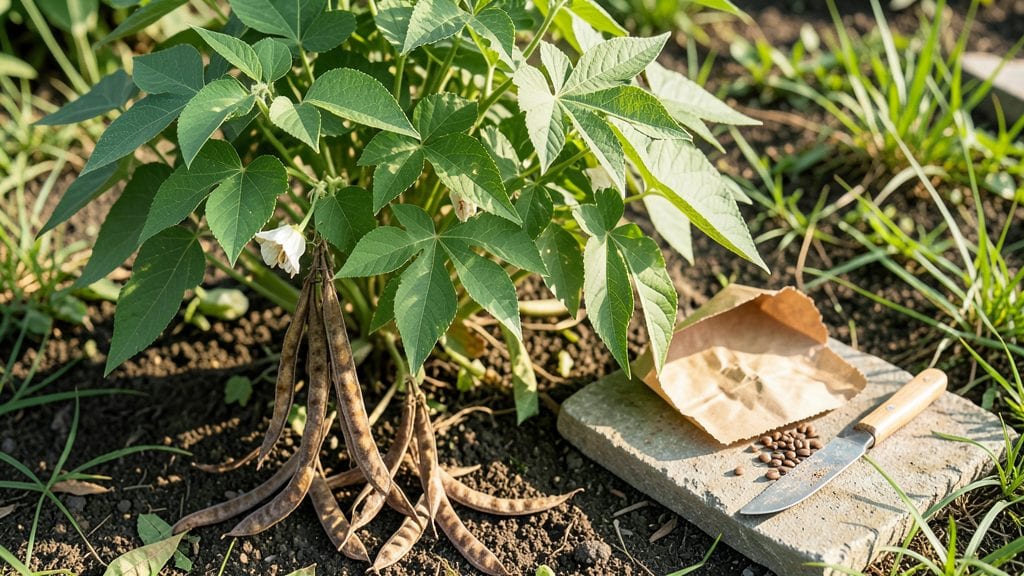
Saving green bean seeds lets you grow your favorite varieties for free next year—no store-bought plants needed. 🌱 I’ve saved seeds from my own garden for three seasons now, and the process is simpler than most gardeners think, once you know the right timing and storage tricks.
The key is picking the right pods—let them stay on the vine until they turn yellow and dry out completely, usually about 2-3 weeks after they’ve stopped producing fresh beans.
Once they’re crispy, crack them open to find the flat, cream-colored seeds inside. These are your future plants, just waiting for a cozy spot to dry out fully before storage.
With proper drying and storage in a cool, dark place, your seeds will stay viable for 3-5 years, ready to sprout when you’re. The payoff? A garden full of beans that taste exactly like the ones you grew this season—no surprises, no disappointments, just pure homegrown satisfaction.
Whether you’re growing bush beans or pole varieties, the same method works. Here’s exactly how to do it without losing a single seed to moisture or pests—plus what to watch for when they’re ready to plant again.
📚 In This Guide
- What you need
- Instructions
- Tips and common mistakes
- Wrapping up and next steps
What you need
- ● Mature green bean pods: Choose healthy, disease-free pods from your best-performing plants. Aim for 10–15 pods per variety to ensure genetic diversity.
- ● Paper towels or newspaper: Use a single sheet (or more if needed) for drying seeds.
- ● Scissors or pruning shears: For carefully snipping open pods without damaging seeds.
- ● Small envelopes or seed-saving bags: Opt for breathable, labeled paper envelopes (e.g., 1–2 oz size) or paper seed packets with a zip-top closure.
- ● Pencil or permanent marker: For labeling seeds with the variety name, date, and location.
- ● Dessicated (dry) environment: A cool, dark, well-ventilated space (e.g., a seed-saving tray, mesh bag, or open container) with low humidity (below 40%).
- ○ Fine-mesh sieve (optional but helpful): A small kitchen strainer (¼-inch mesh) for separating seeds from chaff.
- ● Seed drying tray: A mesh or perforated tray (e.g., plastic or wooden) to speed up drying.
- ● Dehumidifier or silica gel packets: For extra-low-humidity storage in humid climates.
- ● Digital scale: To measure seed moisture content (aim for 5–8% moisture for long-term storage).
- ● Vacuum sealer: For long-term airtight storage (extend shelf life to 10+ years).
- ● Notebook or spreadsheet: To track variety traits, germination rates, and storage conditions.
Step-by-Step instructions for saving green bean seeds
Here’s how to rescue seeds from your best plants and store them properly for next season.
🌱 Step 1: Select and Harvest Mature Pods
Wait until your green beans produce pods that are fully mature but still dry and papery on the vine—these are the ones with viable seeds inside. Look for pods that have turned brown and crispy, but haven’t yet fallen off or been eaten by pests. I pick mine in late summer when the plants are winding down and the pods are clearly past their edible stage.
Harvest on a dry day to avoid moisture, which can speed up seed spoilage. Cut the pods directly from the vine with clean scissors or pruners, leaving a short stem attached. Avoid touching the pods with wet hands or tools—excess moisture encourages mold growth during storage.
💧 Step 2: Extract and Dry the Seeds
Split open the dried pods with your fingers or a small knife, then carefully remove the seeds inside. Place them in a single layer on a clean, dry paper towel or seed-saving tray. I like to spread them out on a baking sheet lined with parchment paper for even airflow.
Let the seeds dry in a warm, dark place for 7-10 days, stirring them gently every few days to prevent clumping. The seeds are ready when they’re completely dry and hard to the touch—no moisture should remain. If you live in a humid climate, use a small fan on low to speed up drying without disturbing the seeds.
⏰ Step 3: Test and Store the Seeds
Before storing, do a quick viability test by placing 10 seeds in a jar of water. If 80% or more float, they’re not worth saving—discard them. If they sink, they’re good to store. I also check for any signs of mold or discoloration, which means the seeds won’t germinate well.
Transfer the dried seeds into an airtight container, like a small glass jar or resealable bag. Add a silica gel packet (or a few uncooked rice grains) to absorb any lingering moisture. Label the container with the bean variety and the year—seeds lose viability over time, and fresh ones always perform best.
☀️ Step 4: Preserve for Long-Term Use
Store the sealed container in a cool, dark place, like a pantry or refrigerator. Green bean seeds stay viable for 3-5 years if kept dry and cool. I check mine annually—if they smell musty or feel damp, they’ve lost viability and should be discarded.
When planting next season, soak the seeds overnight before sowing to speed up germination. This simple step ensures your homegrown beans will thrive just like the original plants.
Tips & tricks for perfect green bean seed preservation
Saving green bean seeds successfully takes patience and attention to detail—here's how to avoid common pitfalls and get the best results every time.
Pod Selection is Everything: In Step 1, those mature pods should be completely dry and papery—almost like they're ready to crumble. If they still have any green or soft spots, they're not ready yet. I've learned the hard way that harvesting too early means seeds won't be viable. Look for pods that have turned completely brown and crispy, but haven't fallen off the vine yet. This is the sweet spot for seed saving.
Drying Strategy for Humid Climates: The 7-10 day drying period in Step 2 can be tricky if you live in a damp area. I've found that placing a small fan on low circulation near my drying seeds (but not directly blowing on them) can cut the drying time by 2-3 days. Just be gentle—you don't want to create dust that could contaminate your seeds. A dehumidifier in the room also helps create ideal drying conditions.
Viability Test Tricks: When testing those 10 seeds in water during Step 3, don't just look at how many float—pay attention to how quickly they sink. If they sink immediately but then float back up, they're not viable. Also, check for any seeds that look discolored or have spots. These won't germinate well, even if they sink. I've saved myself a lot of frustration by being thorough with this test before storing.
Storage Container Upgrade: While any airtight container works for Step 4, I've found that small glass jars with screw-on lids create the best seal. For extra protection against moisture, I place a small silica gel packet inside (the kind that comes in shoe boxes), along with a few uncooked rice grains as a backup moisture absorber. This double protection has kept my seeds viable for the full 3-5 years mentioned in the instructions.
Pro Tips for Save Green Bean Seeds
- Saving green bean seeds successfully takes patience and attention to detail—here's how to avoid common pitfalls and get the best results every time.
- Pod Selection is Everything: In Step 1, those mature pods should be completely dry and papery—almost like they're ready to crumble.
- Drying Strategy for Humid Climates: The 7-10 day drying period in Step 2 can be tricky if you live in a damp area.
Frequently asked questions
Got questions about saving green bean seeds? You’re not alone! Here are the most common concerns—and straightforward answers—to help you succeed.
Do I need to save seeds from heirloom or hybrid beans?
Only heirloom or open-pollinated varieties produce reliable seeds for next year. Hybrid beans (like those labeled "F1") won’t grow true to type—their seeds may yield mixed or inferior plants. Always check seed packets for "OP" (open-pollinated) labels before saving!
How do I know when green beans are ready for seed saving?
Wait until beans are fully mature—overripe, wrinkled, and dried on the vine (usually 6–8 weeks after flowering). If picked too early, seeds won’t mature properly. A good rule: Let a few pods stay on the plant until they turn papery and split open naturally.
What’s the best way to clean seeds from pods?
Remove seeds from pods by hand or gently crush them in a paper towel. Fermenting seeds in water for 2–3 days (covered) helps separate viable seeds from debris—discard any that float. Rinse, dry, and store only the sinkers for best results.
Can I store seeds in the fridge instead of a cool, dry place?
A fridge works short-term (weeks), but for long-term storage (years), use a dark, cool (32–41°F), and dry (5–10% humidity) spot like a pantry or seed vault. Moisture or heat can trigger mold or reduce viability.
What if my saved seeds don’t germinate next year?
Test a few seeds in damp paper towels for 5–7 days. If <50% sprout, try stratifying (chilling) or check storage conditions. Old seeds (5+ years) may need scarification (lightly sanding the seed coat) to break dormancy.
Wrapping up and next steps
Saving green bean seeds is a rewarding way to ensure a fresh, homegrown harvest year after year—plus, it’s a budget-friendly and sustainable practice!
By following these simple steps, you’ll have healthy seeds ready for next season’s planting. Now that you’re equipped with the know-how, why not share your new skills? Try saving seeds from a few different varieties and experiment with growing them in containers or raised beds for even more fun.
Happy gardening! 🌱✨