
Propagation
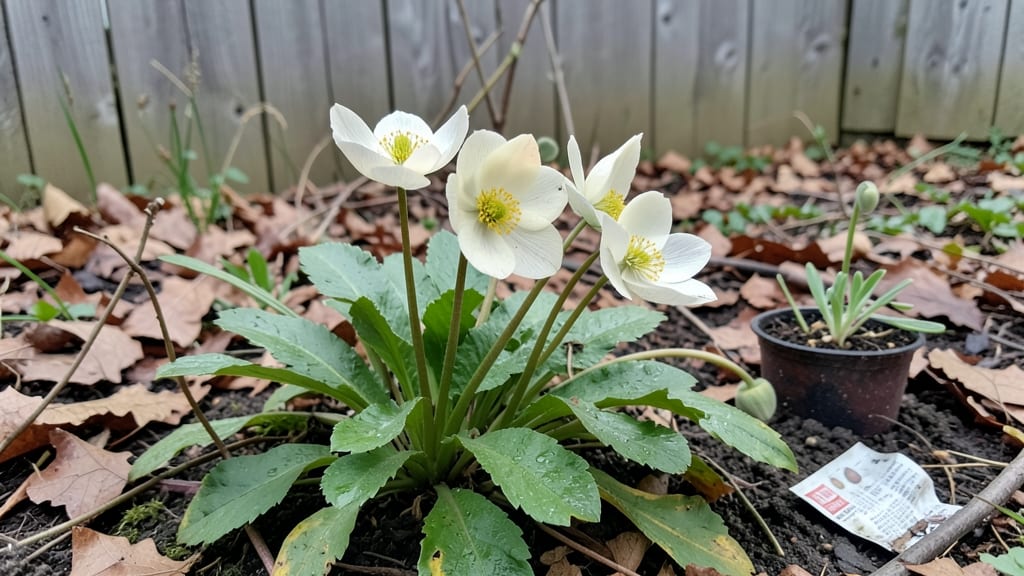
Growing anemone nemorosa from seeds requires a moist cold treatment that mimics their woodland habitat—something I perfected after three failed attempts with dry-start methods. The key isn’t just patience; it’s recreating the damp, shaded forest floor where these seeds naturally germinate.
Most gardeners rush this step, but taking the time pays off with reliable blooms the following spring.
You’ll need fresh seeds (never store-bought old ones), a sealed plastic bag with a damp paper towel, and a fridge for 8-12 weeks of stratification. No fancy equipment—just what’s in your kitchen.
The trick is keeping that paper towel consistently damp (not soggy) while the seeds chill. Think of it as a winter nap for your future woodland stars.
Once you plant them outdoors in fall or early spring, you’ll see tiny leaves emerge within 4-6 weeks—proof the cold-moist prep worked. These seedlings grow slowly at first, but by their second year, they’ll reward you with delicate white blooms that dance in spring breezes.
The payoff? A low-maintenance perennial that spreads naturally over time.
Works best in partial shade and moist, well-draining soil—just like their native habitat. Perfect for woodland gardens, shady borders, or even under trees where other plants struggle. Here’s how to make it happen without the guesswork.
📚 In This Guide
- What you need
- Instructions
- Tips and common mistakes
- Wrapping up and next steps
What you need
- ● Anemone nemorosa seeds – Fresh or stored (purchase from a reputable supplier or collect from mature seed heads). Aim for at least 10-20 seeds for better success rates.
- ● Sterilized seed-starting mix – A well-draining, peat-based or coco-coir blend (e.g., 50% peat moss, 30% perlite, 20% vermiculite). Avoid garden soil to prevent mold.
- ● Small seed trays or pots – 2-3 inch (5-7.5 cm) deep, with drainage holes. Clear plastic or biodegradable pots work well.
- ● Plastic bags or clear lids – To create a humid, sealed environment during stratification.
- ● Spray bottle – For gentle, even watering to keep the mix moist but not soggy.
- ● Refrigerator or cold frame – A consistent 35–40°F (2–4°C) space for stratification (a standard fridge’s crisper drawer works!).
- ○ Fine-mesh sieve – Helps sift seeds from fluffy seed heads (optional but handy!).
- ● Plant labels & marker – To track seed varieties and planting dates.
- ● Grow lights or sunny windowsill – For post-stratification growth (if starting indoors early).
- ● Hydrogen peroxide (3%) – Diluted (1:10 with water) to sterilize trays or tools and prevent fungal issues.
- ○ Heat mat (optional) – For germinating seeds after stratification if your home is chilly.
Step-by-Step instructions for anemone nemorosa seed stratification
Here’s how to break dormancy and ensure strong, reliable blooms next spring.
Collect and Prepare Fresh Seeds
Harvest anemone nemorosa seeds as they mature in late summer or early fall, when the seed heads turn brown and papery. Gently remove the seeds from their follicles and spread them on a clean, dry surface to air-dry for 24 hours. This prevents mold during stratification.
I always use a fine-mesh strainer to separate seeds from debris—this ensures only viable seeds move forward. Store them in a paper envelope (not plastic) in a cool, dry place until you’re ready to stratify. The key here is patience: fresh seeds perform best, but they’ll keep for up to 6 months if stored properly.
Create the Cold-Moist Stratification Mix
Combine equal parts moistened peat moss and coarse sand in a shallow container—this mimics the forest floor conditions nemorosa thrives in. The mix should feel damp like a wrung-out sponge, not soggy. Too much moisture invites rot, while too little prevents proper dormancy breaking.
I use a quart-sized plastic container with a lid for stratification, as it maintains humidity without trapping excess heat. Sprinkle the seeds evenly over the mix, spacing them about ½ inch apart to prevent crowding. Cover the container loosely with a lid or plastic wrap, leaving a small gap for airflow.
Stratify in the Refrigerator for 3 Months
Place the container in your refrigerator’s crisp drawer, where temperatures hover around 35-40°F. This mimics winter’s natural chilling period, which is critical for breaking dormancy. Check the mix every 2-3 weeks—it should remain consistently moist but never waterlogged.
If condensation forms inside the container, open it briefly to air out excess moisture. After 8-12 weeks, you’ll see tiny green shoots emerge—this is your cue that stratification is working. Resist the urge to move them too soon; premature warmth can shock the seeds.
Sow Stratified Seeds in Early Spring
Once seeds sprout, transplant them into individual 3-inch pots filled with a light, well-draining potting mix. Press the soil gently around each seedling to secure it without compacting the roots. Place the pots in a cool, bright location (like a north-facing window) where temperatures stay between 50-60°F.
Keep the soil evenly moist but never soggy—nemorosa seedlings are delicate. You’ll notice the first true leaves appear in 4-6 weeks, signaling it’s time to harden them off. Gradually introduce them to outdoor conditions over 2 weeks before planting in the garden.
Plant Outdoors for Long-Term Establishment
Transplant seedlings into the garden in early spring, spacing them 12-18 inches apart in partial to full shade. Anemone nemorosa thrives in moist, well-draining soil with organic matter worked in. Water deeply after planting to settle the roots, then maintain consistent moisture—this is non-negotiable for reliable blooms.
Mulch with 2 inches of shredded bark to retain moisture and suppress weeds. The first year focuses on root development, so avoid disturbing the soil. By next spring, you’ll see the rewards: delicate white or pink blooms emerging reliably from your cold-moist prep.
Tips & tricks for perfect anemone nemorosa seed stratification
Mastering the cold-moist stratification process transforms anemone nemorosa seeds from dormant to vibrant blooms. These refined techniques ensure your seeds break dormancy reliably and grow into strong plants.
Moisture Control in Step 2: The 24-hour air-drying period in Step 1 is critical—it prevents mold while maintaining seed viability. When creating your cold-moist mix, press a handful gently: water should bead on the surface but not pool. Too much moisture creates anaerobic conditions that promote rot, while too little prevents proper hydration for dormancy breaking. I recommend using a spray bottle to adjust moisture levels precisely between checks.
Container Selection for Step 3: While a quart-sized plastic container works well, consider using a clear plastic takeout container with ventilation holes poked in the lid. This allows you to monitor seed progress without disturbing the environment. The key temperature range of 35-40°F in the refrigerator's crisp drawer is non-negotiable—any warmer and you risk breaking dormancy prematurely, while colder temperatures slow the process unnecessarily.
Seed Spacing Strategy: The ½-inch spacing recommendation in Step 2 might seem generous, but it prevents fungal growth between seeds during the 8-12 week stratification period. For larger seed batches, consider using multiple shallow containers rather than crowding one. This also makes the transplanting process in Step 4 much cleaner—you'll avoid disturbing neighboring seeds when handling individual sprouts.
Transplanting Timing in Step 4: The 4-6 week window for first true leaves is your best indicator of readiness, but environmental factors matter. If you're in a region with unpredictable early spring weather, err on the side of caution—wait until you see consistent 50-60°F daytime temperatures before transplanting. The seedlings' delicate nature means they can't tolerate temperature swings that exceed this range by more than 10°F.
Pro Tips for Anemone Nemorosa Seeds
- Mastering the cold-moist stratification process transforms anemone nemorosa seeds from dormant to vibrant blooms.
- Moisture Control in Step 2: The 24-hour air-drying period in Step 1 is critical—it prevents mold while maintaining seed viability.
- Container Selection for Step 3: While a quart-sized plastic container works well, consider using a clear plastic takeout container with ventilation holes poked in the lid.
Frequently asked questions
about Anemone nemorosa seeds—your go-to guide for troubleshooting, timing, and success!When is the best time to sow Anemone nemorosa seeds?
The ideal time is late summer to early fall (August–September), mimicking their natural germination cycle. This cold-moist stratification period (4–6 weeks in damp, chilled conditions) ensures strong roots before spring growth. Avoid spring sowing—seeds need this dormancy to break!
What if my seeds don’t germinate after stratification?
Patience is key! Germination can take 3–12 months—some seeds lie dormant for a year. Check for freshness (older seeds may fail) and ensure consistent moisture (not soggy). If still no luck, try lightly scratching the seed coat with sandpaper to encourage water uptake.
Can I grow Anemone nemorosa from seeds indoors?
Yes, but outdoor stratification is best for natural success. If indoors, place seeds in a ziplock bag with damp peat moss, refrigerate for 4–6 weeks, then sow in pots with well-draining soil. Transplant seedlings outdoors after last frost—they’re not frost-tender!
Will seed-grown anemones bloom the first year?
Probably not! Seedlings focus on root and leaf growth first. Expect first blooms in year 2 or 3 with proper care. For faster flowers, divide mature plants (spring or fall) or buy established nursery stock.
Where can I buy reliable Anemone nemorosa seeds?
Trust specialty bulb/seed suppliers like Ranunculus.com, Richters, or local native plant nurseries. Avoid cheap online sellers—fresh, named cultivars (e.g., ‘Allenii’, ‘Robinsoniana’) yield the best results. Check reviews for germination rates!
Pro Tip: Label your seedlings!
Anemones can self-seed unpredictably. Use toothpicks + masking tape to mark varieties—especially if testing multiple colors. This saves headaches when dividing or sharing plants later!
Wrapping up and next steps
Growing Anemone nemorosa from seeds is a rewarding journey that rewards patience with stunning woodland blooms! By mastering the cold-moist stratification method, you’ll unlock reliable germination and vibrant spring displays.
Whether you’re a seasoned gardener or just starting, this technique ensures your seeds thrive—so grab those trays, stay consistent, and watch your woodland garden come alive.
Ready to take the next step? Start your seeds this fall and enjoy the magic of windflower blooms next spring. Share your progress or explore more propagation tips—your garden’s transformation begins now! 🌱✨