
Vegetables
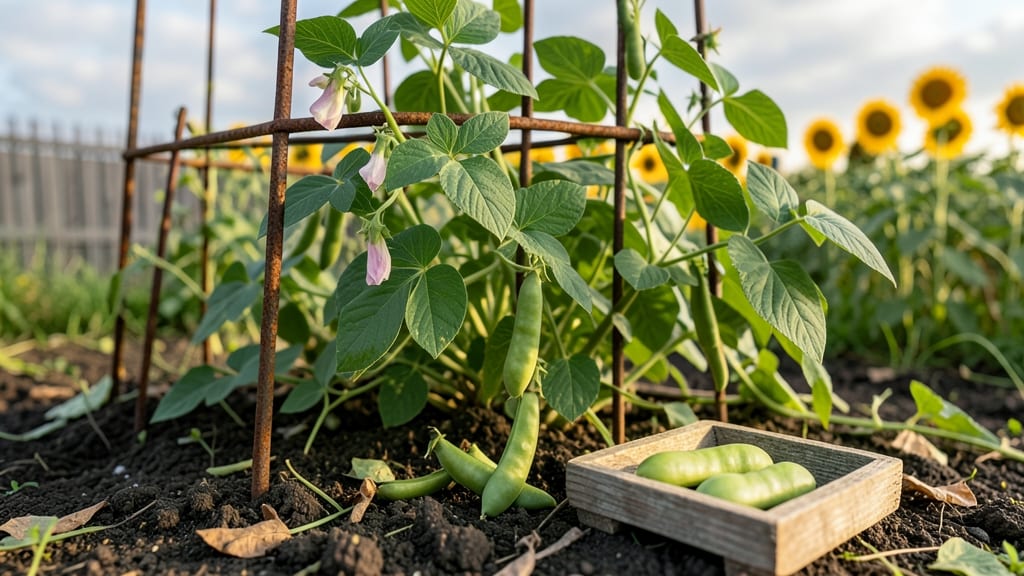
Growing green pea seeds starts with a simple trick: cold prep that mimics winter's chill, foolproofing germination even in warm soil. 🌱 I learned this after watching my first batch of seeds rot in the ground—until I discovered how a quick cold treatment transforms stubborn seeds into eager sprouts.
The difference between success and disappointment often comes down to this one step, and it works for both early spring and fall plantings.
You'll need just three things: a damp paper towel, a plastic bag, and your freezer. No fancy equipment—just a method that's been used by gardeners for decades to break seeds' natural dormancy.
Plant them at 1-2 inches deep, about 2 inches apart, and watch for tiny green hooks breaking through the soil in just 7-14 days. The key is keeping the soil consistently moist but never soggy, which is where most beginners stumble.
What you end up with is a lush, 3-foot-tall pea plant factory producing sweet pods for weeks—sometimes even months if you plant successive batches. The vines will climb naturally, but adding a simple trellis turns a tangle into an organized, space-saving display.
You'll harvest your first pods in about 60 days, and the flavor? Fresh-picked peas taste nothing like the store-bought variety, with a crisp snap and sweetness that's shockingly lush.
This method works for garden beds, containers, or even small patios—just adjust spacing for your growing space. The same cold prep technique extends your harvest into cooler months, so you're not limited to spring plantings. Here's how to make it happen without the guesswork.
📚 In This Guide
- What you need
- Instructions
- Tips and common mistakes
- Wrapping up and next steps
What you need
- ● Green pea seeds – Choose certified organic or heirloom varieties (e.g., Sugar Snap, Snow Peas, or Garden Peas). Aim for 1–2 lbs (0.5–1 kg) per 100 sq ft of garden space.
- ● Cold-hardy growing medium – 2–3 gallons (7.5–11 L) of sterile potting mix or compost-enriched soil (pH 6.0–7.0). Avoid fresh manure.
- ● Containers or garden bed – For cold prep: Deep pots (10–12" tall) or raised beds with drainage.
- ● For direct sowing: Loose, well-drained soil in rows 18–24" apart.
- ● Cold frame or row covers – Frost cloth or a mini greenhouse to protect seedlings from 20–30°F (-6 to -1°C) temps.
- ● Watering can or hose with a gentle spray nozzle (peas need 1–1.5 inches (2.5–4 cm) of water weekly).
- ● Garden trowel or transplanter – For planting seeds 1–1.5" deep and spacing them 2–4" apart.
- ○ Seedling heat mat (optional) – Helps speed up germination in chilly climates (set to 65–75°F (18–24°C)).
- ● Fertilizer – Balanced organic fertilizer (e.g., 5-5-5) or compost tea for nitrogen-loving peas.
- ● Trellis or stakes – Supports climbing varieties (e.g., 4–6 ft (1.2–1.8 m) tall).
- ○ pH test kit (optional) – Ensures soil is in the ideal range for pea growth.
Step-by-Step instructions for growing green peas year-round
Here’s how to break the seasonal barrier and grow sweet peas anytime—no frost required.
🌱 Step 1: Pre-Chill Seeds for Faster, Stronger Germination
Peas thrive when they experience a cold period before sprouting, mimicking their natural outdoor cycle. Place the pea seeds in a sealed plastic bag with a damp paper towel—just enough moisture to feel slightly damp, not soaked. Store this bag in your refrigerator’s crisper drawer for 3-4 days. This cold treatment, called stratification, tricks the seeds into thinking winter’s passed and it’s time to grow.
Check daily for condensation inside the bag. If you see droplets forming, open it for 10 minutes to let excess moisture escape—too much dampness invites mold. After 3 days, remove the seeds and let them sit at room temperature for 12 hours before planting. This warm-up jumpstarts germination, so you’ll see sprouts in 5-7 days instead of the usual 2 weeks.
💧 Step 2: Sow in Warm, Moist Soil for Reliable Sprouting
Fill your 6-inch deep containers with the seed-starting mix (never garden soil—it’s too dense) and moisten it until it feels like a wrung-out sponge: damp but not dripping. Peas hate soggy roots, so ensure your containers have drainage holes. Press the soil down lightly to remove air pockets, then make small 1-inch deep furrows with your finger, spacing them 2 inches apart.
Drop 2-3 seeds into each furrow, then cover them with a thin layer of additional mix—just enough to bury them ½ inch deep. Mist the surface gently with water until it’s evenly moist. Place the containers in a warm spot (65-75°F) away from direct sunlight for the first 3 days. You’ll see the first tiny green hooks (cotyledons) emerge within 5-7 days—that’s your signal to move them to brighter light.
☀️ Step 3: Provide Support and Gradual Sun Exposure
Once seedlings reach 2 inches tall, transplant them into larger 12-inch pots or a garden bed, spacing them 3-4 inches apart. Peas are vining plants, so install 5-foot tall trellises or stakes immediately—their tendrils will latch on within 10 days. Place the pots in a spot with 6-8 hours of sunlight daily, but avoid harsh afternoon sun if your climate runs hot. Young plants can scorch in temperatures above 85°F.
Water at the base of the plants, keeping the soil consistently moist but never waterlogged. You’ll know it’s time to water again when the top ½ inch of soil feels dry to the touch. Fertilize lightly with balanced organic fertilizer every 3 weeks to encourage steady growth. Watch for the first tendrils to curl around the trellis—this is when you’ll see blossoms form in 4-6 weeks.
✂️ Step 4: Harvest and Encourage Continuous Production
Peas are ready to pick when pods are 2-3 inches long and slightly plump but still tender. Harvest every 2-3 days to keep plants producing—left unchecked, pods swell and become tough. Snap them off at the stem with a quick twist, or use small pruning shears for cleaner cuts. The more you harvest, the more your plants will reward you with fresh pods.
To extend the harvest season, remove spent flowers and pods regularly. This prevents the plant from diverting energy to seed production and keeps it focused on new growth. If you’re growing in containers, rotate them a quarter turn weekly so all sides get even sunlight. With this method, you’ll enjoy a steady supply of sweet peas for 6-8 weeks—long after most gardeners have given up on the season.
Tips & tricks for perfect year-round green pea growth
A few strategic adjustments can make all the difference between struggling seedlings and a thriving year-round harvest.
Stratification Timing: The 3-4 day cold treatment in Step 1 is non-negotiable for breaking dormancy, but don't rush it. If your kitchen runs warm (above 75°F), extend the stratification to 5 days to compensate. I've found that seeds stratified at exactly 38°F (the ideal refrigerator crisper temp) germinate most reliably—this mimics natural winter conditions perfectly. For extra insurance, place a thermometer in your fridge to monitor temperature during those critical days.
Soil Moisture Balance: In Step 2, that "wrung-out sponge" consistency is crucial but often misunderstood. Too much moisture creates anaerobic conditions that stunt growth, while too little prevents proper seed hydration. I recommend using a moisture meter for the first 3 days—aim for 40-50% moisture content. If you don't have one, press your finger 1 inch into the soil: it should feel like a damp washcloth, not a dripping sponge. The 12-hour room temperature warm-up after stratification helps regulate this balance beautifully.
Light Transition Strategy: The shift from indirect light in Step 2 to full sun in Step 3 can shock tender seedlings. Instead of abrupt exposure, I gradually increase sunlight over 5-7 days by placing containers near a bright window first, then moving them outside for progressively longer periods. This hardens off the plants and prevents the "leggy" growth that occurs when they stretch toward light too quickly. Once they've reached 2 inches and developed their first true leaves, they're ready for that 6-8 hours of direct sun.
Harvest Frequency Secret: The 2-3 day harvest interval in Step 4 might seem frequent, but it's the key to continuous production. Peas are prolific but short-lived—they'll stop producing if pods aren't removed. I've found that harvesting in the morning gives you the freshest pods and stimulates new flower production that same day. For container growers, a simple trick is to harvest every other day but remove ALL pods on the third day—this gives the plant a "reset" while maintaining production cycles.
Pro Tips for Green Pea Seeds
- A few strategic adjustments can make all the difference between struggling seedlings and a thriving year-round harvest.
- Stratification Timing: The 3-4 day cold treatment in Step 1 is non-negotiable for breaking dormancy, but don't rush it.
- Soil Moisture Balance: In Step 2, that "wrung-out sponge" consistency is crucial but often misunderstood.
Frequently asked questions
Got questions about growing green pea seeds? You’re not alone! Here are some of the most common queries—plus quick answers to help you succeed.
How long does it take for green pea seeds to sprout?
Green pea seeds typically sprout within 7–14 days after planting, depending on soil temperature and moisture. For faster germination, keep the soil consistently moist and warm (around 60–70°F). If your seeds take longer, check for too-cold soil or dry conditions—adjust as needed!
Can I plant green pea seeds in cold weather?
Green peas thrive in cool temperatures (35–85°F), making them perfect for early spring or fall planting. If your region has harsh winters, use row covers or plant in well-draining soil to prevent rot. Just avoid planting when soil temps drop below 40°F—they’ll struggle to sprout.
What’s the best way to store green pea seeds for next year?
Store seeds in a cool, dry place (50–60°F) in an airtight container with a silica gel packet to absorb moisture. Label them with the planting year! Most seeds stay viable for 2–3 years, but check for shriveling or mold before replanting.
Are green pea seeds edible, or just the pods?
Yes! While the pods are the most common harvest, the seeds inside are also edible and packed with protein. For sprouting, soak seeds overnight, then rinse daily in a jar—ready in 3–5 days. Just avoid bitter or shriveled seeds, as they may be old or spoiled.
Why are my green pea plants wilting even with enough water?
Wilting can signal overwatering, pests, or disease. Check for:
- Root rot: Yellow leaves + mushy stems? Let soil dry slightly between waterings.
- Pea weevils: Tiny holes in leaves? Use neem oil or row covers.
- Powdery mildew: White dust on leaves? Improve airflow and avoid overhead watering.
Wrapping up and next steps
Growing green pea seeds year-round is totally doable with the right prep—especially that game-changing cold treatment! Whether you’re a beginner or a seasoned gardener, these tiny seeds pack a punch of flavor, nutrition, and easy-care potential. 🌱
Ready to level up your harvest? Start by testing the cold-soak method on a small batch, then scale up as confidence grows. Soon, you’ll be enjoying crisp, homegrown peas straight from your garden—no greenhouses required!
Next step: Grab those seeds, follow the 3-step guide, and watch your garden thrive! 🌟