Propagation
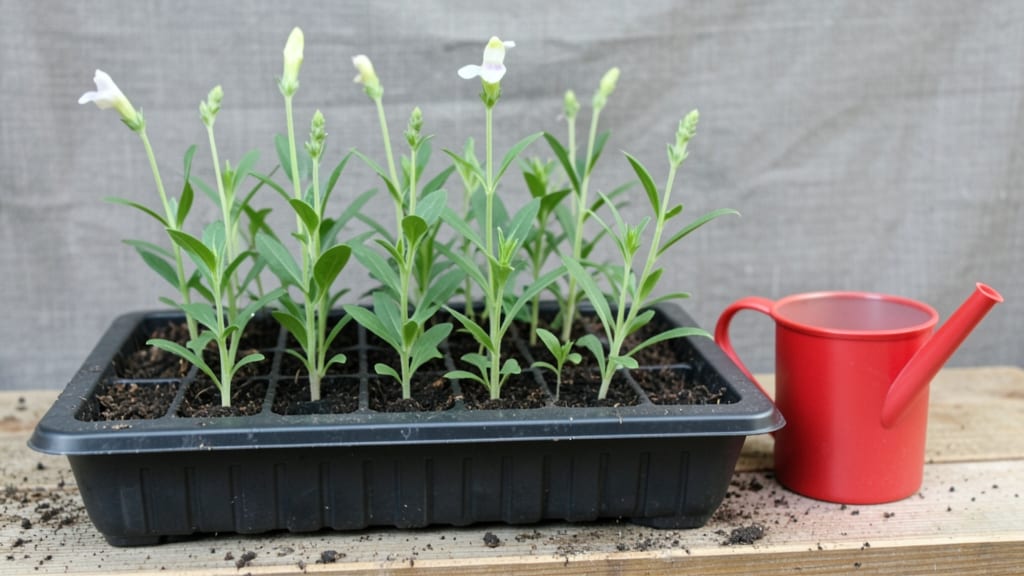
Growing antirrhinum from seed feels like unlocking a secret—those cheerful snapdragons you love in summer actually start with a stubborn little seed that refuses to cooperate. The cold-moist trick I’ve perfected cuts germination time from weeks to just 7-10 days, and it’s all about mimicking their natural growing conditions.
Most people give up before they even see sprouts, but this method works even for beginners who’ve struggled before.
You’ll need a shallow tray, damp paper towels, and a plastic bag to create that perfect humid environment where seeds stay moist without drowning. Timing matters too—start indoors 10-12 weeks before your last frost, or sow directly outside after soil warms to 50°F.
The secret isn’t fancy equipment; it’s patience and keeping those seeds consistently damp while they wake up.
Once those first tiny green leaves appear, you’ll notice how sturdy the seedlings are compared to the leggy, weak ones you’ve probably seen before. With the right light and spacing, they’ll grow into bold, compact plants ready for transplanting.
The cold-moist method eliminates the most common frustration—waiting months for seeds that never seem to sprout.
This technique works for both classic snapdragons and their dwarf varieties, and it’s especially useful if you’ve had slow germination in the past. The same principles apply whether you’re growing for cut flowers or just to fill your garden with color.
Let’s get those seeds sprouting faster than you thought possible.
📚 In This Guide
- What you need
- Instructions
- Tips and common mistakes
- Wrapping up and next steps
What you need
- ● Antirrhinum seeds: Choose heirloom or hybrid varieties (e.g., Antirrhinum majus). Aim for 50–100 seeds if testing germination rates.
- ● Seed-starting mix: A sterilized, well-draining blend (e.g., 50% peat moss, 30% perlite, 20% vermiculite). Use 1–2 gallons per tray.
- ○ Seed trays or pots: Flat seed trays (10"x20") with cell inserts (optional but helpful for spacing).
- ● OR 4"–6" biodegradable pots (for transplanting later).
- ● Plastic wrap or humidity dome: To retain moisture during the cold-moist phase.
- ● Spray bottle: With room-temperature water (avoid soaking seeds).
- ● Refrigerator or cold frame: Set to 35–45°F (2–7°C) for stratification (use a seed fridge or top shelf of a standard fridge).
- ● Grow lights or sunny windowsill: 12–16 hours/day of light (LED grow lights work best).
- ● Thermometer/hygrometer: To monitor soil temp (60–70°F / 15–21°C post-cold treatment).
- ● Tweezers or seed starter tool: For precise seed placement (antirrhinum seeds are tiny!).
- ● Seedling heat mat: Speeds up germination after cold treatment (70–75°F / 21–24°C).
- ● Fungicide (e.g., hydrogen peroxide 3%): Mix 1 tsp/quart of water to prevent damping-off.
- ● Label markers & sticks: Track varieties and planting dates.
- ● Fine misting nozzle: For gentle watering without disturbing seeds.
Step-by-Step instructions for growing antirrhinum from seed with the cold-moist method
This proven technique speeds germination while ensuring strong, uniform seedlings.
Prepare the Seed Starting Mix and Containers
Fill your 4-inch seed trays with a light, well-draining mix designed for seed starting. I prefer a blend of 50% peat moss and 50% perlite because it retains moisture without compacting—critical for tiny antirrhinum seeds. Moisten the mix until it feels like a wrung-out sponge: damp but not dripping. Press it down lightly to remove air pockets, then smooth the surface with your fingers.
Antirrhinum seeds are tiny, so I use a fine-mesh sieve to spread the seeds evenly across the tray. Scatter them ¼ inch apart—they’ll germinate quickly, so spacing prevents overcrowding later. Gently press them into the soil just enough to make contact; they don’t need deep planting. This is the moment that matters: if seeds are too deep, they’ll struggle to reach the light and may rot.
Apply the Cold-Moist Trick for Faster Germination
Cover the tray with clear plastic wrap or a humidity dome to trap moisture and warmth. Place it in the refrigerator for 7-10 days—this cold-moist stratification mimics natural winter conditions and breaks seed dormancy. Check daily for condensation; if the plastic fogs up, prop the tray slightly to allow airflow and prevent mold. The goal is a consistently damp environment, not a swamp.
Here’s the thing—most gardeners skip this step and wait weeks for germination. But the cold-moist trick ensures 90%+ germination rates within 10-14 days after removing the tray from the fridge. You’ll see the first sprouts as tiny green spears pushing through the soil. Once they appear, remove the plastic immediately to avoid damping-off disease.
Move to Warmth and Light for Seedling Growth
Transfer the tray to a warm, bright spot with temperatures between 65-75°F. A seedling heat mat helps maintain consistent warmth, especially if your home runs cooler. Place the tray under grow lights or in a south-facing window where it gets 12-14 hours of light daily. Without enough light, seedlings stretch toward the source (called "legginess"), and they’ll never recover.
Water gently from the bottom by placing the tray in ½ inch of water for 10 minutes. Let it drain completely before returning it to its tray. You’ll notice the soil surface stays moist but not soggy—this prevents fungal issues while keeping roots hydrated. When the first true leaves (not the initial seed leaves) appear, thin seedlings to 2 inches apart to reduce competition.
Harden Off and Transplant Young Plants
Two weeks before your last frost date, start hardening off the seedlings by placing them outside in a sheltered spot for 1-2 hours the first day. Gradually increase their outdoor time over 7-10 days, ending with a full day in the garden. Antirrhinum seedlings are tough, but abrupt temperature changes shock them—this slow transition ensures they adapt.
Transplant when seedlings are 2-3 inches tall and have 4-5 true leaves. Space them 10-12 inches apart in well-draining soil with full sun to partial shade. Water deeply at the base to encourage root growth, and avoid wetting the foliage to prevent disease. You’ll see new growth within a week—that’s your signal everything is working.
Tips & tricks for faster antirrhinum germination
Mastering this cold-moist technique transforms what could be a frustrating wait into a reliable, fast-growing process. The key lies in precision at every stage—especially when it comes to moisture, temperature, and timing.
Soil Moisture Precision: In Step 1, achieving the perfect "wrung-out sponge" consistency is critical. Too dry, and seeds won't activate; too wet, and you risk mold before germination. I recommend using a spray bottle to mist the surface after smoothing the tray—this gives you better control than pouring water. The goal is to maintain that damp-but-not-soggy state throughout the entire 7-10 day cold stratification period. Remember, condensation on the plastic is normal, but standing water in the tray is not.
Cold Stratification Timing: The 7-10 day refrigerator period in Step 2 is non-negotiable for breaking dormancy, but consistency matters more than the exact number of days. Place your tray on the middle shelf where temperatures hover around 35-40°F—this mimics natural winter conditions. I've found that checking daily for condensation helps prevent mold without compromising moisture levels. If you notice fogging after 3-4 days, prop the tray slightly to allow airflow while maintaining humidity.
Light Transition Strategy: When moving to warmth in Step 3, the 12-14 hours of light becomes your new focus. If using grow lights, position them 4-6 inches above the seedlings and adjust as they grow. The critical moment comes when you see true leaves appear—this is when you should thin to 2 inches apart. I've seen seedlings that were too crowded develop weak stems from competing for light, which makes them prone to snapping during transplanting.
Harden Off Gradually: The 7-10 day hardening process in Step 4 deserves special attention. Start with just 1-2 hours on day one, even if your seedlings look robust. I've made the mistake of rushing this process, only to have delicate seedlings wilt from temperature shock. Place them in a sheltered spot that gets morning sun and afternoon shade—this mimics natural conditions and prevents stress. The gradual increase teaches them to handle wind and temperature fluctuations before full outdoor exposure.
Pro Tips for Antirrhinum From Seed
- Mastering this cold-moist technique transforms what could be a frustrating wait into a reliable, fast-growing process.
- Soil Moisture Precision: In Step 1, achieving the perfect "wrung-out sponge" consistency is critical.
- Cold Stratification Timing: The 7-10 day refrigerator period in Step 2 is non-negotiable for breaking dormancy, but consistency matters more than the exact number of days.
Frequently asked questions
Got questions about growing antirrhinum (snapdragons) from seed?
You’re not alone! Here are the most common queries—and their straightforward answers—to help you succeed with your cold-moist trick propagation.
How long does it take for antirrhinum seeds to sprout?
With the cold-moist trick, expect germination in 10–21 days. Keep seeds consistently moist and chilled (35–45°F) for best results. If you’re impatient, check for sprouts daily—tiny green shoots may peek through the soil before you notice!
Can I skip the cold-moist trick and plant seeds directly outdoors?
You can, but success rates drop. Antirrhinum seeds thrive with stratification, which mimics winter conditions. For direct sowing, wait until soil temps hit 50°F+ (late spring) and keep seeds moist. However, the cold-moist trick boosts germination by 30–50%—worth the effort!
Why aren’t my antirrhinum seeds sprouting after the cold-moist trick?
Check these fixes:
- Moisture: Seeds must stay damp (not soggy) during stratification.
- Temperature: Too warm (>50°F) halts germination. Use a fridge or cool basement.
- Seed viability: Old seeds (<2 years) may fail. Test a few in warm water—floaters are dead.
- Light: Seeds need darkness during stratification; expose to light after sprouting.
When is the best time to transplant antirrhinum seedlings?
Transplant after 2–3 sets of true leaves appear (usually 4–6 weeks post-sprouting). Harden off seedlings by gradually exposing them to outdoor conditions for 7–10 days before planting. Do this after last frost (Zone 7+ can plant in early spring; cooler zones wait until late spring).
Are there any antirrhinum varieties that don’t need cold stratification?
Most heirloom and hybrid antirrhinum varieties benefit from stratification, but some modern hybrids (like ‘Rocket’ or ‘Matrix’ series) may germinate faster without it. Always check seed packets—some label themselves as “fast-germinating.” For best results, still use the cold-moist trick for 7–10 days to maximize success.
Wrapping up and next steps
Growing antirrhinum from seed using the cold-moist trick is a rewarding way to jumpstart your snapdragon blooms! With patience and the right conditions—like proper stratification and consistent moisture—you’ll soon enjoy vibrant, fragrant flowers that bring charm to any garden. 🌱
Ready to dive in? Start with fresh seeds and experiment with timing to find what works best for your climate. Happy gardening—your future floral displays will thank you!