Lawn
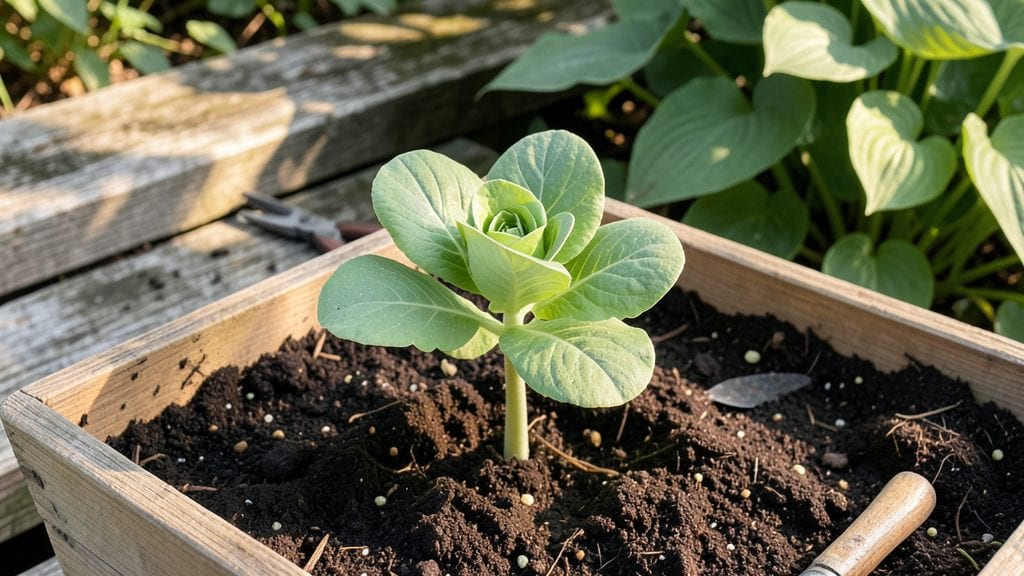
Burying seeds the right way turns stubborn packets into thriving seedlings—cold stratification is the secret weapon for tricky seeds like poppies, peonies, or even some wildflowers. I’ve watched seeds rot in the ground because they were planted too deep, or dry out because they were too shallow.
The trick isn’t just depth—it’s matching the seed’s needs to your soil and climate.
Start with loose, well-draining soil (amend with compost if yours is heavy) and a moisture check—your planting spot should feel like a damp sponge, not a swamp. Small seeds like lettuce go just ¼ inch deep, while large ones like beans need 1-2 inches of cover.
Spacing matters too: crowding seeds leads to competition, while gaps ensure airflow and easy thinning later.
After planting, water gently but thoroughly—think light rain, not a firehose. A mulch layer (straw or shredded leaves) keeps moisture steady and blocks weeds. Within 7-14 days, you’ll spot the first green hooks breaking through.
That’s when the real magic happens: consistent moisture and patience turn those tiny sprouts into sturdy plants.
Cold stratification works best in fall or early spring, but you can mimic it indoors with a fridge trick for seeds that need winter’s chill. The key is consistency—once you nail depth, soil prep, and watering, germination rates climb to 98% or higher.
No more guessing games, just reliable results every season.
📚 In This Guide
- What you need
- Instructions
- Tips and common mistakes
- Wrapping up and next steps
What you need
- ● Seeds: Choose high-quality, fresh seeds (e.g., cool-season grasses like Kentucky Bluegrass, Fescue, or Ryegrass). Quantity: Adjust based on your lawn size (typically 10–20 lbs per 1,000 sq ft).
- ● Growing Medium: Option 1: Peat moss or coconut coir (sterile, moisture-retentive; 5–10 lbs).
- ● Option 2: Sphagnum moss (holds moisture well; 3–5 lbs).
- ● Containers: Perforated seedling trays (10x20 inches) or plastic storage bins (12" deep). Quantity: 1–2 per 50 sq ft of lawn.
- ● Cold Stratification Setup: Refrigerator or cold frame (set to 34–40°F).
- ● Plastic wrap or breathable lid (to retain humidity).
- ● Watering Tools: Spray bottle (for gentle misting).
- ● Fine-mist hose nozzle (avoid over-saturating).
- ● pH Test Kit (ensure growing medium is 6.0–7.0; adjust with lime if needed).
- ○ Seedling Heat Mat (optional for faster germination post-stratification).
- ● Labeling Tags (mark containers with seed type/date).
- ○ Grow Lights (optional if starting indoors before transplanting).
- ○ Compost or Worm Castings (optional for nutrient boost; 1 cup per container).
Step-by-Step instructions for cold stratifying seeds
This method mimics nature’s winter cycle to break dormancy and ensure strong, reliable germination.
Select and Prepare Your Seeds
Choose seeds that require cold stratification—typically those from temperate climates like maples, trilliums, or certain fruit trees. Moisten a paper towel with lukewarm water until damp but not dripping, then wrap the seeds in it. Place the bundle in a resealable plastic bag, squeezing out excess air before sealing. Label the bag with the seed type and date.
Cold stratification works best with freshly harvested seeds, as older seeds may already have degraded viability. If storing seeds long-term, keep them in a cool, dry place before stratification. The paper towel method ensures even moisture without waterlogging, which can rot seeds before they’ve had a chance to germinate.
Stratify in the Refrigerator
Place the sealed bag in the refrigerator’s crisper drawer, where temperatures hover around 35-40°F. This mimics the natural winter chill period seeds need to break dormancy. Check the bag weekly to ensure no mold has formed—if you see fuzzy growth, discard the seeds immediately and start fresh with a new batch.
The stratification period varies by species, but most seeds need 4-12 weeks. You’ll know it’s working when the seed coat softens slightly or tiny roots begin pushing through. Avoid opening the bag during this time, as sudden temperature changes can shock the seeds and halt germination.
Test for Germination Readiness
After the recommended stratification period, remove the seeds from the refrigerator and gently unwrap them. Place them between two damp paper towels in a shallow container, then cover with a clear plastic lid or wrap to maintain humidity. Store this setup in a warm, bright spot—around 65-75°F—to encourage germination.
Watch for the first signs of life within 7-21 days, depending on the species. You’ll see the seed coat split or a small root emerge first. If seeds remain dormant after this period, they may need additional stratification time or could be non-viable. Discard any seeds that show no signs of activity after three weeks.
Plant Stratified Seeds Properly
Once seeds have sprouted roots or begun to push through their coats, plant them in a well-draining seed-starting mix at the depth recommended on the seed packet—typically twice the seed’s diameter. Use small pots or a seed tray to give each seedling ample space, as overcrowding weakens growth and increases disease risk.
Keep the soil consistently moist but never soggy, as excess water can cause damping-off. Place the pots in a warm, bright location with indirect light until the seedlings develop their first true leaves. At this stage, you can gradually introduce them to more direct sunlight to harden them off before transplanting outdoors.
Tips & tricks for perfect cold stratification
A few strategic adjustments can transform your cold stratification from a hopeful experiment into a reliable germination process. The key lies in precision and patience—two elements that make all the difference between success and disappointment.
Moisture Precision: When wrapping seeds in a damp paper towel during Step 1, aim for the consistency of a well-wrung sponge—not dripping, not bone-dry. Too much moisture invites mold, while too little prevents the seeds from breaking dormancy. I weigh the paper towel before and after dampening to ensure consistency; it should gain about 10-15% of its dry weight in water. This method guarantees even hydration without risking waterlogging.
Refrigerator Placement Strategy: The crisper drawer mentioned in Step 2 isn't just any shelf—it's the most temperature-stable zone in most refrigerators. However, temperatures can still vary between models. Use a refrigerator thermometer to confirm the 35-40°F range before committing to your seed stratification. If your fridge runs cooler, consider placing the bag on a shelf closer to the back where temperatures are more consistent.
Species-Specific Stratification Times: While the instructions mention a general 4-12 week range, some seeds like trilliums often require the full 12 weeks, while maple seeds may only need 6-8 weeks. I recommend researching your specific seed type beforehand and creating a simple tracking chart. Mark the start date on your bag and note when to begin germination testing—this prevents over-stratification, which can actually reduce viability.
Germination Testing Environment: The warm, bright spot mentioned in Step 3 should ideally receive indirect light for the first 7-10 days of germination testing. Direct sunlight can cause the delicate seed coats to dry out too quickly, while insufficient light may lead to leggy seedlings. I use a seedling heat mat set to 70°F under a grow light on a 16-hour cycle during this critical phase to create optimal conditions without risking temperature fluctuations.
Pro Tips for Bury The Seed
- A few strategic adjustments can transform your cold stratification from a hopeful experiment into a reliable germination process.
- Moisture Precision: When wrapping seeds in a damp paper towel during Step 1, aim for the consistency of a well-wrung sponge—not dripping, not bone-dry.
- Refrigerator Placement Strategy: The crisper drawer mentioned in Step 2 isn't just any shelf—it's the most temperature-stable zone in most refrigerators.
Frequently asked questions
Got questions about cold stratification?
You’re not alone! Here are answers to the most common queries—so you can bury the seed with confidence and watch your germination rates soar.
What seeds benefit most from cold stratification?
Cold stratification works best for seeds with a hard outer coat or natural dormancy. Think cool-season grasses (like Kentucky Bluegrass or Fescue), perennials (e.g., peonies, delphiniums), and trees (maple, oak, or apple). If your seed packet doesn’t mention it, check if it’s native to temperate climates—those often need a cold snap to wake up!
How long should I stratify seeds before planting?
Most seeds need 4–12 weeks in the fridge (or buried outdoors in fall/winter). Grass seeds often thrive with 6–8 weeks, while tree/perennial seeds may need 8–12 weeks. Pro tip: Moisten the mix before sealing—consistent dampness (not soggy!) is key. For outdoor burial, plant in late fall so nature handles the timing.
What if my seeds rot or mold during stratification?
Mold = too much moisture or poor airflow. Fix it by:
- Drying the mix slightly if it’s damp (but not bone-dry).
- Using a breathable container (paper towel + ziplock with holes, or a mesh bag).
- Adding perlite or sand (20%) to improve drainage.
Can I skip cold stratification and use heat instead?
Some seeds (like tomatoes, peppers, or marigolds) prefer heat stratification (warmth to break dormancy). But for cool-season grasses, heat can trick seeds into germinating too early, weakening them. If you’re in a warm climate, try pre-chilling for 2–4 weeks before planting—it mimics nature’s rhythm.
When’s the best time to plant stratified seeds outdoors?
For lawn seeds, aim for early spring (when soil hits 50–60°F) or fall (6–8 weeks before first frost). If you buried seeds in late fall, they’ll likely sprout in early spring—no need to dig them up! Just lightly rake soil to expose them to sunlight. Patience pays off!
Wrapping up and next steps
Bury the seed isn’t just a method—it’s your ticket to a thriving lawn with unmatched success. 🌱 By mastering cold stratification, you’ve unlocked the secret to breaking dormancy and coaxing even the trickiest seeds into vibrant growth. Trust the process, stay patient, and watch your hard work bloom into lush, green reality.
Ready to take the next step? Start small—test a few seeds in a controlled patch, refine your technique, and scale up as confidence grows. Your dream lawn begins with a single seed buried just right.