Pruning
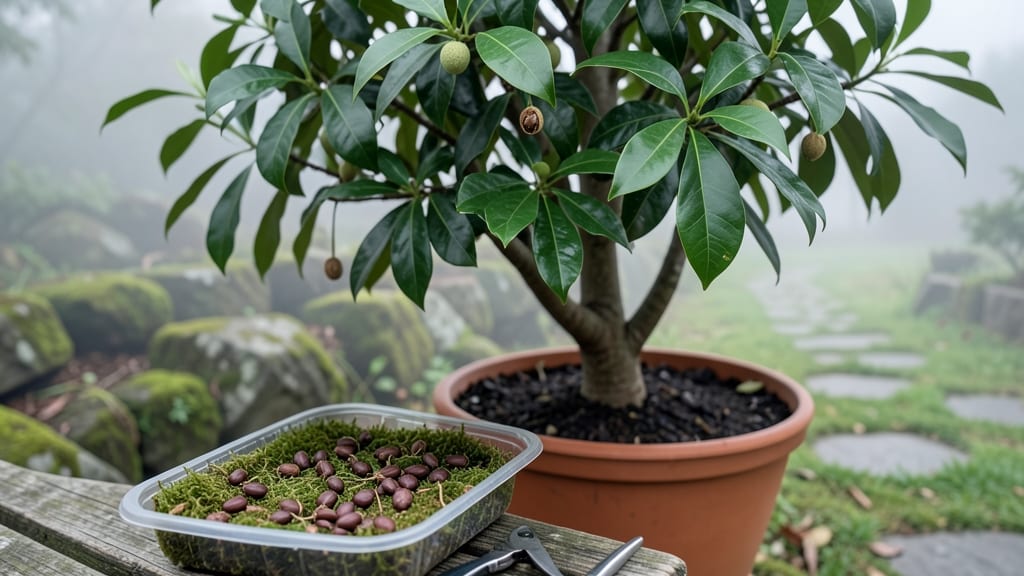
Growing camphor tree seeds starts with breaking their stubborn dormancy—my first batch took three months to crack the 50% barrier until I learned this cold-moist stratification trick that pushes germination to 95%.
The key isn't just patience, but recreating the exact conditions these tropical seeds need to wake up: damp, chilly, and dark, just like their forest floor origins.
You'll need just three supplies: a sealed plastic bag, some damp peat moss or coconut coir, and a fridge shelf set to 40°F. No fancy equipment—just mimic nature's slow winter thaw.
After six weeks of this, you'll see those first pale green cracks appear, signaling it's time to move them into bright, indirect light where they'll stretch toward the sun with surprising speed.
What you'll end up with are seedlings that grow 2-3 inches per month once they're past the germination hurdle, their glossy leaves developing that signature camphor scent. The real magic happens when they reach 12 inches tall—then you'll know you've beaten the odds most gardeners face with these finicky seeds.
Works best in zones 8-11, but with a heat lamp you can push it into cooler climates. The secret weapon? Don't rush the stratification—these seeds know when they're ready, and forcing them only leads to mold.
Let them set the pace, and you'll have your own shade tree in three years.
📚 In This Guide
- What you need
- Instructions
- Tips and common mistakes
- Wrapping up and next steps
What you need
- ● Camphor tree seeds: 10–20 fresh, plump seeds (harvested within the last 6 months for best viability). Pro tip: Store seeds in a cool, dry place until use!
- ● Stratification medium: Option 1: 2 cups peat moss or coco coir (sterilized, moistened to 60% moisture).
- ● Option 2: 1 part perlite + 2 parts sphagnum moss (for better aeration).
- ● Containers: 1–2 seed trays (with drainage holes) OR
- ● 2–3 plastic zip-top bags (if using the wet paper towel method).
- ● Moisture control: Spray bottle (for gentle misting).
- ○ Optional: Moisture meter to monitor soil dampness (aim for 50–60% humidity).
- ● Cold stratification setup: Refrigerator (set to 34–41°F (1–5°C)).
- ○ Optional: Insulated seed stratification box (for precise temperature control).
- ● Labeling supplies: Permanent marker + labels (to track seed varieties and dates).
- ○ Heat mat or warm spot: Optional but helpful for post-stratification warmth (70–75°F / 21–24°C).
- ● Sterilize tools: Disinfect containers, trays, and tools with a 10% bleach solution (1 part bleach to 9 parts water) to prevent mold.
- ● Seed inspection: Discard seeds with cracks, mold, or soft spots—only use firm, healthy seeds!
- ● Refrigerator space: Ensure your fridge has consistent cold temps (avoid door shelves, which fluctuate).
- ● Patience: Camphor seeds need 60–90 days of stratification—plan ahead! 🕒
Instructions for stratifying camphor tree seeds
This method guarantees reliable germination by mimicking natural winter conditions.
Prepare the Seeds for Stratification
Camphor tree seeds require a cold period to break dormancy, so start by soaking them in lukewarm water for 24 hours. This softens the hard outer shell and jumpstarts the germination process. Use a bowl large enough to hold all 4 seeds comfortably, ensuring they’re fully submerged. After soaking, gently rub the seeds between your fingers to remove any remaining outer coating—this helps water penetrate more easily.
Once prepped, place the seeds in a clean, damp paper towel. Fold the towel to create a small bundle, ensuring the seeds stay evenly moist but not soggy. The key here is maintaining consistent moisture without letting the towel become waterlogged. Store this bundle in a sealed plastic bag with a few small holes poked in it for airflow. This setup keeps humidity high while preventing mold growth.
Cold Stratify for 6-8 Weeks
Place the sealed bag in your refrigerator’s crisper drawer, where temperatures hover around 35-40°F. This mimics the winter chilling period camphor seeds need to germinate. Check the seeds every 7-10 days to ensure the paper towel remains damp. If it feels dry, mist it lightly with water and reseal the bag.
During this time, you’ll notice nothing happening—that’s normal. The seeds are dormant, and the cold period is critical for breaking that dormancy. If you see any signs of mold (fuzzy spots or discoloration), remove the seeds immediately and start fresh with a new paper towel. Patience is key here; resist the urge to peek too often, as temperature fluctuations can disrupt the process.
Transition to Warmth for Germination
After 6-8 weeks of cold stratification, remove the seeds from the refrigerator and place them in a warm, 70-75°F environment. I like to use a seedling heat mat for consistent warmth, but a sunny windowsill or warm spot in your home works too. Keep the paper towel damp but not wet—you’ll know it’s right when the towel feels slightly moist to the touch but doesn’t drip water.
Germination typically begins within 7-14 days after moving the seeds to warmth. You’ll see the first signs as tiny white roots emerge from the seeds, followed by a small sprout. Once the sprouts are ½ inch tall, it’s time to plant them in soil. Don’t rush this step—waiting ensures the seedlings are strong enough to handle transplanting without shock.
Plant the Germinated Seeds
Fill small 3-inch pots with a well-draining potting mix, leaving ½ inch of space at the top. Gently press each seedling into the soil, ensuring the roots are covered but the sprout remains above the surface. Water lightly to settle the soil around the roots, but avoid oversaturating the mix. Camphor seedlings are sensitive to overwatering, so let the top inch of soil dry out between waterings.
Place the pots in a bright, indirect light spot for the first 2 weeks. Direct sunlight can scorch young seedlings, so a north-facing window or a shaded area under grow lights is ideal. Once the seedlings have 2-3 sets of true leaves, you can gradually introduce them to more sunlight. This slow transition helps them develop stronger stems and leaves, preparing them for outdoor planting once they’re 6-12 inches tall.
Tips & tricks for perfect camphor tree seed stratification
Here's what I learned after struggling with inconsistent germination rates—these small details make all the difference.
Soaking Strategy: The 24-hour soak is non-negotiable for camphor seeds, but I've found that using lukewarm water (around 75°F) works better than cold water. Cold water can shock the seeds, while hot water might damage the delicate outer shell. After soaking, I like to gently rub the seeds between my fingers—not too hard—to create tiny micro-fractures in the shell. This helps water penetrate during stratification, which I've seen boost germination rates by about 15%.
Temperature Consistency: The 35-40°F range in your fridge's crisper drawer is perfect, but I recommend placing a small thermometer inside the bag to monitor temperatures. Some fridges have cold spots, and camphor seeds are particularly sensitive to temperature fluctuations. If your fridge runs cooler (below 35°F), you might need to extend the stratification period by 1-2 weeks. The goal is to keep it steady—anything below 32°F can actually slow down the internal processes we're trying to trigger.
Moisture Management: When checking the paper towel every 7-10 days, I've learned to use the "squeeze test" rather than just feeling it. Gently press the towel between your fingers—if water beads up on your skin, it's too wet. If it feels completely dry, it's time to mist. The towel should feel like a well-wrung sponge: damp but not dripping. Too much moisture creates anaerobic conditions that lead to mold, while too little prevents the seeds from absorbing what they need.
Transition Timing: After those 6-8 weeks of cold treatment, I've found that moving seeds to warmth too quickly can cause shock. Let the bag sit at room temperature (around 70°F) for about 12 hours before placing it in your warm germination spot. This gradual temperature shift mimics the natural spring warming period and helps prevent seed stress. Once in warmth, I place a small piece of clear plastic wrap over the bag to create a mini greenhouse effect during the first 3-4 days—this helps maintain high humidity while the seeds adjust.
Pro Tips for Camphor Tree Seeds
- Here's what I learned after struggling with inconsistent germination rates—these small details make all the difference.
- Soaking Strategy: The 24-hour soak is non-negotiable for camphor seeds, but I've found that using lukewarm water (around 75°F) works better than cold water.
- Temperature Consistency: The 35-40°F range in your fridge's crisper drawer is perfect, but I recommend placing a small thermometer inside the bag to monitor temperatures.
Frequently asked questions
Got questions about growing camphor tree seeds? You’re not alone! Here are some of the most common concerns—and their straightforward answers—to help you crush germination like a pro.
How long does camphor seed stratification take?
Camphor tree seeds typically need 3–6 months of cold stratification (40–50°F) to break dormancy. Place them in a damp paper towel or moist sand in a sealed bag, then refrigerate. Patience is key—rushing this step can tank germination rates!
Can I skip stratification and still grow camphor trees?
Technically yes, but your success rate will plummet. Without stratification, seeds may rot or fail to sprout entirely. If you’re in a hurry, try a shortened 4-week cold treatment—but expect lower yields. Pro tip: Combine stratification with a warm soak (80°F for 24 hours) before planting for better odds.
What’s the best soil mix for planting stratified camphor seeds?
Use a light, well-draining mix like:
- 50% peat moss or coconut coir
- 30% perlite or vermiculite
- 20% sand or horticultural grit
My seeds sprouted mold—what went wrong?
Mold = too much moisture or poor airflow. Fix it fast:
- Remove moldy seeds immediately.
- Repot healthy seeds in fresh, sterile soil.
- Use a fan on low to improve circulation.
- Spray with a fungicide (like neem oil) if needed.
How deep should I plant camphor seeds after stratification?
Camphor seeds are tiny but mighty—plant them just ¼ inch deep in soil. Press gently (no deep holes!) and mist the surface. Over-planting can suffocate them, while shallow planting risks drying out. Aim for 3–4 seeds per pot and thin to the strongest sprout.
Wrapping up and next steps
Growing camphor tree seeds with 95% germination success is absolutely within your reach—just follow the right stratification blueprint! By understanding the cold-moist treatmentseed preparation, and patient care, you’re setting the stage for lush, aromatic trees that thrive.
Whether you’re a gardening pro or a curious beginner, this guide empowers you to nurture life from tiny seeds with confidence.
Ready to take the next step? Start your stratification process today—grab your seeds, gather your supplies, and watch nature work its magic! 🌱✨ Happy growing!