
Lawn
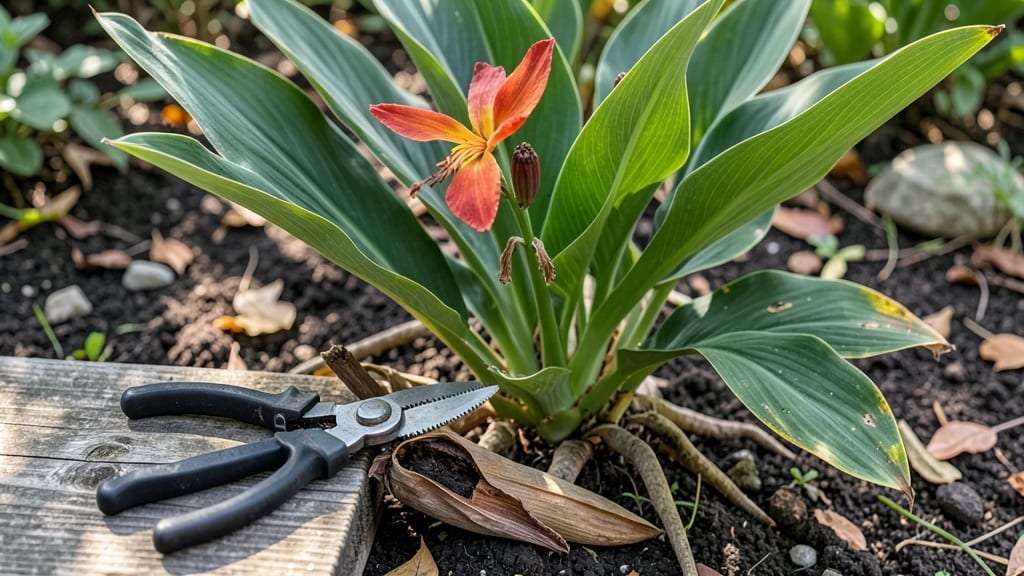
Canna seed pods are the secret to multiplying your tropical plants for free—if you know when to harvest them before they burst open. ✨ I’ve learned the hard way that waiting too long means lost seeds, while harvesting too early ruins germination.
The timing is everything, and once you master it, you’ll have more cannas than you know what to do with.
These pods look like tiny, leathery corn kernels and turn from green to brown when ready. You’ll need a sharp knife, paper bags for drying, and a warm, dry spot—no fancy equipment.
The key is patience: pods take 2-4 weeks to dry fully, and rushing them ruins the seeds inside. I’ve dried hundreds this way, and the process gets easier every year.
What you’ll end up with is a stash of plump, viable seeds that sprout faster than store-bought canna tubers. Plant them in spring, and you’ll see those familiar bold leaves emerging in 4-6 weeks.
The best part? You can store dried seeds for up to a year without losing viability, so you’re never stuck without backup plants.
Works for both garden cannas and container-grown varieties—just adjust harvest timing based on your climate. Let’s get those pods dried and ready for next season’s jungle of blooms.
📚 In This Guide
- What you need
- Instructions
- Tips and common mistakes
- Wrapping up and next steps
What you need
- ● Canna plants with mature seed pods – Look for fully developed, brownish pods (typically 3–6 months after flowering).
- ● Sharp pruning shears or garden scissors – A bypass pair (not anvil-style) to avoid crushing pods. Quantity: 1 pair.
- ● Clean, breathable storage containers – Paper bags, mesh bags, or cardboard boxes with holes for airflow. Size: Large enough to hold pods without overcrowding.
- ● Drying rack or screen – A flat, elevated surface (e.g., a wooden frame, wire mesh, or even a clean wooden pallet). Size: At least 2’ x 3’ for optimal airflow.
- ○ Desiccant (optional but helpful) – Silica gel packets or food-grade diatomaceous earth to speed up drying in humid climates.
- ● Labeling supplies – Masking tape + markers to label pods by variety and harvest date.
- ● Gloves (recommended) – Nitrile or cotton gloves to protect hands from sap and prickly stems.
- ● Dry, well-ventilated space – Indoors or outdoors (under a covered porch works). Temperature: 60–80°F (15–27°C) with <50% humidity.
- ● Sunlight access – Indirect light is ideal; avoid direct sun to prevent overheating.
- ● Patience (2–4 weeks) – Seed pods need time to dry thoroughly before storage.
- ● Knowledge of your canna variety – Some pods (like Canna × generalis) dry faster than others.
Step-by-step instructions for harvesting and drying canna seed pods
Here's how I harvest and preserve canna seed pods—simple, foolproof, and ready for next season.
🌿 Step 1: Identify and Harvest Ripe Seed Pods
Wait until the seed pods turn a deep brown and feel slightly papery to the touch—this means they're fully mature. I like to harvest on a dry, sunny morning when the pods are firm but not brittle. Use clean, sharp scissors or pruning shears to snip the pods from the stem, leaving about ½ inch of stem attached.
Don't harvest too early—green pods won't dry properly and may mold. If you miss the window, the pods will eventually split open and scatter seeds on their own. I always wear gloves to avoid staining my hands with the plant's natural dyes.
💧 Step 2: Clean and Prepare the Seed Pods
Gently brush off any debris or loose soil from the pods using a soft brush or your fingers. Place them in a single layer on a clean, dry surface like a baking sheet or mesh screen. Avoid stacking them—proper airflow is key to even drying.
Skip washing the pods unless they're visibly dirty. Moisture speeds up mold growth, and canna seed pods dry best when left in their natural state. If you must clean them, let them air-dry completely before proceeding.
☀️ Step 3: Dry the Seed Pods Properly
Choose a warm, dry location with good airflow, like a sunny windowsill or a well-ventilated room. I use a small fan on low setting to circulate air gently—this prevents moisture buildup and speeds up drying without damaging the pods. Aim for a temperature between 65-75°F.
Turn the pods every 2-3 days to ensure even drying. They're ready when they feel completely dry and brittle to the touch—this usually takes about 2-3 weeks. If mold appears (fuzzy spots or discoloration), remove the affected pods immediately and dry the remaining ones in a warmer, drier spot.
⏰ Step 4: Store the Dried Seed Pods
Once fully dry, place the seed pods in a breathable container like a paper bag or a small mesh pouch. Avoid airtight containers—they trap moisture and encourage mold. Label the container with the variety name and the harvest date.
Store in a cool, dark place, like a pantry or basement. Properly dried and stored canna seed pods stay viable for 1-2 years. Check them occasionally for signs of pests or moisture—if you notice any, transfer them to a new container immediately.
🌱 Step 5: Plant the Seeds Next Season
When ready to plant, open the dried seed pods and remove the seeds inside. Canna seeds are large and easy to handle—no need for fancy tools. Soak the seeds in warm water for 12-24 hours before planting to soften the outer coating and encourage faster germination.
Plant the seeds 1 inch deep in well-draining soil and keep them moist until sprouts appear. With patience, you'll have vibrant canna lilies blooming in just a few months—worth every step!
Tips & tricks for perfect canna seed pod preservation
Preserving canna seed pods properly ensures you'll have healthy plants for seasons to come—here's what I've learned the hard way.
Harvest Timing Secret: The deep brown color and papery texture are your best indicators of readiness. I've found that harvesting on a dry morning helps prevent mold during drying. If you're unsure, gently squeeze the pod—it should feel firm but give slightly, like a ripe avocado. Harvesting too early means wasted effort, while waiting too long risks the pods splitting open naturally.
Drying Environment Matters: That 65-75°F temperature range is ideal because it's warm enough to dry the pods efficiently without causing them to crack. I've had the best success using a small fan on low—it creates gentle airflow that prevents moisture buildup. If your space gets humid, consider placing a dehumidifier nearby or using silica gel packets in the drying area.
Storage Wisdom: While 1-2 years is the typical shelf life, I've had pods last up to 3 years when stored in a cool, dark basement with a silica gel packet included. The key is maintaining that breathable container—paper bags work perfectly because they allow moisture to escape while keeping pests out. I always double-check for any signs of moisture or pests every few months, transferring to fresh containers if needed.
Germination Boost: That 12-24 hour soak is crucial for breaking the seed's dormancy. I like to use room temperature water and add a drop of dish soap to prevent bacterial growth. You'll notice the seed coats soften noticeably after soaking—this is your signal that germination is ready to begin. For extra insurance, I sometimes soak the seeds overnight, then plant them the next morning while the moisture is still present.
Pro Tips for Canna Seed Pods
- Preserving canna seed pods properly ensures you'll have healthy plants for seasons to come—here's what I've learned the hard way.
- Harvest Timing Secret: The deep brown color and papery texture are your best indicators of readiness.
- Drying Environment Matters: That 65-75°F temperature range is ideal because it's warm enough to dry the pods efficiently without causing them to crack.
Frequently asked questions
Got questions about canna seed pods?
Here are some of the most common ones—plus quick, practical answers to help you harvest, dry, and store them like a pro!
What’s the best time to harvest canna seed pods?
Harvest seed pods when they turn brown and papery (usually late summer to early fall). Avoid harvesting too early—they won’t dry properly, and too late means they may crack open and scatter seeds. Pro tip: Morning harvests prevent humidity buildup, speeding up drying.
How long does it take to dry canna seed pods?
Drying time depends on humidity and airflow. In ideal conditions (60–70°F, low humidity), pods dry in 1–2 weeks. Hang them upside-down in a well-ventilated spot (like a mesh bag or screen). Troubleshoot: If mold appears, increase airflow or try a dehydrator (set to 95°F).
Can I reuse canna seed pods for planting next year?
Yes! Once fully dried, store pods in a cool, dark place (like a sealed jar with silica gel) for up to 2 years. Before planting, soak them overnight to soften the husk—this makes germination easier. Bonus: Label pods by variety to avoid mix-ups!
What if my canna seed pods won’t open naturally?
If pods stay stubbornly closed, try these tricks:
- Freeze them overnight—thawing can shock them open.
- Gently crack with a hammer (wear gloves!)
- Soak in warm water for 24 hours to soften fibers.
Are canna seed pods edible, or just for propagation?
While the seeds inside are edible (roasted or ground into flour), the pods themselves are tough and fibrous—best used for decor or compost. Caution: Only consume seeds from non-toxic canna varieties (like Canna edulis); others may cause irritation.
Wrapping up and next steps
Harvesting and drying canna seed pods year-round is a rewarding way to propagate your plants while adding a touch of natural beauty to your garden.
Whether you're a seasoned grower or just starting out, mastering this process ensures healthy seeds and vibrant blooms for seasons to come. Now that you’re equipped with the right tools and knowledge, why not take the next step?
🌱 Your Next Steps:
- Experiment with timing: Try harvesting at different stages to see what works best for your climate.
- Share your success: Inspire others by documenting your canna seed journey—photos and tips go a long way!
- Expand your garden: Use your dried seeds to grow new canna plants and enjoy their stunning foliage year after year.
You’ve got this! Happy growing, and may your garden bloom with canna magic all season long. 🌿✨