
Propagation
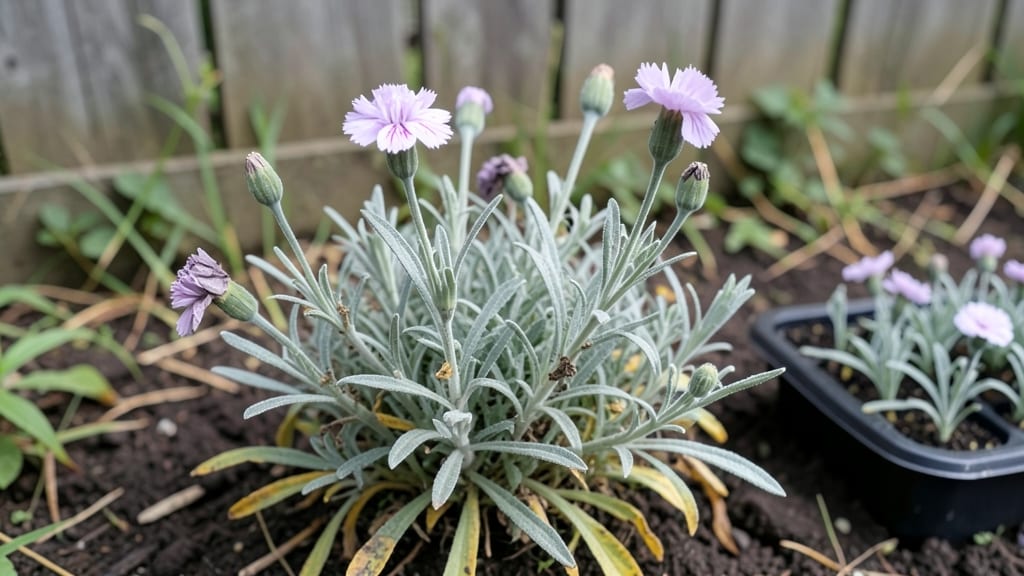
Growing carnations from seed gives you vibrant blooms you won’t find at nurseries—if you’re willing to play the long game. ✨ Most gardeners skip this because seeds take patience, but the payoff is worth it: fragrant, long-lasting flowers that thrive in your garden or containers.
The trick lies in cold stratification, a process that mimics winter conditions to break seed dormancy. You’ll need a mix of peat moss and perlite, patience for 8 weeks, and a sunny spot.
I’ve grown carnations this way for three seasons, and the first flush of blooms always feels like a reward for the wait.
By the time you’re pinching back those first seedlings, you’ll be seeing bold colors—reds, pinks, whites—emerging by midsummer. The key is keeping them evenly moist during germination and giving them bright light after sprouting.
Even if some seeds take longer, you’ll end up with sturdy plants that reward you with heavy blooms all season.
Works for both garden beds and containers, and the same method applies to heirloom varieties. Ready to grow carnations that turn heads? Here’s exactly how to get started—no fancy equipment needed.
📚 In This Guide
- What you need
- Instructions
- Tips and common mistakes
- Wrapping up and next steps
What you need
- ● Carnation seeds: Choose heirloom or hybrid varieties (e.g., Dianthus caryophyllus). Start with 10–20 seeds for a small batch.
- ● Seed-starting mix: A lightweight, sterile peat-based or coconut coir mix (avoid garden soil—it’s too dense!). Use 1–2 cups per seed tray.
- ● Seed trays or small pots: 2–4 inch deep with drainage holes. A 1020-cell tray works well for 100+ seeds.
- ● Plastic wrap or humidity dome: To retain moisture during germination.
- ● Grow lights or sunny windowsill: Carnations need 12–16 hours of light daily (LED grow lights are ideal).
- ● Spray bottle: For gentle watering (avoid over-saturating seeds).
- ○ Fine-mist setting on a hose: Optional for larger setups.
- ● Refrigerator (for cold stratification): A zip-top bag and paper towels to mimic winter conditions.
- ○ Small fan (optional): For airflow to prevent damping-off disease.
- ● Transplanting tools: A small trowel or spoon for moving seedlings.
- ● Seedling heat mat: Speeds up germination (70–75°F is ideal).
- ● pH test kit: Carnations prefer 6.0–7.0 pH in soil.
- ● Slow-release fertilizer: Like osmocote (mix 1 tsp per quart of soil).
- ● Support stakes or cages: For tall varieties (e.g., spider carnations).
Step-by-step instructions for growing carnations from seed
Here's my foolproof method for coaxing vibrant carnations from seed using cold stratification—no fancy equipment needed.
🌱 Step 1: Prepare Seeds with Cold Stratification
Carnation seeds need a 12-16 week cold treatment to break dormancy. Place the seeds in a sealed plastic bag with a damp paper towel—just enough moisture to keep it damp but not soaking. Store the bag in your refrigerator's crisp drawer (35-40°F) for 8-10 weeks.
Check weekly for mold or excessive moisture. If the towel feels dry, mist lightly with water. After 8 weeks, remove the seeds and let them sit at room temperature for 2 weeks to acclimate. This mimics winter's natural chilling period and dramatically improves germination rates.
🪴 Step 2: Sow Stratified Seeds in Containers
Fill 4-inch diameter pots with sterile seed-starting mix (never garden soil—it's too dense). Press the mix down lightly to remove air pockets, then create shallow furrows 1/8 inch deep with your finger. Space seeds 1/4 inch apart—they're tiny, so I use a toothpick to handle them.
Cover the seeds with a thin layer of mix, then mist gently until the surface looks uniformly damp. Place the pots in a clear plastic dome or cover with plastic wrap to retain humidity. Keep them in bright, indirect light (no direct sun yet) at 65-70°F.
☀️ Step 3: Provide Warmth and Light for Germination
Germination takes 2-4 weeks at this stage, so patience is key. Keep the soil consistently moist—water when the top inch feels dry to touch. Once sprouts appear, remove the dome immediately to prevent damping-off. Place the seedlings under grow lights 12-14 hours daily (a south window alone won't cut it).
Watch for first true leaves (the second set after the initial seed leaves). At this point, thin seedlings to one per pot using scissors to avoid disturbing roots. If a seedling looks weak, leave it—it'll catch up with its stronger siblings.
🌿 Step 4: Harden Off and Transplant
After 6-8 weeks of indoor growth, your seedlings should have 4-6 true leaves and sturdy stems. Begin hardening off by placing them outside in partial shade for 1 hour daily, gradually increasing time over 10 days. Choose a cloudy day for the final full-day transition to avoid shock.
Transplant outdoors after your last frost date, spacing plants 12-18 inches apart in well-draining soil. Carnations thrive in full sun (6+ hours daily) and prefer slightly alkaline soil (pH 6.5-7.0). Water deeply at the base—avoid wetting leaves to prevent fungal issues.
✂️ Step 5: Prune and Maintain for Blooms
The key to abundant blooms is regular pruning. Once the plant reaches 6-8 inches tall, pinch back the top set of leaves to encourage bushier growth. Deadhead spent blooms immediately—they'll reward you with continuous flowering from late spring through fall.
Fertilize lightly every 4-6 weeks with a balanced 10-10-10 formula (half-strength) after the first flush of blooms. Carnations are drought-tolerant once established, but water 1 inch weekly during dry spells. Mulch around the base to retain moisture and regulate soil temperature.
Tips & tricks for perfect carnation growth from seed
A few strategic adjustments can transform your carnation-growing success from hit-or-miss to reliably stunning. Here's what I've learned after years of trial and error with these delicate bloomers.
Cold Stratification Precision: The 8-10 week cold treatment in your refrigerator's crisp drawer (35-40°F) is non-negotiable—this mimics winter's natural chilling period that carnation seeds require to break dormancy. I've found that using a small plastic container with ventilation holes works better than a sealed bag, as it prevents condensation buildup that can lead to mold. Place a small thermometer in the drawer to monitor temperature—consistent 40°F is ideal, and fluctuations above 45°F can reduce germination rates by up to 40%.
Seed Handling Technique: Carnation seeds are microscopic, so I recommend using a fine-tip paintbrush or toothpick to place them in their 1/8-inch deep furrows. The spacing of 1/4 inch apart might seem generous, but it prevents overcrowding that leads to weak, leggy seedlings. After sowing, I gently press the mix down with a popsicle stick rather than patting it—this creates better seed-to-soil contact without compacting the mix too much.
Lighting Strategy: The bright, indirect light requirement during germination is often misunderstood. While a south-facing window provides light, it rarely offers the consistent 12-14 hours of light carnations need. I've had the most success with a simple LED grow light placed 6 inches above the seedlings—this ensures proper photosynthesis without the heat stress that can come from direct sunlight. The key is maintaining that 65-70°F temperature range while providing light intensity equivalent to 10,000 lux.
Harden-Off Gradually: The 10-day hardening-off period is where many growers rush the process. I recommend increasing outdoor exposure by 30 minutes every 2-3 days rather than daily. On cloudy days, you can safely double the exposure time since there's no risk of sunburn. The final full-day transition should always occur on a cloudy day—this prevents the shock that can occur when seedlings go from indoor conditions to full sun exposure.
Pro Tips for Carnations From Seed
- A few strategic adjustments can transform your carnation-growing success from hit-or-miss to reliably stunning.
- Cold Stratification Precision: The 8-10 week cold treatment in your refrigerator's crisp drawer (35-40°F) is non-negotiable—this mimics winter's natural chilling period that carnation seeds require to break dormancy.
- Seed Handling Technique: Carnation seeds are microscopic, so I recommend using a fine-tip paintbrush or toothpick to place them in their 1/8-inch deep furrows.
Frequently asked questions
Got questions about growing carnations from seed? You’re not alone—this process has a few quirks! Below, we’ve answered the most common queries to help you grow lush, fragrant blooms with confidence.
How long does it take for carnation seeds to germinate?
With cold stratification (a key step!), carnation seeds typically germinate in 14–28 days. Keep them in a cool, moist environment (around 40–50°F) for the first 4–6 weeks, then move to warmth (70–75°F) for sprouting. Patience pays off—these seeds aren’t fast starters!
Do I really need cold stratification for carnation seeds?
Yes!
Carnations are winter-hardy perennials in nature, so their seeds require a cold period. Skip stratification, and you’ll likely see little to no germination. Mix seeds with damp sand or peat, refrigerate for 4–6 weeks, then plant. It’s worth the effort for those dreamy blooms!
Can I grow carnations from seed indoors?
Start seeds indoors 8–10 weeks before your last frost date in well-draining pots with seed-starting mix. Use a grow light (14–16 hours/day) since windowsills often lack enough light. Once seedlings have 2–3 true leaves, transplant outdoors after hardening off.
Why aren’t my carnation seedlings growing straight?
Leggy seedlings usually mean too little light or overcrowding. Move them closer to a light source (or add a grow bulb) and thin seedlings to 1 inch apart to reduce competition. If they’re already planted outdoors, stake or cage them early to prevent flopping in wind.
Are there any easy alternatives to growing carnations from seed?
If seeds feel too tricky, try cuttings or bare-root plants from nurseries. Many carnations (like Dianthus hybrids) grow well from stem cuttings in water or soil. For instant color, opt for potted carnations—just know they’re often annuals and won’t rebloom like seed-grown varieties!
Wrapping up and next steps
Growing carnations from seed is a rewarding journey that transforms a tiny seed into a burst of vibrant blooms—especially with the magic of cold stratification! 🌱 With patience, the right tools, and a little care, you’ll enjoy lush flowers in just 8 weeks.
Whether you’re a seasoned gardener or a curious beginner, this process proves that beauty grows from persistence.
Ready to dive in? Start by gathering your seeds and supplies, then follow the steps with confidence. Before you know it, your windowsill or garden will be alive with color—and you’ll have the pride of knowing you nurtured every petal from scratch. Happy growing! 🌸