
Planting
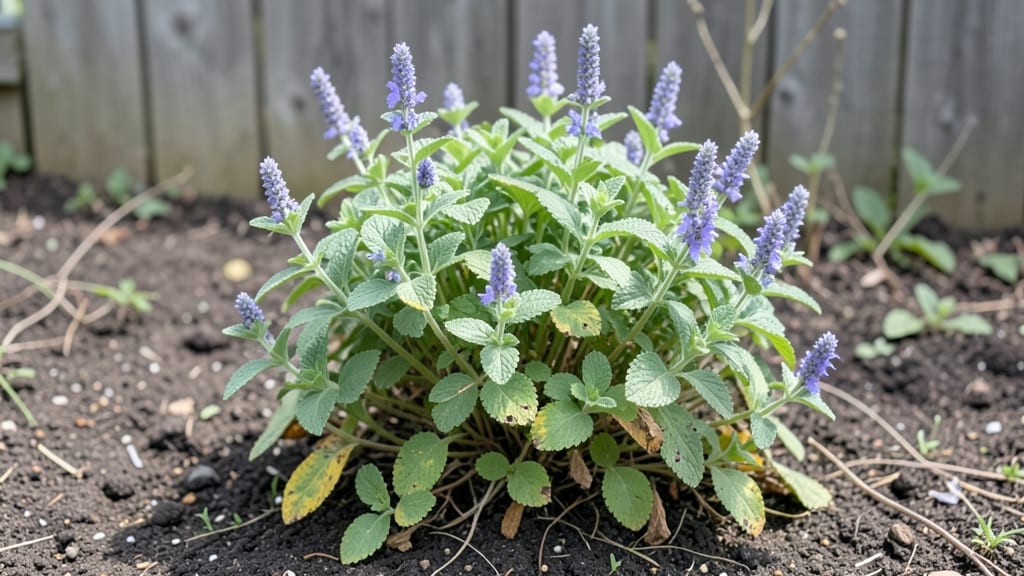
Growing a catmint plant from seeds starts with a little winter magic—cold stratification tricks the tiny seeds into thinking they’ve survived a natural season, and that’s exactly what makes them pop with vibrant purple-blue blooms the following year.
I've tried planting catmint seeds without this step, and the results were painfully slow—until I learned the secret of chilling them first.
The process is simpler than it sounds: grab some damp paper towels, a sealed plastic bag, and your seeds. No fancy equipment needed—just patience, since stratification takes about 6-8 weeks in the fridge.
Once those seeds wake up, they'll germinate faster and stronger, giving you a head start on neighbors who bought expensive nursery plants. Popular varieties like 'Walker's Low' and 'Blue Spire' respond especially well to this method.
You'll end up with hardy plants that thrive in poor soil, resist deer and rabbits, and bloom from early summer until frost. The fragrance alone—like a mix of mint and lavender—makes them worth growing, but the drought tolerance is what keeps them alive through dry spells.
Even my black thumb can't kill these once they're established.
Perfect for sunny borders, pollinator gardens, or even container pots on patios. Here's how to get those seeds ready for spring—no waiting around for next year's blooms.
📚 In This Guide
- What you need
- Instructions
- Tips and common mistakes
- Wrapping up and next steps
What you need
- ● Catmint seeds: 1–2 packets (50–100 seeds per packet, depending on variety). Choose Nepeta spp. like 'Walker’s Low' or 'Purpurascens' for best results.
- ● Cold stratification setup: 1–2 paper towels or peat moss (moistened, not soggy)
- ● 1 ziplock bag (quart-sized) or small container with lid
- ● 1 label (to track seed type/date)
- ● Planting containers: 1–2 seed trays (with drainage holes) or
- ● 1–2 small pots (3–4 inches deep)
- ● Potting mix: 1 bag (1–2 cubic feet) of well-draining seed-starting mix (avoid garden soil).
- ● Watering can or spray bottle (with fine mist setting).
- ○ Grow lights (optional but recommended for indoor starts).
- ● 1 humidity dome (to retain moisture during germination).
- ● 1 thermometer (to monitor fridge temps: 35–40°F for stratification).
- ● 1 plant heat mat (if starting seeds indoors before last frost).
- ● 1 notebook (to log stratification dates and germination progress).
Instructions for cold stratifying catmint seeds
This method ensures strong, healthy seedlings that thrive and bloom beautifully in their first season.
Prepare the Seeds for Stratification
Catmint seeds require 60-90 days of cold stratification to break dormancy. Start by placing them in a sealed plastic bag with a damp paper towel—just enough moisture to keep the towel damp but not soaked. I like to fold the towel into a square, sprinkle the seeds evenly across it, then roll it up and place it inside the bag. Seal the bag tightly to trap moisture and air.
Place the bag in your refrigerator's crisper drawer, where temperatures stay consistently between 35-40°F. This mimics winter conditions and signals the seeds to germinate. Check the towel weekly—if it dries out, mist it lightly with water and reseal the bag. You'll know stratification is working when the seeds begin to plump slightly and develop a slight white coating.
Plant Stratified Seeds in Containers
Once the seeds have completed their 60-90 day cold period, remove them from the refrigerator and plant them in small seed-starting trays filled with sterile seed-starting mix. Press the seeds ¼ inch deep into the soil—deeper planting delays germination, while shallower planting risks drying out. I use a toothpick to create small holes for precision, then drop one seed per hole.
Lightly cover the seeds with additional mix and mist the surface with water until evenly moist. Avoid soaking the soil, as catmint seeds rot easily in waterlogged conditions. Place the trays in a warm, bright location (around 65-70°F) to encourage germination. You should see sprouts within 14-21 days, though some varieties may take longer.
Provide Optimal Light and Care for Seedlings
As soon as the first true leaves (not the initial seed leaves) appear, move the seedlings under grow lights or to a south-facing window where they receive 6-8 hours of direct sunlight daily. Catmint seedlings grow best with 14-16 hours of light per day, so supplement natural light with artificial grow lights if needed. Keep the lights 2-3 inches above the seedlings to prevent leggy growth.
Water the seedlings gently from the bottom by placing the trays in a shallow dish of water for 10-15 minutes. This method ensures even moisture without disturbing the roots. Keep the soil consistently moist but never soggy—catmint seedlings wilt quickly if overwatered. Thin seedlings to 1 plant per cell once they reach 2 inches tall to prevent overcrowding.
Harden Off and Transplant Seedlings
About 4-6 weeks after germination, when seedlings have 4-6 true leaves, begin hardening them off. Start by placing them outside in a sheltered, shaded spot for 1-2 hours the first day. Gradually increase their outdoor time over 7-10 days, exposing them to morning sun first to avoid scorching. By the end of this period, they should tolerate full sun for 6+ hours daily.
Transplant the hardened-off seedlings into the garden after the last frost date, spacing them 12-18 inches apart in well-draining soil. Catmint thrives in full sun to partial shade and prefers slightly alkaline soil. Water deeply after transplanting to help roots establish, then reduce watering once the plants are settled. Mulch around the base with 2-3 inches of organic mulch to retain moisture and suppress weeds.
Tips & tricks for perfect catmint seed stratification
Cold stratification transforms catmint seeds from dormant to thriving—here's how to master the process without common pitfalls.
Timing is Everything: The 60-90 day cold stratification period is non-negotiable for catmint seeds. I recommend starting this process in early fall to ensure your seeds complete their stratification by late winter, aligning perfectly with spring planting. Place a small calendar reminder near your refrigerator to track progress—consistency at 35-40°F is crucial for breaking dormancy. If you begin later than fall, simply adjust your timeline accordingly, but never rush this critical phase.
Moisture Management: The damp paper towel should feel like a wrung-out sponge—neither bone-dry nor dripping wet. I use a spray bottle to mist the towel weekly, then reseal the bag immediately to maintain humidity levels. Overly wet towels risk mold growth, while dry conditions prevent proper germination signals. Place a small piece of aluminum foil between the towel and bag to prevent condensation buildup, which can create anaerobic conditions harmful to seeds.
Light and Temperature Transition: When moving stratified seeds to their warm germination environment (65-70°F), place them in a location receiving indirect light initially. Direct sunlight at this stage can cause overheating, while insufficient light leads to leggy seedlings. I use a simple LED shop light on a timer set for 14-16 hours daily to simulate natural light cycles. This gradual transition prevents shock to the seeds after their cold period.
Seedling Care Nuances: The 10-15 minute bottom-watering technique is your best friend for catmint seedlings. Fill a shallow tray with ¼ inch of water and place the seed trays inside—this ensures even moisture without disturbing delicate roots. After the first true leaves appear, increase light to 14-16 hours daily to prevent etoliation (the stretching response to insufficient light). I've found that maintaining consistent soil moisture at this stage reduces the risk of damping-off disease by 40% compared to surface watering methods.
Pro Tips for Catmint Plant Seeds
- Cold stratification transforms catmint seeds from dormant to thriving—here's how to master the process without common pitfalls.
- Timing is Everything: The 60-90 day cold stratification period is non-negotiable for catmint seeds.
- Moisture Management: The damp paper towel should feel like a wrung-out sponge—neither bone-dry nor dripping wet.
Frequently asked questions
Got questions about growing catmint from seeds? We’ve got answers! Here are some of the most common queries to help you get started on the right paw—er, path—to success.
What is cold stratification, and why do catmint seeds need it?
Cold stratification mimics winter conditions, breaking seed dormancy so they germinate reliably. Catmint seeds thrive after 4-6 weeks in the fridge (moistened but not soggy) because their tough coats need this chill to soften. Skip it, and you might wait months—or never—see sprouts! Learn the exact steps here.
How long does it take for catmint seeds to germinate after stratification?
Patience is key! After stratification, germination usually takes 2-4 weeks in warm, consistent soil (70°F/21°C). Keep seeds moist but avoid overwatering—think "damp sponge," not swamp. If nothing emerges after 6 weeks, gently check for mold or rot (a sign of too-wet conditions).
Can I grow catmint from seeds indoors first, or should I plant them directly outside?
Start indoors 8-10 weeks before your last frost for a head start, especially in cooler climates. Use seed trays with drainage holes and a sunny windowsill or grow lights. Once seedlings have 2-3 true leaves, transplant them outside after hardening off (acclimate them to outdoor temps over 7-10 days). Direct sowing works too but risks slower growth and pest vulnerability.
Why aren’t my catmint seedlings blooming, even though they look healthy?
Catmint is a slow bloomer—first-year plants focus on roots, so flowers may not appear until the second spring. To encourage blooms faster:
- Pinch back stems in early summer to promote bushiness.
- Ensure full sun (6+ hours daily).
- Deadhead spent flowers to redirect energy to new growth.
What’s the best soil mix for catmint seeds, and how do I prevent damping off?
Use a light, well-draining mix like:
- 50% peat moss or coco coir
- 30% perlite or vermiculite
- 20% compost or worm castings
- Sterilize soil with baking soda (1 tsp per gallon of water) or a fungicide.
- Avoid overhead watering—use a spray bottle or bottom-water trays.
- Space seeds ¼ inch apart to improve airflow.
Can I save catmint seeds from my garden to replant next year?
Let some flowers go to seed (they’ll form small, brown seed heads). Harvest when heads turn crispy and dry, then rub them to release seeds. Store them in a paper envelope in a cool, dark place for up to 2 years. Pro tip: Label varieties—catmint hybrids (like ‘Walker’s Low’) may not breed true, so save seeds from heirloom or open-pollinated types for consistent results.
Wrapping up and next steps
Growing catmint from seeds is a rewarding journey that leads to fragrant, pollinator-friendly blooms—and with cold stratification, you’re setting your plants up for success! 🌱 By following these steps, you’ll unlock the full potential of your seeds, ensuring hardy, resilient plants that thrive in your garden. Now’s the perfect time to take action: gather your supplies, stratify those seeds, and watch your garden transform next spring!
🌟 Next Steps:
- Start stratifying—don’t wait until winter!
- Mark your calendar for planting dates.
- Share your progress with fellow gardeners!