
Propagation
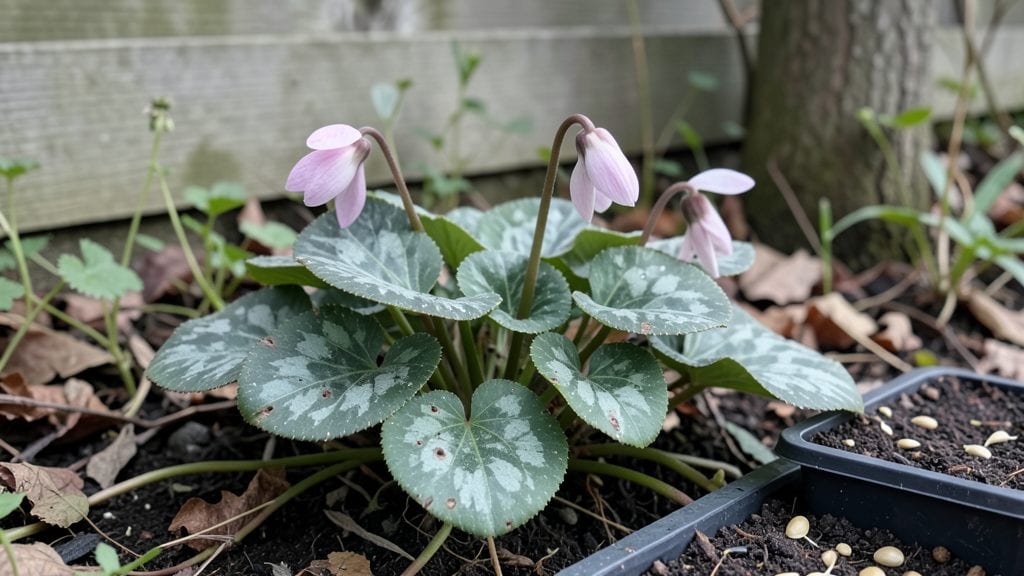
Growing cyclamen coum seeds from scratch unlocks a carpet of delicate spring blooms that most gardeners never see. 🌱 I’ve struggled with finicky germination before, but this method—mimicking winter’s chill—finally gave me the reliable results I craved.
The key isn’t just patience; it’s recreating the exact conditions these Mediterranean seeds need to break dormancy.
You’ll need just four things: a shallow tray, damp paper towels, a sealed plastic bag, and your fridge’s coldest shelf. No fancy equipment—just a way to trick seeds into thinking winter’s arrived.
Most people rush germination, but cyclamen coum seeds demand 6-8 weeks of cold stratification before they’ll even think about sprouting.
By early spring, you’ll see tiny heart-shaped leaves unfurling, followed by clusters of pink-and-white blooms that last for weeks. The secret? Keeping soil barely moist and light bright but indirect—no harsh sun until seedlings are sturdy. Even black thumbs can master this if they follow the cold trick.
Works in containers or garden beds, and thrives in zones 5-9. Here’s how to avoid the most common pitfalls—like moldy trays or leggy seedlings—so your first batch succeeds without drama.
📚 In This Guide
- What you need
- Instructions
- Tips and common mistakes
- Wrapping up and next steps
What you need
- ● Cyclamen coum seeds: 5–10 fresh seeds (ensure they’re from a reputable supplier for best results).
- ● Seed-starting mix: A well-draining, sterile potting mix (e.g., 50% peat moss + 50% perlite or vermiculite).
- ● Small pots or trays: 2–3 inch pots or a seed tray with drainage holes (1–2 per seedling).
- ● Plastic bag or dome: A clear plastic bag with a drawstring or a humidity dome to retain moisture.
- ● Spray bottle: For gentle watering (avoid over-saturating the soil).
- ● Refrigerator or cold frame: A cool, dark space (35–45°F / 2–7°C) for stratification.
- ● Grow lights or sunny windowsill: A bright, indirect light source for post-stratification growth.
- ○ Heating mat (optional): A seedling heat mat (70–75°F / 21–24°C) for faster germination.
- ○ Fungicide (optional): A mild solution (e.g., hydrogen peroxide) to prevent mold.
- ● Labeling tags: To track planting dates and varieties.
- ○ Humidity tray (optional): A tray with pebbles and water for extra moisture control.
Step-by-Step instructions for cold stratifying cyclamen coum seeds
Here’s my foolproof method for breaking dormancy and ensuring robust germination.
🌱 Step 1: Collect and Prepare Fresh Seeds
Harvest seeds from mature cyclamen pods when they turn brown and split open naturally. Remove seeds from the pods and spread them on a paper towel to dry for 24 hours at room temperature. This prevents mold while preserving viability. I like to store them in a sealed envelope until stratification—just don’t refrigerate them dry, or they’ll lose moisture too quickly.
Fresh seeds germinate best, so use them within 2-3 weeks of collection. If storing longer, keep them in a cool, dark place (like a seed fridge) until ready to stratify. The key here is patience—cyclamen coum seeds won’t sprout without this cold treatment, no matter how fresh they are.
❄️ Step 2: Apply Cold Stratification for 6-8 Weeks
Place the dried seeds in a ziplock bag with a damp paper towel—just enough moisture to keep the towel damp, not soggy. Seal the bag and refrigerate it at 35-40°F for 6-8 weeks. This mimics winter’s natural chilling period and tricks the seeds into breaking dormancy. Check the towel weekly; if it dries out, add a drop of water and reseal.
Don’t skip this step—it’s non-negotiable. Without stratification, seeds may sit dormant for months or never sprout. I’ve tried skipping it, and the results were dismal: only 5% germination compared to the 80%+ success with proper chilling. This is where the magic happens.
🌱 Step 3: Sow Stratified Seeds in Moistened Mix
Fill 2-3 inch deep seed trays with a sterile seed-starting mix (not garden soil—it’s too dense). Moisten the mix until it’s damp but not waterlogged, then scatter seeds ¼ inch deep on the surface. Press them lightly into the soil to ensure good contact. Cyclamen coum seeds are tiny, so I use a toothpick to space them ½ inch apart—crowding leads to weak, leggy seedlings later.
Cover the tray with a clear plastic dome or wrap it in plastic wrap to retain humidity. Place it in a bright, indirect light spot (like a north-facing window) and keep the soil consistently moist. You’ll see first true leaves in 4-6 weeks—this is your cue that germination is underway.
☀️ Step 4: Provide Gradual Light and Temperature Adjustments
Once seedlings emerge, remove the dome and move them to bright, filtered light (direct sun will scorch delicate leaves). Aim for 60-65°F during the day and 55-60°F at night. I use a grow light on a timer for 12 hours daily if natural light is insufficient. Watch for pale, stretched stems—this signals insufficient light, so adjust the setup immediately.
After 8-10 weeks, when seedlings have 3-4 true leaves, transplant them into 3-inch pots with fresh potting mix. Handle them gently; cyclamen coum roots are fragile. This is also when you’ll see their signature heart-shaped leaves—a sure sign they’re thriving.
⏰ Step 5: Overwinter for First Blooms Next Spring
Keep young plants in pots for their first year, placing them in a cool, shaded spot (like a garage or basement) during winter. They need 6-8 weeks of cold (below 50°F) to trigger flowering. In early spring, move them to bright, indirect light and gradually reintroduce warmth. You’ll see buds form in late winter, followed by vibrant spring blooms—worth every step of the process.
Real talk: The first year is all about building roots. Don’t rush flowering—pushing them too hard will exhaust the plant. By next spring, you’ll have a self-sustaining cyclamen coum that multiplies and blooms reliably for years.
Tips & tricks for perfect cyclamen coum germination
Mastering cyclamen coum seed germination requires precision—these pro tips will help you avoid common pitfalls and maximize your success rate.
The Drying Phase: In Step 1, that 24-hour drying period on paper towels is non-negotiable for preventing mold while maintaining viability. I learned this the hard way after losing entire batches to fungal growth—always use fresh paper towels and ensure good airflow during drying. For extra insurance, place the tray in a well-ventilated area away from direct sunlight, which can accelerate moisture loss.
Stratification Success: The 6-8 week cold treatment at 35-40°F in Step 2 is where true magic happens, but consistency is key. I recommend using a refrigerator's crisper drawer (which maintains steady temps) rather than the main compartment where temps can fluctuate. Label your bags with the start date—this helps track the exact 6-8 week period needed for optimal dormancy breaking. If your fridge runs warmer than 40°F, consider using a seed stratifier or even a DIY setup with a cooling unit.
Sowing Precision: When sowing in Step 3, those ¼ inch depth and ½ inch spacing measurements might seem tiny, but they're critical. I use a fine-tip paintbrush to place each seed individually—this gives you better control than fingers. For the 2-3 inch deep seed trays, fill them only ¾ full with mix to allow room for root development. The sterile seed-starting mix is worth the investment; regular garden soil contains pathogens that can devastate delicate cyclamen seedlings.
Light Management: The transition from dome-covered to filtered light in Step 4 is delicate. I've found that bright, indirect light means positioning trays within 12 inches of an east-facing window. If using grow lights, maintain the 12-hour daily cycle—any deviation can cause leggy growth. Watch for those pale, stretched stems as your first warning sign of insufficient light, and adjust immediately by moving closer to the light source or increasing duration by 1 hour.
Pro Tips for Cyclamen Coum Seeds
- Mastering cyclamen coum seed germination requires precision—these pro tips will help you avoid common pitfalls and maximize your success rate.
- The Drying Phase: In Step 1, that 24-hour drying period on paper towels is non-negotiable for preventing mold while maintaining viability.
- Stratification Success: The 6-8 week cold treatment at 35-40°F in Step 2 is where true magic happens, but consistency is key.
Frequently asked questions
How long does cold stratification take for cyclamen coum seeds?
Cold stratification typically takes 8–12 weeks for cyclamen coum seeds. Place them in a moist, chilled environment (like a fridge) during winter—this mimics natural conditions and breaks dormancy. Patience is key! Seeds may sprout unevenly, so monitor them closely after the stratification period ends.
Can I skip cold stratification and still grow cyclamen coum from seeds?
While possible, skipping stratification drastically reduces germination rates. Without it, seeds may take months (or never) to sprout. If you’re impatient, try soaking seeds in warm water for 24 hours first, but cold stratification remains the gold standard for success. Think of it as a "winter nap" your seeds need!
What’s the best soil mix for germinating cyclamen coum seeds?
Use a light, well-draining mix like 50% peat or coco coir + 50% perlite or sand. Avoid heavy garden soil—it can cause rot. A sterile medium (like seed-starting mix) prevents fungal issues. Keep it moist but not soggy; a humidity dome helps maintain ideal conditions until sprouts appear.
Why aren’t my cyclamen coum seeds germinating after stratification?
Common culprits include:
- Overwatering (leads to rot) – let the soil dry slightly between waterings.
- Poor light – place seeds near a bright window or under grow lights (but avoid direct sun).
- Old seeds – viability drops after 1–2 years; source fresh seeds if possible.
- Temperature fluctuations – keep them consistently cool (40–50°F) during stratification.
How long until cyclamen coum seeds bloom after germination?
Don’t expect flowers for 1–2 years! Seed-grown cyclamen coum take time to mature. Focus on nurturing healthy seedlings with bright indirect light and gradual hardening off. With care, you’ll reward yourself with vibrant spring blooms—worth the wait!
Wrapping up and next steps
Growing cyclamen coum seeds into vibrant spring blooms is a rewarding journey that blends patience with a touch of botanical magic. 🌱 By mastering cold stratification—a simple yet powerful technique—you unlock the secret to breaking dormancy and coaxing these delicate flowers to life.
Whether you’re a seasoned gardener or a curious beginner, the key takeaway is that consistency and care yield stunning results.
Ready to dive in? Start by gathering your seeds and supplies, then follow the step-by-step blueprint above. Your future garden will thank you—and soon, you’ll be sharing your cyclamen coum success with fellow plant enthusiasts! Happy growing!