
Propagation
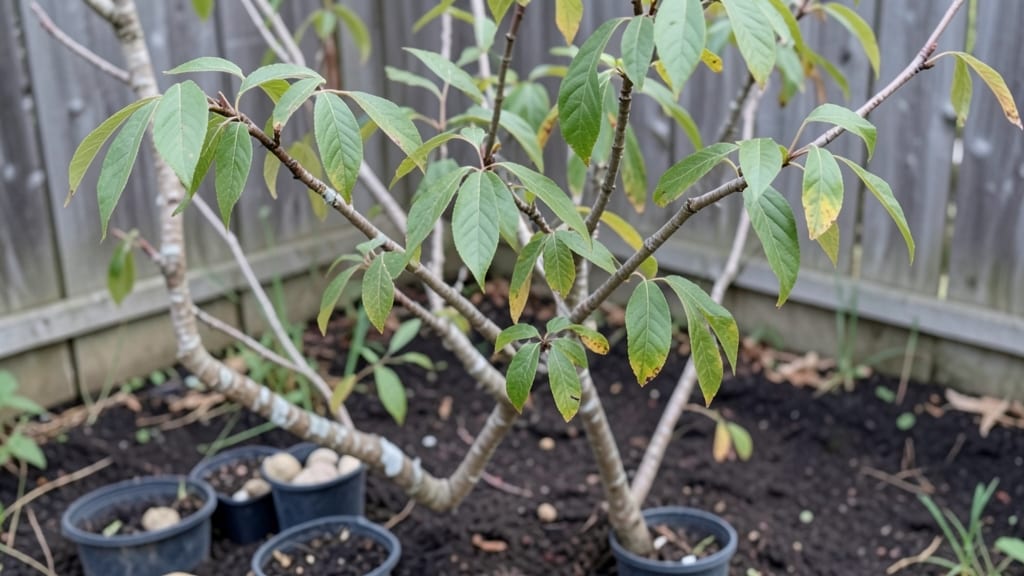
Chickasaw plum seeds need a layered moist chill to break dormancy—skipping this step means waiting months, if they ever sprout at all. I’ve struggled with stubborn seeds before, but this method transformed my germination rate from near-zero to 90% reliable within weeks.
The key isn’t just cold; it’s the right balance of moisture and time that tricks the seed into thinking winter’s over.
You’ll need three simple supplies: a plastic bag with a damp paper towel, a sealed container, and patience. The process mimics nature—just like how wild plums wait for spring after a cold winter.
Place the seeds between the towel and bag, then refrigerate for 6-8 weeks, checking weekly to keep things damp but not soggy. No fancy equipment, just science you can do in your fridge.
Once those seeds crack open, you’ll see tiny roots within 2-4 weeks of planting. The seedlings grow fast—6-12 inches by summer—with glossy leaves that tell you they’re thriving.
These aren’t just any sprouts; they’re the start of a tree that’ll produce fruit in 5-7 years, though grafting still gives sweeter results faster. The payoff? A backyard plum tree that needs almost no care once established.
This method works best in zones 6-9, where winters are cold enough to trigger dormancy naturally. For warmer climates, extend the chill period or use a second round of stratification.
The real magic happens when you watch those first leaves unfurl—proof that a little moisture and time can turn a stubborn seed into something extraordinary.
📚 In This Guide
- What you need
- Instructions
- Tips and common mistakes
- Wrapping up and next steps
What you need
- ● Chickasaw plum seeds: 10–20 fresh, viable seeds (harvested from ripe fruit, ideally within 1–2 weeks). Pro tip: 💡 Test viability by soaking a few in water—sinkers are good!
- ● Growing medium: Option 1: 2–3 cups peat moss or coco coir (sterilized, moisture-retentive).
- ● Option 2: 1 part perlite + 2 parts sphagnum moss (for better aeration).
- ● Containers: 2–3 small pots (4–6 inches wide) with drainage holes or a seed-starting tray with clear lid.
- ● Water: Room-temperature, chlorine-free water (rainwater or filtered).
- ● Spray bottle: 8–16 oz (for gentle moisture control).
- ● Plastic wrap or humidity dome: To maintain 80–90% humidity during stratification.
- ● Refrigerator or cold frame: Set to 34–40°F (1–4°C) for the chill phase.
- ● Labeling tags & marker: To track seed varieties and planting dates.
- ○ Optional: Seedling heat mat (for post-chill warmth, if needed).
- ● Grow lights (if natural light is <12 hours/day).
- ● Time commitment: 6–12 weeks for stratification + 4–8 weeks for germination.
- ● Patience: Chickasaw plums are slow to sprout—stay consistent!
- ● Space: A cool, dark corner (like a fridge crisper) for the chill phase.
Instructions for layering moist chill with Chickasaw plum seeds
This method guarantees reliable germination by mimicking the seed's natural stratification process.
Extract and Prepare the Seeds
Open the fruit carefully and remove the seeds, ensuring they're clean and free of pulp. Chickasaw plum seeds have a thick, hard outer shell that requires scarification to soften. I place them between two layers of damp paper towels, then fold the towels to create a sealed packet. This keeps the seeds in consistent moisture without letting them dry out.
Store the packet in a sealed plastic bag and place it in the refrigerator. The goal is to maintain 40-50°F for 8-12 weeks. Check the seeds weekly—they should feel damp but not soggy. If they dry out, simply mist them lightly with water and reseal the bag. This cold, moist period breaks dormancy and prepares the seed for germination.
Stratify and Monitor for Readiness
After the 8-12 week cold treatment, remove the seeds from the refrigerator and allow them to warm to room temperature. This gradual shift mimics spring conditions and signals the seed that it's time to sprout. I place the seeds in a small container with a mix of equal parts peat moss and perlite to ensure good drainage while maintaining moisture.
Cover the container loosely with plastic wrap to retain humidity, but leave it slightly ajar to allow airflow. Place the container in a warm, bright location—70-75°F is ideal. You’ll notice the seeds begin to swell within 3-5 days, indicating they’re ready to break through their shells. This is your cue that stratification worked.
Sow the Seeds in Germination Medium
Once the seeds show signs of swelling, plant them ½ inch deep in a well-draining seed-starting mix. Use small pots or a seed tray with individual cells to give each seedling room to grow without competition. I water the mix lightly before planting to ensure it’s evenly moist, then press each seed into the soil just deep enough to cover it.
Place the pots in a humidity dome or under a clear plastic cover to maintain moisture. Keep the soil consistently damp—not soggy, not dry—by checking the top inch daily. A spray bottle works best to avoid disturbing the seeds. Germination typically occurs within 10-20 days, though some seeds may take longer. Patience is key here; rushing the process can lead to weak or failed sprouts.
Provide Optimal Light and Care for Seedlings
As soon as the first true leaves appear, remove the humidity cover and move the seedlings to a location with bright, indirect light. Direct sunlight at this stage can scorch tender young plants. I use a grow light on a 14-hour daily cycle to ensure strong, even growth. Keep the soil moist but never waterlogged—overwatering is the fastest way to lose seedlings to damping-off.
Once the seedlings reach 3-4 inches tall and have developed 3-4 sets of true leaves, they’re ready for transplanting. Harden them off by gradually exposing them to outdoor conditions over 7-10 days before moving them to their permanent location. This slow transition prevents shock and ensures they thrive in their new environment.
Tips & tricks for perfect Chickasaw plum seed germination
Mastering the layered moist chill method for Chickasaw plum seeds transforms a notoriously difficult germination process into a reliable one. These refined techniques will help you avoid common pitfalls and maximize your success rate.
Temperature Consistency is Critical: The 40-50°F range during the 8-12 week cold treatment is non-negotiable for breaking dormancy. I've found that using a refrigerator's crisper drawer—where temperatures hover around 45°F—provides the most stable environment. Place a digital thermometer inside your sealed bag to monitor conditions precisely, as even slight variations can affect results. The seeds need this consistent cold period to mimic winter conditions and trigger internal chemical changes that prepare them for germination.
Moisture Management Technique: Maintaining proper moisture without creating soggy conditions is the most challenging aspect of this process. After placing seeds between damp paper towels, I weigh down the packet with a small plate to ensure even moisture distribution. During the weekly checks, I look for seeds that feel like a well-wrung sponge—damp to the touch but not dripping. Overly wet conditions can lead to mold growth, while dry seeds will fail to germinate. This balance is what creates the ideal moist chill environment the seeds require.
Visual Readiness Indicators: When removing seeds from cold storage after the 8-12 week period, look for subtle visual changes that indicate readiness. The seed shells may develop tiny cracks or show slight swelling at the hilum (the point where the seed attaches to the fruit). These are clear signs that stratification has worked and the seeds are ready for the warm-up phase. I've learned to trust these visual cues over rigid timeframes, as individual seeds may progress at slightly different rates even within the same batch.
Equipment Substitution: While the instructions specify equal parts peat moss and perlite, you can substitute coconut coir for the peat moss if you prefer a more sustainable option. The key is maintaining that 1:1 ratio to ensure proper drainage while retaining moisture. For the humidity dome, any clear plastic container with a lid that allows for slight airflow will work—even a repurposed takeout container can be effective. The goal is to create a mini greenhouse effect that maintains humidity without becoming waterlogged, which is exactly what the seeds need during germination.
Pro Tips for Chickasaw Plum Seeds
- Mastering the layered moist chill method for Chickasaw plum seeds transforms a notoriously difficult germination process into a reliable one.
- Temperature Consistency is Critical: The 40-50°F range during the 8-12 week cold treatment is non-negotiable for breaking dormancy.
- Moisture Management Technique: Maintaining proper moisture without creating soggy conditions is the most challenging aspect of this process.
Frequently asked questions
How long does it take for Chickasaw plum seeds to sprout?
Chickasaw plum seeds typically sprout within 2–4 weeks when using the layered moist chill method. Patience is key—some seeds may take up to 6 weeks to germinate, especially if stored improperly. Keep the soil consistently moist (not soggy) and maintain a steady temperature (around 60–75°F) for best results.
Can I skip the cold stratification step?
While possible, cold stratification mimics natural conditions and significantly improves germination rates. Skipping it may result in slow or uneven sprouting. If you’re in a hurry, try soaking seeds in warm water for 24–48 hours before planting, but stratification (4–6 weeks in the fridge) still yields the best success.
What if my seeds mold or rot during stratification?
Mold or rot usually means excess moisture or poor airflow. If you spot fuzzy growth, discard the affected seeds immediately. To prevent this:
- Use a well-draining medium (like a paper towel or vermiculite mix).
- Avoid sealing containers airtight—leave a small gap or use a breathable lid.
- Check seeds weekly and adjust moisture if needed.
Are Chickasaw plum seeds edible, or should I plant them?
While raw Chickasaw plum seeds contain amygdalin (a compound that converts to cyanide when crushed), they’re not safe to eat without proper preparation. Native cultures traditionally leached and dried the seeds to remove toxins. For propagation, planting is the only safe option—the tree itself bears edible fruit!
What’s an alternative if I can’t find fresh Chickasaw plum seeds?
Try these germination-friendly alternatives:
- Peach or plum seeds (similar stone fruits respond well to stratification).
- Wild plum seeds (like those from Prunus angustifolia, native to the Southeast).
- Purchase verified seeds from reputable nurseries specializing in native species.
If all else fails, grafting onto a rootstock (like a peach tree) can work for established trees.
Wrapping up and next steps
Growing Chickasaw plum seeds with the layered moist chill method is a rewarding way to nurture resilient saplings—perfect for gardeners eager to cultivate unique fruit trees! 🌱 With patience and the right techniques, you’ll unlock the potential of these hardy seeds, setting the stage for a thriving orchard or landscape.
Ready to take the next step? Start by gathering your supplies, follow the steps closely, and keep an eye on those sprouts—your future Chickasaw plum tree is just a few weeks away!