
Pruning
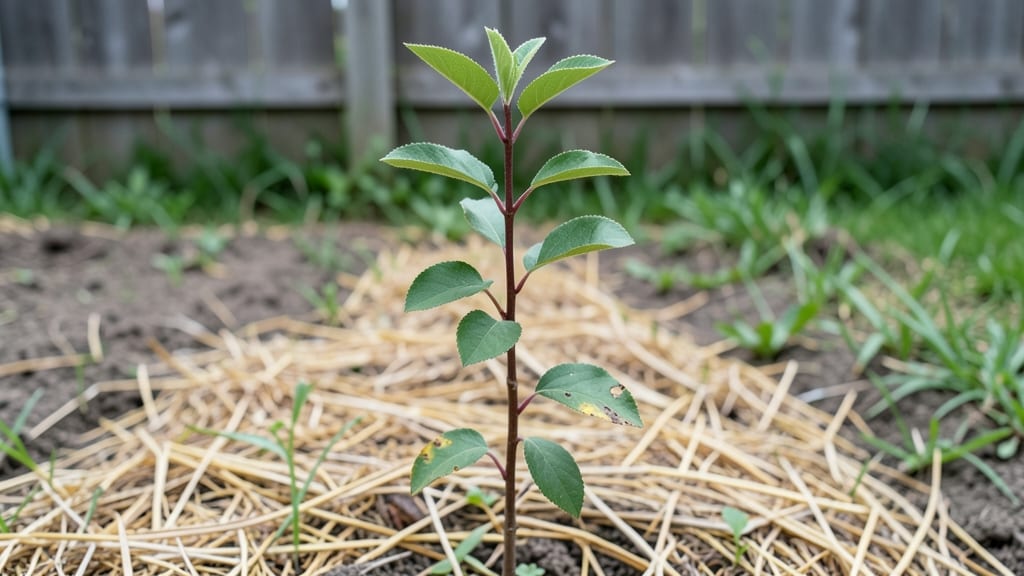
Growing a plum tree seedling from scratch means you’ll have a fruit-bearing giant in your yard someday—if you start with this layering trick for stronger roots before planting. 🌱 I’ve watched weak seedlings flop in their first season, but this method gives them a fighting chance from day one by encouraging deeper root systems before they even hit the ground.
The secret’s in the timing and technique: you’ll need a healthy seedling, some flexible vine material (like a sturdy branch), and a spot where it can root into moist soil while still attached to the mother plant.
It’s not complicated, but it does take patience—about 3-4 months of careful monitoring before you’re ready to transplant. Most gardeners skip this step, which is why so many young plum trees struggle their first year.
What you’ll end up with is a sturdy, well-anchored tree that resists wind, drought, and transplant shock better than anything you’d buy at a nursery. The roots spread out wider, soaking up nutrients and water more efficiently, and the tree starts producing fruit sooner.
Plus, you’ll avoid the heartbreak of watching a delicate seedling wilt after its first big storm.
Works for any plum variety—European, Japanese, or native—and adapts to containers if you’re working with limited space. The best part? You’re not just planting a seedling; you’re giving it a head start on a long, fruitful life. Let’s get those roots growing strong.
📚 In This Guide
- What you need
- Instructions
- Tips and common mistakes
- Wrapping up and next steps
What you need
- ● Plum tree seedling: A healthy, 1-3 year old seedling (check for firm stems and vibrant leaves).
- ● Rooting hormone: A small tube or powder (e.g., Rootone) to boost root growth.
- ● Sharp pruning shears: Clean, sterilized shears (bypass-style for precision).
- ● Moisture-retaining medium: Sphagnum moss or coconut coir (sterilized and dampened).
- ● Plastic wrap or clear bag: To create a humid microclimate (e.g., a gallon-sized zip-top bag).
- ● Small pot or container: 6–12 inches deep with drainage holes (e.g., plastic nursery pot).
- ● Watering can or spray bottle: For gentle hydration (avoid over-saturating).
- ● Perlite or vermiculite: Mix with moss for better aeration (1:1 ratio).
- ● Fertilizer (balanced, 10-10-10): Light dose after roots form (¼ tsp per gallon of water).
- ● Heat mat: For cooler climates to encourage faster rooting.
- ● Label markers: To track seedling varieties and planting dates.
- ● Garden twine: To secure plastic wrap if needed.
Step-by-Step instructions for layering plum tree seedlings
Here’s how to coax strong roots before planting—no fancy tools needed.
🌱 Step 1: Select and Prepare a Healthy Seedling
Choose a 1-year-old plum seedling with flexible, green stems—thick enough to bend but not brittle. Look for branches about ¼-inch in diameter and at least 12 inches long. These will become your rooting stems.
Prune the seedling back to 12-18 inches tall, cutting just above a leaf node (the bump where leaves attach). This encourages energy to focus on root growth rather than top growth. Remove any flowers or fruit—you want all the plant’s power going into roots, not reproduction.
🌿 Step 2: Create the Layering Trench
Dig a shallow trench about 3 inches deep along the edge of the planting area. Keep it close to the base of the seedling so the stem stays connected to the main plant. The trench should be wide enough to bury about half the stem’s circumference.
Moisten the soil in the trench until it’s damp but not soggy. This helps the buried stem make contact with moisture, which is critical for root formation. If the soil feels dry, add a little water and wait 10 minutes before proceeding.
💧 Step 3: Bend and Bury the Stem
Gently bend a low-growing branch down into the trench, creating a gentle curve—not a sharp bend. Secure it with a U-shaped wire or bent piece of rebar, pressing the stem into the moist soil so about 6-8 inches of the branch is buried. Leave the tip of the branch above ground.
Cover the buried section with soil, patting lightly to remove air pockets. The goal is to keep the stem in contact with the soil while still allowing the top to photosynthesize. Water the area lightly to settle the soil around the buried stem.
☀️ Step 4: Monitor and Encourage Root Growth
Keep the soil consistently moist but not waterlogged—aim for 1 inch of water per week, either from rain or irrigation. You’ll know it’s working when new leaves appear on the buried section. This means roots are forming at the nodes where the stem touches the soil.
After 6-8 weeks, gently dig around the buried section to check for roots. If they’re 1-2 inches long, it’s time to separate the new plant. If not, leave it another 2-4 weeks. Avoid disturbing the plant too soon—you’ll see the best results if you wait for strong root development.
✂️ Step 5: Sever and Plant the New Seedling
Once roots are established, cut the new plant from the parent stem just below the buried section. Dig up the rooted section carefully, keeping as much soil around the roots as possible. This minimizes transplant shock and gives the new seedling a better chance of survival.
Plant the new plum seedling in its permanent spot, watering deeply to help the roots settle into the soil. Mulch around the base with 2-3 inches of organic mulch to retain moisture and protect the roots. Your layered seedling will now grow as an independent tree with a strong root system.
Tips & tricks for perfect plum tree seedling layering
Here's what I've learned from years of trial and error with plum tree propagation—these tricks will help you avoid common pitfalls and maximize success.
The Stem Selection Secret: Look for branches with a slight green tint rather than fully hardened brown stems. These semi-hardwood branches root best because they're in the ideal stage of maturity—not too young, not too old. In Step 1, when you're pruning back to 12-18 inches, focus on keeping at least two healthy branches with this greenish hue. I've found that branches with a diameter between ¼-inch and ½-inch give the best balance of rooting potential and future tree strength.
Trench Timing Tip: The 10-minute wait after moistening the trench in Step 2 is crucial—it lets the soil absorb water evenly without becoming waterlogged. I always test the moisture by squeezing a handful of soil; it should hold together but not drip water. If you're working in hot weather, you might need to moisten the trench every 5-7 days rather than just once, as the soil will dry out faster. A simple spray bottle works great for spot-moistening between waterings.
Rooting Success Indicator: Don't wait until 6-8 weeks to check for roots—start looking after 4 weeks. New leaves on the buried section are your first sign of success, but you can also gently brush away soil to peek at the nodes where roots should form. I've had the best results when I see tiny white root hairs appearing at these nodes. If you notice yellowing leaves, that's a sign of overwatering—reduce to ½ inch of water per week until the plant recovers.
Severing Strategy: When it's time to separate the rooted section in Step 5, use clean, sharp pruners to make your cut just below where the roots formed. The key is to make this cut on a dry day when the soil is firm—this helps prevent the roots from tearing. I always mark the separation point with a small piece of twine before making the cut, so I know exactly where to sever. After cutting, immediately plant the new seedling in its permanent spot to minimize stress.
Pro Tips for Plum Tree Seedling
- Here's what I've learned from years of trial and error with plum tree propagation—these tricks will help you avoid common pitfalls and maximize success.
- The Stem Selection Secret: Look for branches with a slight green tint rather than fully hardened brown stems.
- Trench Timing Tip: The 10-minute wait after moistening the trench in Step 2 is crucial—it lets the soil absorb water evenly without becoming waterlogged.
Frequently asked questions
Got questions about growing plum tree seedlings?
Here are some of the most common ones—and their answers—to help you succeed with your root-development project!
How long does it take for plum tree seedlings to develop roots through layering?
With the right conditions (moisture, warmth, and proper soil contact), plum tree seedlings typically form roots in 4–8 weeks. Patience is key—check for root growth by gently tugging the layered stem. If resistance is felt, roots are likely forming!
When is the best time of year to start layering plum tree seedlings?
Spring or early summer is ideal for layering plum tree seedlings. The soil is warm, and the tree is actively growing. Avoid winter (dormant period) or extreme heat, which can stress the plant. Pro tip: Start layering when new growth appears—usually after the last frost!
Can I use this method for other fruit trees, like peach or cherry?
Layering works for many fruit trees, including peach, cherry, and apricot. The process is similar, but check the specific needs of your tree—some may require slightly different soil conditions or timing. Just ensure the tree is healthy and disease-free before starting.
What should I do if my layered plum seedling isn’t rooting after 2 months?
Don’t panic! First, check for moisture, light, and soil contact. If the stem is dry or the soil isn’t snug, adjust and wait another 2–4 weeks. If no progress, try rooting hormone or a different layering spot. If all else fails, start fresh with a new seedling—sometimes timing just isn’t right!
Do I need to fertilize my plum tree seedling while layering?
Not initially! Fertilizer can burn tender roots during the early stages. Once roots form and you’re ready to transplant, use a balanced, low-nitrogen fertilizer to support growth. Wait until new leaves appear before adding nutrients—your seedling will thank you!
Wrapping up and next steps
Growing a plum tree seedling from scratch is a rewarding journey, and mastering the layering trick ensures your young tree starts strong! 🌱 With the right tools, patience, and care, you’ll soon watch roots develop and your seedling thrive.
Now that you’re equipped with the knowledge, it’s time to roll up your sleeves and give your plum tree the best start—your future harvest depends on it!
Ready to take the next step? Pick a sunny day, gather your supplies, and begin layering your seedling today! Happy gardening! 🌿