
Pruning
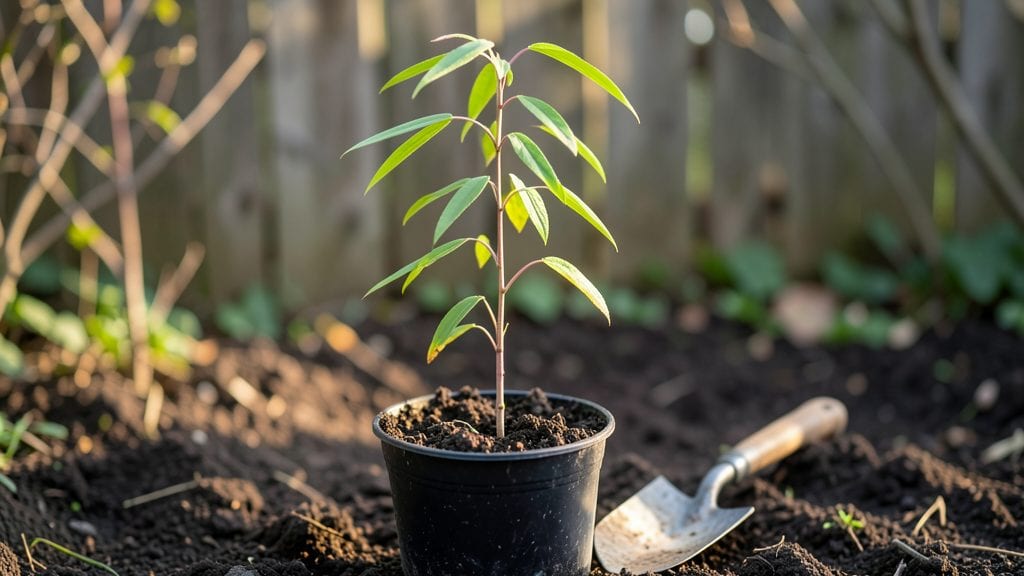
Growing a willow tree seedling from scratch starts with cold stratification—a simple trick that mimics winter's natural process to break dormancy and trigger strong root growth. I learned this after my first batch of seedlings sprouted weak stems that flopped in the wind.
The key? Moisture, patience, and a fridge for 4-6 weeks before planting. This method turns flimsy seedlings into sturdy saplings ready for transplanting.
You'll need potting mix, a plastic bag, and a few willow seeds collected from mature trees. No fancy tools—just a damp paper towel to keep them moist while they chill. After stratification, plant them in well-draining soil and keep them in bright, indirect light.
Willow seedlings crave moisture but hate soggy roots, so check soil daily. Within weeks, you'll see those first pale green leaves pushing through the soil.
The payoff comes when you transplant them outdoors after the last frost. A properly stratified willow seedling establishes twice as fast as store-bought saplings, with roots that reach deep into the soil.
You'll end up with a tree that grows 3-5 feet per year—fast enough to cast shade within a few seasons. The secret? That cold treatment ensures roots grow before leaves demand water.
Works best in zones 4-9, though willows adapt surprisingly well. For container growing, use a large pot with drainage holes—just don't let them dry out. Here's where most beginners trip up: rushing the stratification or planting too deep. Take your time, and you'll have a willow thriving where others fail.
📚 In This Guide
- What you need
- Instructions
- Tips and common mistakes
- Wrapping up and next steps
What you need
- ● Willow tree seeds – 10–20 seeds (fresh or stored properly to maintain viability)
- ● Potting mix – 1–2 gallons of well-draining, sterile mix (e.g., 50% peat moss, 30% perlite, 20% sand)
- ● Seed-starting trays or small pots – 2–4 inch deep containers (biodegradable or plastic, with drainage holes)
- ● Plastic storage bag or airtight container – Large enough to hold moistened mix and seeds (e.g., ziplock bag or Tupperware)
- ● Paper towels or coffee filters – 2–3 sheets (for moisture retention)
- ● Spray bottle – For gentle watering (avoid soaking)
- ● Refrigerator – Set to 34–40°F (1–4°C) for stratification (standard home fridge works!)
- ● Humidity dome or plastic wrap – To maintain moisture during stratification
- ● Grow lights or sunny windowsill – For post-stratification germination (12–16 hours of light/day)
- ● Seedling heat mat – Speeds up germination after stratification (70–75°F range)
- ● pH testing kit – Ensures soil pH is 5.5–6.5 (ideal for willow seedlings)
- ● Fungicide (organic or chemical) – Pre-treats soil to prevent mold (e.g., neem oil or hydrogen peroxide)
- ● Labeling tags – To track seedling progress and planting dates
- ● Outdoor hardening tray – For gradual acclimation before transplanting
Step-by-Step instructions for cold stratifying willow tree seedlings
Cold stratification unlocks willow seeds' natural dormancy—here's how to break it reliably.
Collect and Prepare Fresh Willow Seeds
Gather willow seeds from mature trees in late summer or early fall when seed pods turn brown and dry. Place them in a paper bag and let them air-dry for 1-2 weeks in a cool, dry spot. This mimics natural drying conditions and prevents mold. Once dry, remove seeds from the pods by gently rubbing them between your fingers—willow seeds are tiny, so work slowly to avoid losing them.
I like to spread them on a clean towel to inspect for damage or empty shells. Discard any seeds that look shriveled or hollow, as they won’t germinate. Store the viable seeds in a sealed container in the refrigerator until you’re ready to stratify them. This keeps them dormant and prevents premature sprouting.
Mix Stratification Medium and Moisten
Combine equal parts of moistened peat moss and coarse sand in a clean container. The peat moss retains moisture while the sand ensures good drainage—willow seeds rot quickly if left too wet. Use your hands to mix them thoroughly until the blend looks uniformly damp but not soggy. You should be able to squeeze a handful without water dripping out.
Fill a shallow tray or small pot with this mix, leaving about 1 inch of space at the top. Press the medium down lightly to create a firm but not compacted surface. This ensures seeds stay in place during the stratification process. Willow seeds need consistent moisture, so I recommend misting the mix lightly every 3-4 days to maintain even dampness.
Plant Seeds and Refrigerate for Cold Treatment
Scatter the willow seeds evenly over the moistened mix, spacing them about ½ inch apart. Press them lightly into the surface—just enough to ensure they make contact with the medium but don’t bury them. Cover the tray with a clear plastic lid or wrap it tightly in plastic wrap to create a humid environment. This mimics the natural moisture willow seeds experience during winter.
Place the tray in the refrigerator and store it at a temperature between 35-45°F. Check the seeds every 7-10 days to ensure the mix hasn’t dried out. If the surface feels dry to the touch, mist it lightly again. Cold stratification typically takes 4-8 weeks, depending on the willow species. You’ll know it’s working when the seeds begin to swell slightly or show signs of sprouting.
Transition to Warmth and Light for Germination
Once the seeds have undergone the full cold treatment, remove them from the refrigerator and place the tray in a warm, bright location. I use a seedling heat mat set to 70-75°F to encourage rapid germination. Keep the plastic cover in place for the first 7-10 days to maintain humidity, but remove it once the seeds begin to sprout. This prevents damping-off, a fungal disease that can kill young seedlings.
Position the tray under grow lights or in a south-facing window where it receives at least 6-8 hours of indirect light daily. Willow seedlings are sensitive to direct sunlight at this stage, so avoid placing them in harsh midday light. You should see the first signs of germination within 2-4 weeks after removing the cold treatment. Watch for tiny green shoots poking through the soil—this is your signal that the process is working.
Transplant Seedlings to Individual Pots
Once seedlings reach about 2-3 inches tall and have developed their first true leaves, it’s time to transplant them into individual 3-inch pots. Fill each pot with a well-draining potting mix and make a small hole in the center. Gently lift each seedling by its leaves (never the stem) and place it into the hole, ensuring the roots are covered but the soil doesn’t mound around the stem.
Water the seedlings lightly after transplanting to settle the soil and encourage root growth. Place the pots in a bright, indirect light location and keep the soil consistently moist but not waterlogged. Willow seedlings grow quickly, so you’ll need to transplant them again into larger pots or the ground within 4-6 weeks. This ensures they have enough space to develop strong root systems before facing outdoor conditions.
Tips & tricks for perfect willow tree seedling stratification
A few key strategies will help you maximize germination success with willow seeds.
Seed Selection: In Step 1, when collecting seeds, focus on those that are plump and slightly glossy rather than shriveled. I've found that seeds with a slight sheen often have higher viability. The 1-2 week drying period is crucial—don't rush it. If you're unsure about seed quality, you can do a quick float test: place seeds in water for 15 minutes. Viable seeds will sink while empty ones float.
Medium Consistency: The peat moss and coarse sand mix in Step 2 should feel like a well-wrung sponge. Too wet and seeds will rot; too dry and they won't germinate. I like to add a handful of perlite to improve aeration while maintaining that damp-but-not-wet consistency. After mixing, let the medium sit for 10 minutes before planting—this allows any excess moisture to redistribute evenly.
Cold Treatment Precision: During the 4-8 week refrigeration in Step 3, consistency is key. The 35-45°F range is ideal, but most home refrigerators run around 38°F—perfect for our needs. I recommend placing a small thermometer in the fridge with your seeds to monitor temperature. If your fridge fluctuates, consider using a dedicated seed stratification fridge or even a well-insulated cooler with ice packs for more stable conditions.
Light Transition Strategy: When moving seeds to warmth in Step 4, don't rush the 7-10 day humidity period. I've seen seedlings develop damping-off within days if exposed to airflow too soon. After removing the plastic cover, place a small fan on low setting nearby to gradually acclimate seedlings to airflow while maintaining humidity. This helps prevent fungal issues that can wipe out entire trays.
Pro Tips for Willow Tree Seedling
- A few key strategies will help you maximize germination success with willow seeds.
- Seed Selection: In Step 1, when collecting seeds, focus on those that are plump and slightly glossy rather than shriveled.
- Medium Consistency: The peat moss and coarse sand mix in Step 2 should feel like a well-wrung sponge.
Frequently asked questions
How long does cold stratification take for willow tree seedlings?
Cold stratification typically requires 4–8 weeks in a refrigerator (34–40°F) for willow seedlings. Some varieties may need longer—up to 12 weeks—if moisture levels drop. Check seedling moisture weekly; adjust dampness if the medium dries out. Patience pays off for stronger root development!
Can I skip cold stratification and still grow a willow seedling?
While possible, skipping stratification reduces germination success by 30–50%. Willow seeds have hard coats that need cold to soften. If you’re impatient, try soaking seeds in warm water for 24 hours before planting, but combine this with a short (2-week) fridge stint for best results.
What’s the best soil mix for post-stratification planting?
Use a loose, well-draining mix of:
- 60% peat moss or coco coir
- 30% perlite or sand
- 10% compost
My stratified willow seedling sprouted mold—what now?
Mold signals over-moisture. Act fast:
- Remove the seedling and air-dry the roots for 1–2 hours.
- Repot in fresh, sterile mix (sterilize with hydrogen peroxide if needed).
- Water lightly only when the top inch feels dry.
- Add a fungicide spray (like neem oil) to prevent recurrence.
When can I transplant my willow seedling outdoors?
Wait until soil temps reach 50°F+ and all frost risk has passed (typically late spring). Harden off seedlings by exposing them to outdoor conditions for 1–2 weeks before planting. Choose a site with full sun and moist (but not waterlogged) soil—willows thrive near water but hate "wet feet."
Wrapping up and next steps
Growing a willow tree seedling from scratch is a rewarding journey that combines patience, care, and a little scientific know-how—like cold stratification! 🌱 By following this blueprint, you’ve learned how to boost root growth, ensure healthy germination, and set your young tree up for long-term success.
Whether you’re a gardening novice or a seasoned green thumb, these steps make the process simple and reliable.
Now that you’re armed with the right techniques, why not take the next step? Start your seedling today, monitor its progress, and watch it thrive into a stunning willow tree. Happy planting—your future shade (or privacy screen!) is just sprouts away. 🌿✨