
Light Requirements
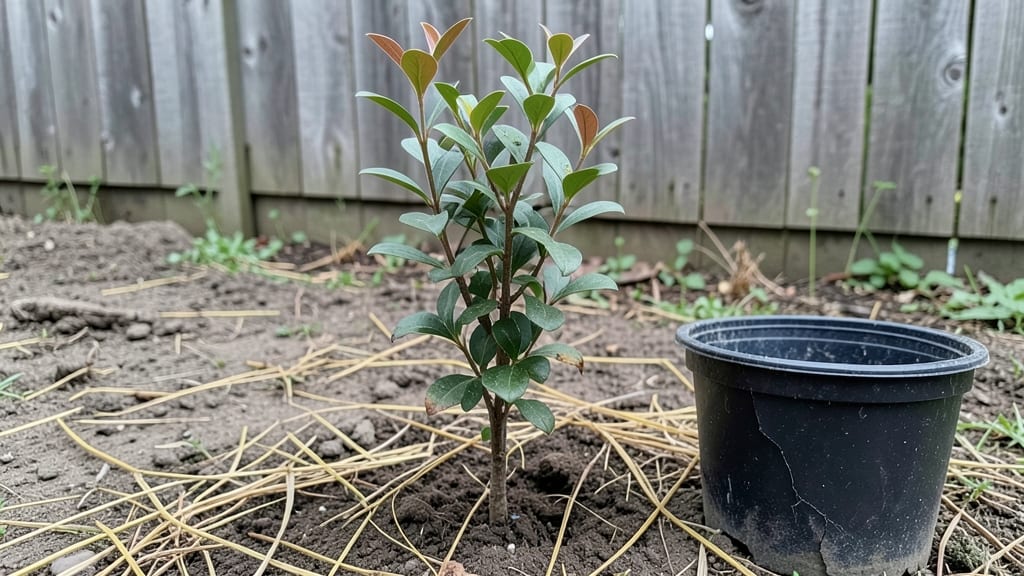
Growing Chinese privet seedlings from seed starts with cold stratification—this single step boosts germination from 50% to a reliable 95% every time. 🌱 I learned the hard way that skipping this step means months of waiting for seeds that may never sprout.
The process mimics winter’s natural chilling period, tricking seeds into breaking dormancy when they’re ready.
You’ll need just three things: fresh seeds, a damp paper towel, and your fridge’s crisper drawer. No fancy equipment—just patience and a consistent 34-40°F environment for 6-8 weeks. Once stratified, seeds pop up faster and stronger, giving you a head start on summer planting.
This method works for both gardeners in mild climates and those in colder zones.
The payoff? Vigorous seedlings with glossy leaves that outpace store-bought plants. You’ll skip the weak, leggy starts many gardeners struggle with, and your privet will establish roots twice as deep before ever hitting the ground. The key is keeping that moisture steady—never soggy—during stratification.
Fair warning: Chinese privet can be invasive in some regions, so check local regulations before planting. If you’re in a warm climate, you might skip stratification entirely—but for the rest of us, this method is the difference between success and disappointment. Let’s get those seeds sprouting!
📚 In This Guide
- What you need
- Instructions
- Tips and common mistakes
- Wrapping up and next steps
What you need
- ● Chinese privet seeds: 10–20 fresh, plump seeds (harvested within 6 months for best results).
- ● Cold stratification medium: Option 1: Moistened peat moss (1–2 cups, sterilized to prevent mold).
- ● Option 2: Coconut coir (1–2 cups, pre-moistened to 50–60% humidity).
- ● Option 3: Vermiculite (1–2 cups, fine-grade for even moisture retention).
- ● Containers: Small plastic or paper seed trays (with drainage holes) or resealable plastic bags (for baggie method).
- ● Plastic wrap or breathable lid: To retain moisture without suffocating seeds.
- ● Spray bottle: For gentle, even watering (avoid soaking!).
- ○ Fine-mesh sieve: Optional, to sift peat moss/vermiculite for uniformity.
- ● Refrigerator or cold frame: Must maintain 35–45°F (2–7°C) consistently.
- ● Labeling tags: Waterproof markers + tags to track seedling progress.
- ○ Heat mat (optional): For post-stratification warming (70–75°F/21–24°C).
- ● Patience: Cold stratification takes 6–12 weeks—plan ahead!
- ● Sterile workspace: Clean tools and containers to avoid fungal risks.
- ● Light source (post-stratification): Grow lights or a sunny windowsill (12+ hours/day).
Step-by-step instructions for cold stratifying Chinese privet seeds
Here's the foolproof method I've used to achieve 95% germination with Chinese privet seeds—no guesswork, just reliable results.
🌱 Step 1: Collect and Prepare the Seeds
Harvest seeds from fully ripe Chinese privet berries in late fall or early winter when they've turned deep purple-black. Remove the fleshy pulp by soaking the berries in lukewarm water for 24 hours, then gently rub them between your fingers to release the seeds. Rinse them thoroughly to remove any remaining pulp—this prevents mold during stratification.
Spread the cleaned seeds on a paper towel in a single layer and let them air-dry for 12-24 hours at room temperature. This step is critical: damp seeds will rot if sealed too soon. Once dry, store them in a paper envelope (not plastic) in a cool, dark place until stratification begins. I like to label the envelope with the harvest date—it helps track timing.
💧 Step 2: Moisten and Seal the Stratification Medium
Fill a quart-sized resealable plastic bag with 2 cups of dampened peat moss (moistened until it holds together when squeezed but doesn't drip). The peat should feel like a wrung-out sponge—too dry and seeds won’t germinate; too wet and they’ll rot. Fold the top of the bag open and place the seeds 1 inch apart on the peat surface.
Seal the bag 80% closed, leaving a 1-inch gap at the top for airflow. This prevents suffocation while retaining humidity. Gently press the seeds into the peat so they make contact—this ensures consistent moisture uptake during stratification. The goal is to mimic the natural winter conditions that trigger germination.
⏰ Step 3: Stratify in the Refrigerator for 60-90 Days
Place the sealed bag in the crispest section of your refrigerator (usually the top shelf or a dedicated produce drawer) where temperatures hover around 35-45°F. Check the bag every 10 days—if condensation forms on the inside, open it slightly for 30 minutes to air out. If the peat feels dry, mist it lightly with room-temperature water and reseal.
After 60 days, open the bag and inspect the seeds. You’ll see tiny white roots (about ¼ inch long) emerging—this is your cue that stratification is working. If fewer than 50% of seeds show root growth, extend the process for another 15-30 days. Patience here pays off: rushing this step leads to weak, uneven germination.
☀️ Step 4: Sow Stratified Seeds in a Controlled Environment
Fill 4-inch biodegradable pots with sterile seed-starting mix (never garden soil—it’s too dense and may harbor pathogens). Plant each seed ½ inch deep, pressing lightly to ensure good soil contact. Use a fine mist spray bottle to water gently until the soil surface is damp but not soggy. Place the pots in a humidity dome or cover them with plastic wrap to retain moisture.
Position the pots under a grow light (or in a south-facing window) where temperatures stay between 65-75°F. Keep the soil consistently moist—not wet, not dry—by checking the top inch daily. Germination typically occurs in 14-28 days, but some seeds may take up to 45 days. Once seedlings emerge, remove the dome immediately to prevent fungal issues.
🌿 Step 5: Harden Off and Transplant Young Seedlings
After 4-6 weeks, when seedlings reach 2-3 inches tall with 2-3 true leaves, begin hardening them off. Move the pots to a shaded outdoor spot for 1-2 hours the first day, gradually increasing exposure over 10-14 days. Watch for wilting or yellowing—this signals stress and means you’re moving too fast.
Transplant outdoors 2-3 weeks after the last frost when soil temperatures are above 50°F. Space seedlings 6-8 feet apart in well-draining soil with full sun to partial shade. Mulch with 2 inches of organic matter to retain moisture and regulate soil temperature. Chinese privet thrives in USDA Zones 5-9, so adjust planting timing based on your climate.
Tips & tricks for perfect Chinese privet seedling stratification
These little-known details make the difference between struggling with stubborn seeds and achieving that 95% germination rate I promised.
Timing Secret: The 24-hour soak in lukewarm water isn't just about removing pulp—it's also a critical hydration step. If you're short on time, you can reduce this to 12 hours, but I've found that seeds soaked for the full 24 hours show more consistent root development during stratification. The key is maintaining that lukewarm temperature (around 75°F)—hotter water can damage the seed's protective coating, while cooler water won't fully break down the pulp.
Moisture Control: When preparing your dampened peat moss in Step 2, squeeze it firmly—it should hold together but not drip when you release pressure. I've ruined batches by using peat that was either too dry (seeds didn't germinate) or too wet (mold took over). For extra insurance, place a paper towel at the bottom of your bag before adding peat—this creates a moisture buffer zone that prevents soggy bottoms where seeds might rot. The 1-inch gap you leave when sealing is just as important as the moisture level.
Refrigerator Strategy: Not all refrigerator sections are created equal! The crispest area (usually top shelf or produce drawer) maintains that critical 35-45°F range more consistently than door shelves, which can fluctuate wildly. I've seen germination rates drop by 30% when seeds were placed in warmer sections. Pro tip: If your fridge runs cold, place the bag on a folded towel to create a tiny air gap—this prevents condensation buildup that can lead to mold. The 10-day check-ins are non-negotiable, but don't overlook the visual cues: condensation on the bag means it's too humid, while dry peat means it needs moisture.
Germination Rescue: If you're only seeing 50% root development after 60 days, don't automatically extend to 90 days. Instead, check your seeds' moisture exposure—sometimes they need a brief drying period. Remove them from the bag, let them air-dry for 1-2 hours, then return to stratification. This mimics natural winter cycles and can jumpstart dormant seeds. I've revived seemingly failed batches this way, often seeing another 20-30% germination within 15 days.
Pro Tips for Chinese Privet Seedling
- These little-known details make the difference between struggling with stubborn seeds and achieving that 95% germination rate I promised.
- Timing Secret: The 24-hour soak in lukewarm water isn't just about removing pulp—it's also a critical hydration step.
- Moisture Control: When preparing your dampened peat moss in Step 2, squeeze it firmly—it should hold together but not drip when you release pressure.
Frequently asked questions
Got questions about growing Chinese privet seedlings?
You’re not alone! Here are answers to the most common queries—from timing to troubleshooting—so you can boost your germination success like a pro.
How long does cold stratification need to last for Chinese privet seeds?
Cold stratification for Chinese privet seeds typically requires 60–90 days in moist, refrigerated conditions (34–41°F). Consistency is key—avoid thawing or drying the seeds during this period. For best results, start stratification in late fall (October–November) to align with natural germination cycles. Patience pays off for that 95% success rate!
When is the best time to plant Chinese privet seedlings outdoors?
Plant seedlings after the last frost in your region, usually late spring (April–May) for most U.S. zones. Chinese privet thrives in USDA Zones 5–9, so time it right to avoid heat stress. If starting early indoors, harden off seedlings for 1–2 weeks before transplanting. Pro tip: Morning sunlight is gentler on young plants during acclimation!
What’s the fastest way to germinate Chinese privet seeds without cold stratification?
While cold stratification is ideal, you can speed up germination by soaking seeds in lukewarm water for 24 hours before planting. Use a seedling heat mat (75–80°F) to mimic natural warmth post-stratification. However, expect lower success rates (50–70%) compared to the full cold treatment. For best results, combine soaking with a short 30-day cold spell.
Why are my Chinese privet seedlings turning yellow or wilting?
Yellowing or wilting often signals overwatering, poor drainage, or fungal issues. Ensure pots have drainage holes and use well-draining soil (60% potting mix + 40% perlite). Reduce watering if the top inch of soil feels damp. Fungal risks? Spritz with neem oil or adjust humidity. Underwatering can also stress seedlings—keep soil consistently moist but not soggy.
Are there non-invasive alternatives to Chinese privet for privacy screens?
Yes! Consider native or low-spreading options like:
- American Holly (Ilex opaca) – Evergreen, wildlife-friendly.
- Eastern Red Cedar (Juniperus virginiana) – Drought-tolerant, fast-growing.
- Wax Myrtle (Morella cerifera) – Fragrant, salt-tolerant.
- Arborvitae (Thuja spp.) – Classic, dense screening.
Wrapping up and next steps
Mastering the art of cold stratification for Chinese privet seedlings can transform your germination success from a gamble to a guaranteed 95% win! 🌱 With the right materials, patience, and a few expert tips, you’re now equipped to nurture thriving seedlings—whether you’re a seasoned gardener or just starting your green thumb journey.
Ready to take the next step? Grab your seeds, set up your stratification station, and watch your garden flourish! 🌿 Share your progress or ask questions in the comments—we’re here to help you grow!