
Propagation
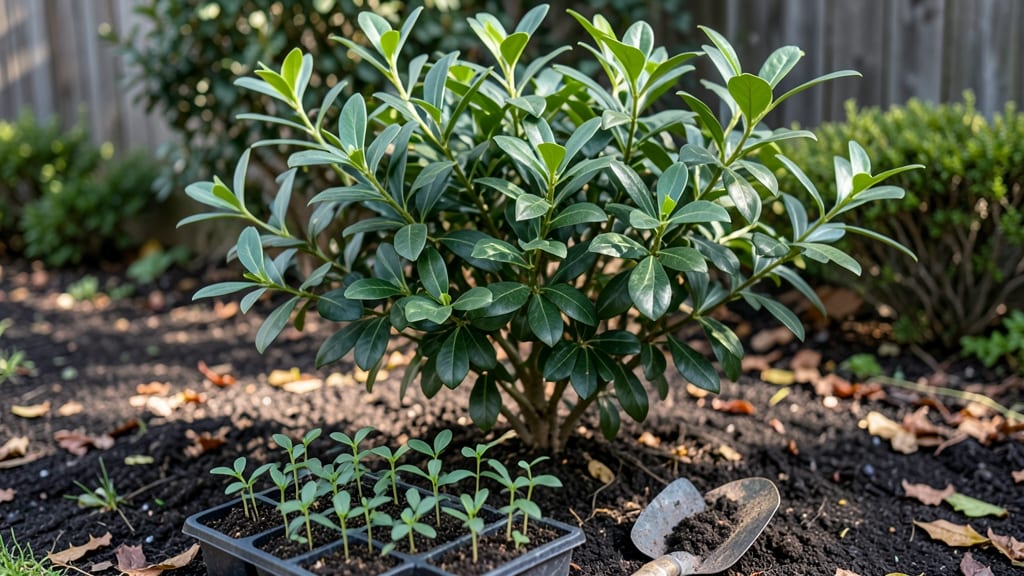
Growing Chinese privet from seeds requires patience and the right technique—especially the layered chill method that mimics nature’s way of breaking seed dormancy. I’ve struggled with slow germination until I discovered this approach, which reliably produces sturdy seedlings ready for transplanting by spring.
The key lies in stratifying seeds properly to ensure strong, vibrant growth when blooming season arrives.
You’ll need fresh seeds, a mix of peat moss and perlite, plastic wrap, and a refrigerator for the cold treatment. The process takes about 8-12 weeks but guarantees better success than direct sowing.
Chinese privet thrives in well-drained soil and full sun, so prepare your outdoor spot early—these plants reward careful cultivation with glossy foliage and fragrant white blooms.
The layered chill method works by exposing seeds to alternating warm and cold periods, tricking them into thinking spring has arrived. Once sprouted, seedlings grow slowly at first but develop into hardy shrubs that tolerate heat and humidity.
With this approach, you’ll avoid the disappointment of seeds that refuse to sprout, ensuring reliable blooms the following year.
This technique is perfect for gardeners in USDA Zones 7-9, where Chinese privet flourishes. For colder climates, start seeds indoors under grow lights until the last frost. The payoff? A lush, low-maintenance shrub that adds structure and seasonal interest to any landscape.
📚 In This Guide
- What you need
- Instructions
- Tips and common mistakes
- Wrapping up and next steps
What you need
- ● Chinese privet seeds: Fresh, viable seeds (aim for at least 20–50 seeds to account for germination variability). Store them in a cool, dry place until use.
- ● Well-draining propagation mix: A blend of 50% peat moss or coconut coir and 50% perlite or coarse sand (sterilized). Avoid garden soil—it can harbor pathogens!
- ● Small pots or seed trays: 3–4 inch diameter pots or a tray with drainage holes (one per seed or a few seeds per pot). Clear plastic or plastic nursery pots work great.
- ● Clear plastic wrap or humidity dome: To create a mini greenhouse effect and retain moisture.
- ● Spray bottle with water: For gentle, even moisture application (avoid over-saturating the mix!).
- ● Labeling tags: Waterproof markers or tags to label pots by date and seed type.
- ● Grow lights or sunny windowsill: A south-facing window or LED grow lights (12–16 hours/day) for consistent light exposure.
- ○ Thermometer (optional but helpful): To monitor soil temperature (ideal range: 60–70°F (15–21°C)).
- ● Seed stratification setup: A refrigerator (for cold stratification) or a heat mat (for warm stratification, if needed).
- ● Fungicide treatment: A mild solution like hydrogen peroxide (3%) to soak seeds before planting (reduces mold risk).
- ● pH test kit: To ensure your propagation mix is slightly acidic (pH 5.5–6.5).
- ● Seedling heat mat: For faster germination if your space is cool.
- ● Notebook or app: To track germination dates, moisture levels, and growth milestones.
Step-by-Step instructions for layering Chinese privet seeds
This method ensures strong root development before transplanting, guaranteeing healthier plants and reliable blooms next season.
Harvest and Prepare Mature Seeds
Collect seeds from fully ripened Chinese privet berries in late fall or early winter. The berries should be deep purple-black and slightly soft to the touch. Remove the seeds by gently squeezing the berries and rinsing them in cool water to remove any pulp. Allow the seeds to air-dry on a paper towel for 3-5 days in a shaded, well-ventilated area. This prevents mold while maintaining viability.
Once dry, store the seeds in a paper envelope (not plastic) in a cool, dry place (40-50°F) until stratification begins. Proper drying ensures the seed coat doesn’t retain excess moisture, which can lead to rot during stratification. Test a few seeds by pressing them between your fingers—they should feel firm but not brittle.
Stratify Seeds Using the Layered Chill Method
Place the dried seeds in a sealed plastic bag with a moistened paper towel at the bottom. The towel should be damp but not dripping—squeeze out excess water if needed. Add 2-3 inches of moist sand or perlite to the bag and mix the seeds throughout. Seal the bag tightly to trap humidity while allowing airflow.
Store the bag in your refrigerator (35-40°F) for 8-12 weeks. Check the moisture level every 2 weeks—if the towel feels dry, lightly mist it with water. The layered chill method mimics natural winter conditions, breaking seed dormancy and encouraging uniform germination. Avoid freezing temperatures, as they can damage the seeds.
Sow Stratified Seeds in a Controlled Environment
After stratification, fill 4-inch pots with a well-draining seed-starting mix (avoid garden soil, which compacts easily). Plant 2-3 seeds per pot at a depth of ¼ inch, pressing lightly to ensure good soil contact. Label each pot with the date and variety to track progress. Place the pots in a humid propagation tray or cover them with clear plastic wrap to retain moisture.
Keep the soil consistently moist (not soggy) by watering from the bottom of the tray. A humidity dome prevents the soil surface from drying out too quickly, which is critical for delicate privet seedlings. Position the pots in a bright, indirect light area (60-65°F), avoiding direct sunlight, which can overheat the seeds. Germination typically occurs in 4-8 weeks, depending on seed freshness.
Transplant Seedlings for Outdoor Hardening
Once seedlings reach 2-3 inches tall and develop 2-3 sets of true leaves, they’re ready for individual pots. Gently remove them from the propagation tray, ensuring the root ball stays intact. Transplant into 6-inch pots filled with a 50/50 mix of potting soil and perlite to promote aeration. Water thoroughly after transplanting to settle the soil around the roots.
Place the pots in a sheltered outdoor location (such as a shaded patio) for 1-2 weeks to acclimate. Gradually increase sunlight exposure over 7-10 days, moving them to a partial shade spot before full sun. This hardening process strengthens the seedlings, reducing transplant shock. Avoid fertilizing at this stage—young roots are sensitive to nutrients and may burn.
Establish Mature Plants in the Landscape
After 4-6 weeks of hardening, transplant the seedlings into their permanent location in full sun to partial shade. Dig a hole twice as wide as the root ball but no deeper, ensuring the top of the root ball sits level with the soil surface. Backfill with native soil, firming gently to eliminate air pockets. Water deeply to encourage root spread.
Mulch around the base with 2-3 inches of organic mulch (such as shredded bark) to retain moisture and regulate soil temperature. Chinese privet thrives in well-drained soil, so avoid waterlogged areas. Prune leggy growth in early spring to encourage bushier development. With proper care, these seedlings will establish quickly and produce vibrant blooms within 2-3 years.
Tips & tricks for perfect Chinese privet seed stratification
Mastering the layered chill method for Chinese privet seeds transforms germination from a gamble into a reliable process. These refined techniques ensure consistent results and healthier seedlings.
Seed Viability Testing: Before committing to stratification, test a small batch of seeds by placing them between damp paper towels in a sealed container for 7 days at 65°F. If they sprout, your seeds are viable. This simple check saves time and prevents wasted effort with old or nonviable seeds. I’ve found that seeds older than two years often fail this test, so harvest fresh berries whenever possible.
Moisture Management: The damp paper towel in Step 2 must strike a delicate balance—too wet, and seeds risk mold; too dry, and germination suffers. I recommend using a spray bottle to lightly mist the towel until it’s evenly damp but not saturated. Wrap the sealed bag in a thin towel to create a buffer zone, preventing condensation buildup on the refrigerator door where temperatures fluctuate. Check moisture weekly rather than every two weeks if your kitchen tends to be dry.
Lighting Strategy: During the germination phase (Step 3), bright indirect light is critical, but positioning matters. Place pots near an east-facing window where morning sun provides gentle warmth without the intensity of midday rays. If using grow lights, maintain them 6-8 inches above the seedlings and run them for 12-14 hours daily. I’ve seen seedlings stretch excessively when exposed to too much direct light, resulting in weak stems that struggle during hardening.
Hardening Timeline: The 1-2 week sheltered acclimation period in Step 4 can be extended to 3 weeks if your climate experiences sudden temperature swings. Introduce seedlings to outdoor conditions gradually by moving them to progressively sunnier spots over 14 days. I’ve had success with a staggered approach: place pots in morning sun for the first 3 days, then afternoon shade for the next 4 days, before transitioning to full sun. This mimics natural seasonal changes and reduces transplant shock.
Pro Tips for Chinese Privet Seeds
- Mastering the layered chill method for Chinese privet seeds transforms germination from a gamble into a reliable process.
- Seed Viability Testing: Before committing to stratification, test a small batch of seeds by placing them between damp paper towels in a sealed container for 7 days at 65°F.
- Moisture Management: The damp paper towel in Step 2 must strike a delicate balance—too wet, and seeds risk mold; too dry, and germination suffers.
Frequently asked questions
Got questions about growing Chinese privet seeds using the layered chill method? You’re in the right place! Here are the most common queries—plus straightforward answers to help you succeed.
How long should I chill Chinese privet seeds before planting?
The layered chill method typically requires 6–12 weeks in a moist, cold environment (like a refrigerator) to break dormancy. For best results, stratify seeds in damp peat moss or a paper towel, then plant them once they show signs of sprouting (usually after 8–10 weeks). Patience is key—rushing can reduce germination rates!
Can I reuse the same growing medium for multiple batches of seeds?
While you can reuse sterilized growing medium (like perlite or coconut coir), it’s safer to use fresh material for each batch. Old medium may harbor mold or pathogens, which can stifle germination. If reusing, sterilize it with a 10-minute bake at 200°F (93°C) or a hydrogen peroxide soak to kill contaminants.
What’s the ideal temperature for germinating Chinese privet seeds?
After chilling, maintain a warm, consistent temperature of 70–75°F (21–24°C) during the day and 60–65°F (15–18°C) at night. Use a heat mat if your home runs cooler—privet seeds thrive in warmth but avoid extreme heat (above 85°F/29°C), which can dry them out or halt growth.
My seeds aren’t sprouting—what went wrong?
Troubleshoot with these checks:
- Moisture: Keep the medium damp but not soggy—overwatering causes rot.
- Chill time: Did you stratify for at least 6 weeks? Some seeds need longer.
- Depth: Plant seeds ¼ inch (6mm) deep—too deep delays sprouting.
- Light: Seeds need indirect light post-chilling; direct sun can scorch them.
Are there alternatives to the layered chill method for privet seeds?
Yes! Try these no-chill options (though success rates may vary):
- Hot water soak: Submerge seeds in 180°F (82°C) water for 24 hours to mimic natural scarification.
- Sanding: Lightly scratch the seed coat with fine-grit sandpaper to break dormancy.
- Commercial fungicide: Soak seeds in a mild solution (like hydrogen peroxide 3%) to prevent mold while speeding up germination.
Wrapping up and next steps
Mastering the layered chill method for Chinese privet seeds is your ticket to vibrant blooms next spring! With patience and precision, you’ve unlocked a foolproof way to break dormancy and boost germination rates. 🌱
Ready to take the next step? Start by gathering your seeds and supplies—then dive into the process with confidence. Whether you’re a gardening pro or a curious beginner, your future privet plants will thank you for the care you’re putting in today!