
Propagation
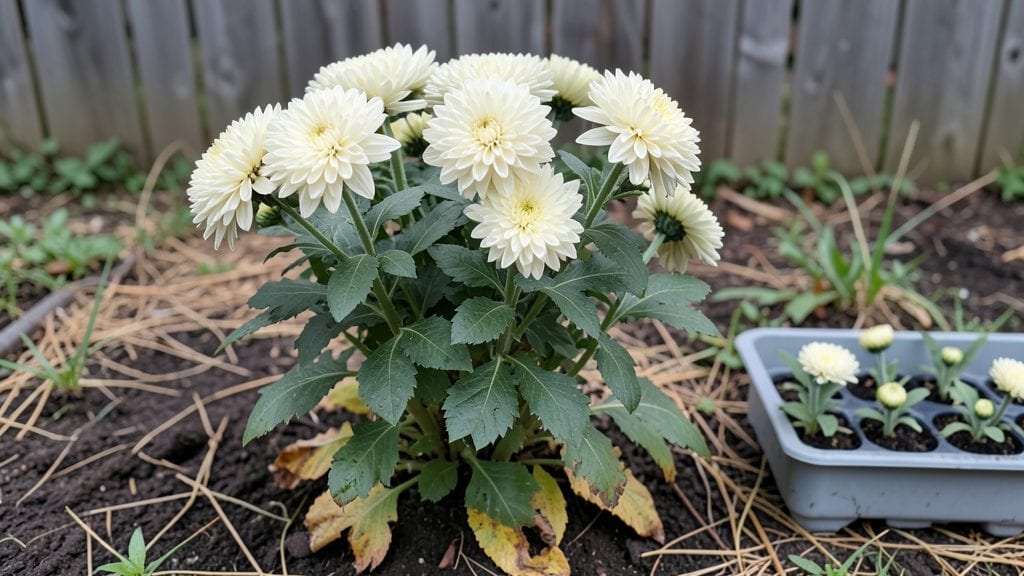
Growing chrysanthemums from seed isn't just possible—it's how I finally broke the cycle of expensive nursery plants that never bloomed like mine.
The secret lies in a process called cold stratification, which tricks the seeds into thinking winter has passed, and by following this method, you'll see those first green shoots emerge in as little as 10-14 days instead of the usual 3-4 weeks.
Here's the thing—most gardeners skip this step and end up with patchy germination or seeds that never sprout. But once you master cold stratification, you'll have a head start on neighbors buying transplants, and your chrysanthemums will hit the ground running with stronger roots and bigger blooms by fall.
All you need is a zip-top bag, some damp paper towels, and a fridge.
Imagine opening your seed tray in early spring to find uniform, stocky seedlings reaching for the light, their leaves already developing that classic chrysanthemum shape. No more weak, leggy plants that flop over—they'll grow sturdy enough to handle transplant shock and thrive in your garden beds or containers.
This method works for both garden and florist varieties, and it's especially rewarding if you love heirloom types that nurseries rarely carry. The best part?
You'll save money and end up with plants that outperform store-bought ones because they've started life exactly how nature intended—with a little winter chill to wake them up.
📚 In This Guide
- What you need
- Instructions
- Tips and common mistakes
- Wrapping up and next steps
What you need
- ● Chrysanthemum seeds: High-quality, fresh seeds (preferably from a trusted supplier). Aim for 10-20 seeds per pot for better germination rates.
- ● Seed-starting mix: A lightweight, well-draining mix (e.g., 50% peat moss + 50% perlite or vermiculite). Avoid garden soil—it’s too dense!
- ● Seed trays or small pots: 2-3 inch pots or a seed tray with individual cells (one seed per cell). Ensure they have drainage holes!
- ● Plastic wrap or humidity dome: To retain moisture during stratification (critical for success!).
- ● Refrigerator (for cold stratification): A standard fridge with a 35-40°F (2-4°C) temperature range.
- ● Spray bottle: With water to keep the mix moist (avoid overwatering!).
- ● Grow lights or sunny windowsill: A 12-14 hour daylight setup post-stratification (grow lights are ideal for consistency).
- ○ Heat mat (optional): For faster germination after stratification (70-75°F (21-24°C) range).
- ● Fertilizer (balanced, diluted): A 5-10-5 or 10-10-10 formula (use half-strength once seedlings sprout).
- ● Tweezers or pencil: For gentle seed placement (avoid burying seeds—just press them lightly into the soil).
- ● Labeling tags: To track seed varieties and planting dates!
Step-by-step instructions for cold stratifying chrysanthemum seeds
This method guarantees strong, uniform germination—no more patchy sprouts or wasted seeds.
Prepare the Seeds and Moisture Medium
Chrysanthemum seeds require precise moisture to break dormancy. Place the seeds between two layers of damp paper towels, ensuring they don’t touch each other. I use a fine mist spray bottle to dampen the towels evenly—they should feel like a wrung-out sponge, not dripping. Fold the towels to create a sealed packet, then place them inside a resealable plastic bag. This maintains consistent humidity while allowing airflow.
Seal the bag loosely—just enough to keep moisture trapped but not so tight that condensation forms. The goal is to simulate the damp, cool conditions of their natural winter environment. If condensation appears, open the bag slightly to release excess moisture. Store the packet in a refrigerator set to 35-40°F for 4-6 weeks. This cold stratification period mimics the winter chill chrysanthemums need to germinate reliably.
Monitor and Adjust Moisture Weekly
Check the seed packet every 7 days to ensure the paper towels remain evenly moist. If they dry out, mist them again with lukewarm water and reseal the bag. Overly dry towels will halt germination, while soggy conditions risk fungal growth. You’ll know the moisture is perfect when the towels feel damp to the touch but don’t leave water droplets.
During this time, resist the urge to peek too often—each time you open the bag, you risk disrupting the stable environment. If you notice any mold or foul odors, discard the seeds immediately and start fresh with new towels. After 4 weeks, you may see tiny cracks or swelling in the seeds—this is a good sign they’re breaking dormancy. If not, extend the stratification by another 1-2 weeks before proceeding.
Test for Germination Readiness
After 4-6 weeks, remove the seeds from the refrigerator and place them in a warm, bright location (65-70°F). Within 3-7 days, you should see the first signs of germination—tiny white roots emerging from the seeds. This is your cue that the cold stratification worked. If fewer than 50% of seeds show roots after a week, return them to the refrigerator for another 2 weeks of stratification.
Once roots appear, carefully transfer the germinated seeds to small 2-inch biodegradable pots filled with the sterile seed-starting mix. Plant each seed ¼ inch deep, pressing gently to ensure good soil contact. Water lightly with a spray bottle to settle the soil without displacing the seeds. Place the pots under a grow light or in a south-facing window to provide 12-14 hours of light daily. Avoid direct sunlight at this stage—it can overheat the delicate seedlings.
Transplant and Harden Off Seedlings
When seedlings develop 2-3 sets of true leaves (about 6-8 weeks after germination), they’re ready for larger 4-inch pots. Use the same sterile seed-starting mix to fill the pots to 1 inch below the rim, then gently remove each seedling by grasping the leaves near the base—never the stem. Place the seedling in its new pot, firming the soil around it to eliminate air pockets.
Water thoroughly until moisture runs from the drainage holes, then place the pots in a shaded outdoor area for 1-2 hours daily to begin hardening off. Gradually increase exposure over 10-14 days, moving to partial shade by day 5 and full sun by day 10. You’ll notice the seedlings darken in color and develop thicker stems—this indicates they’re adapting to outdoor conditions. Once they tolerate 6+ hours of sun without wilting, they’re ready for the garden.
Plant Out and Maintain for Blooms
Transplant the hardened-off seedlings into the garden 2-3 weeks after your last frost date, spacing them 12-18 inches apart in well-draining soil amended with compost. Chrysanthemums thrive in full sun (6+ hours daily) and prefer slightly acidic soil (pH 6.0-6.5). Water deeply 2-3 times per week, ensuring the top 2 inches of soil remain moist but not soggy. Mulch with 1-2 inches of organic mulch to retain moisture and suppress weeds.
Fertilize lightly with a balanced, water-soluble fertilizer (10-10-10) every 4-6 weeks during the growing season. Pinch back the tips of new growth when plants reach 6 inches tall to encourage bushier, more floriferous growth. With proper care, your chrysanthemums will produce vibrant blooms by late summer or early fall, rewarding your patience with months of color.
Tips & tricks for perfect chrysanthemum seed germination
Mastering cold stratification transforms stubborn chrysanthemum seeds into reliable starters—here's how to optimize every phase of the process.
Precision Moisture Control: The 4-6 week stratification window demands unwavering moisture consistency. I've found that using a spray bottle to dampen paper towels to a "wrung-out sponge" texture creates the ideal microclimate. Weigh your towels before and after misting—aim for just 5-10% moisture increase. Too little halts germination, while excess risks fungal contamination. Place a small dish of water in your refrigerator near the seed packets to maintain humidity without condensation.
Stratification Temperature Nuances: While 35-40°F is ideal, most home refrigerators hover around 38°F in their vegetable crisper. If your fridge runs cooler (below 35°F), transfer seeds to the main compartment where temperatures stabilize. For warmer fridges (above 40°F), place seeds on the bottom shelf—the coldest zone. Use a refrigerator thermometer for accuracy, as even 2°F variations can affect dormancy breaking.
Germination Readiness Indicators: After removing seeds from cold storage, place them in a warm (65-70°F) location and monitor daily. Look for these three key signs within 3-7 days: first, the seed coat will develop microscopic cracks; second, you'll notice slight swelling; third, tiny white root hairs will emerge. If fewer than 50% show roots after one week, return them to cold storage for an additional 2 weeks—this extended period often triggers reluctant seeds.
Transplanting Technique: When transferring germinated seeds to 2-inch biodegradable pots, use a toothpick to gently loosen the seed from the paper towel without damaging delicate roots. Press the soil mixture around the seed to eliminate air pockets, then water with a spray bottle until moisture appears at the drainage holes. This careful handling prevents transplant shock that could stall early growth. Place pots on a heating mat set to 70°F for the first 72 hours to accelerate root establishment.
Pro Tips for Chrysanthemum From Seed
- Mastering cold stratification transforms stubborn chrysanthemum seeds into reliable starters—here's how to optimize every phase of the process.
- Precision Moisture Control: The 4-6 week stratification window demands unwavering moisture consistency.
- Stratification Temperature Nuances: While 35-40°F is ideal, most home refrigerators hover around 38°F in their vegetable crisper.
Frequently asked questions
Got questions about growing chrysanthemums from seed?
You’re not alone! Here are answers to the most common queries to help you achieve that 95% germination success—no guesswork required.
How long does cold stratification take for chrysanthemum seeds?
Cold stratification typically lasts 4–8 weeks in the fridge (34–40°F). For best results, place seeds in a moist paper towel or potting mix inside a sealed bag. Patience pays off! If you’re in doubt, err on the longer side—chrysanthemums appreciate it.
When is the best time to plant chrysanthemum seeds?
Start seeds 8–10 weeks before your last frost date (indoors) for spring blooms, or 6–8 weeks before fall’s first frost for autumn color. Chrysanthemums thrive in cooler weather, so avoid planting in scorching heat—60–70°F is ideal.
Why aren’t my chrysanthemum seeds germinating?
Check these fixes:
- Inconsistent moisture: Keep soil evenly damp (not soggy).
- Wrong temps: Seeds need warmth (70°F) after stratification.
- Old seeds: Store-bought seeds lose viability after 1–2 years.
- Light needs: Seeds germinate best in darkness—cover with a thin layer of soil.
Can I grow chrysanthemums from seed in containers?
Use 5–6 inch pots with drainage holes and well-draining soil. Dwarf varieties (e.g., ‘Bonanza’) thrive in containers, while larger types may need 1-gallon pots. Just ensure they get 6+ hours of sunlight daily—containers dry out faster!
What’s an alternative if cold stratification fails?
Try scarification (lightly nicking the seed coat with sandpaper) or soaking seeds in warm water for 24 hours before planting. For stubborn seeds, a botanical hormone gel (like Rootone) can boost germination rates. Experiment!
How do I prevent damping-off disease in seedlings?
Damping-off is common in humid conditions. Prevent it with:
- Sterilized soil (bake potting mix at 200°F for 30 mins).
- Thin seedlings to 2 inches apart for airflow.
- Avoid overhead watering—use a spray bottle instead.
- Add 1 tsp cinnamon per gallon of soil (natural fungicide!).
Wrapping up and next steps
Growing chrysanthemums from seed is a rewarding journey—especially when you master the cold stratification trick to boost germination rates! With patience, the right tools, and a little science-backed care, you’ll soon enjoy vibrant blooms that brighten your garden. 🌱✨
Ready to take the next step? Start small:
- Test a few seeds first to refine your process.
- Share your progress with fellow gardeners for tips and encouragement!
- Once your seedlings thrive, experiment with varieties or even grafting for advanced projects.