Planting
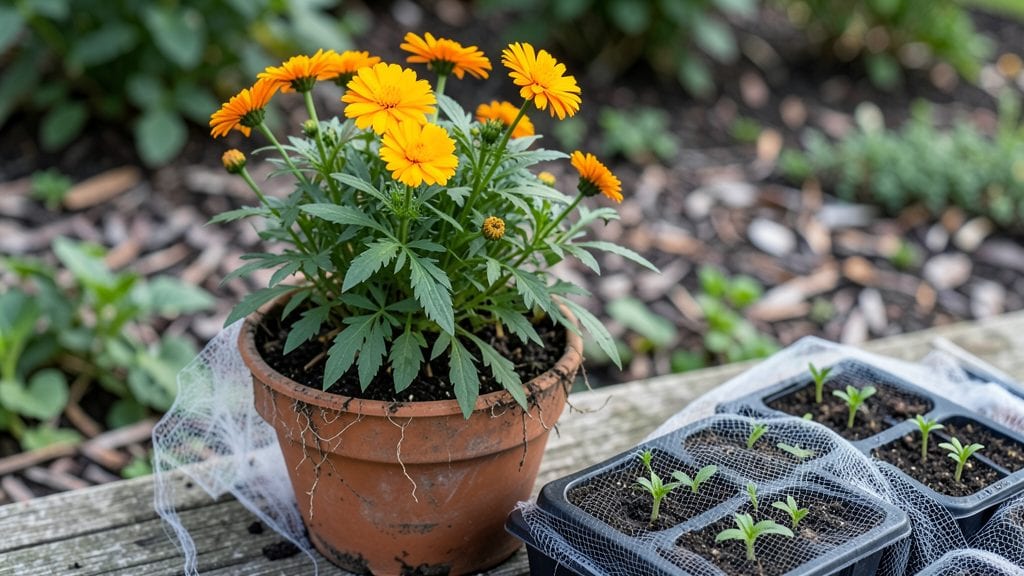
Cold sowing seeds in late summer lets hardy plants get a head start on spring without waiting for warmer weather. ✨ I stumbled onto this trick after watching my foxglove seedlings outpace store-bought plants by weeks—now it's my secret weapon for biennials and perennials that need winter stratification.
The setup couldn't be simpler: choose seeds like hollyhocks, columbine, or sweet William, then scatter them directly into garden beds or containers before the first frost. No greenhouse needed—just a little snow cover and nature does the rest while you're busy with holiday decor.
Most varieties handle temps down to 10°F without complaint.
By spring, you'll have stocky, established plants ready to bloom earlier than neighbors who waited until March. The roots develop deeper over winter, making them more drought-resistant too. Plus, you skip the finicky seed-starting indoors that always feels like a gamble.
Works in zones 3-8, though southern gardeners should start earlier to avoid summer heat stress. The key is choosing the right seeds and giving them a spot with decent drainage—no fancy equipment required. Let's get those seeds in the ground!
📚 In This Guide
- What you need
- Instructions
- Tips and common mistakes
- Wrapping up and next steps
What you need
- ● Seeds: Choose cold-hardy varieties like lettuce, spinach, kale, peas, or radishes. Aim for organic, untreated seeds (1–2 packets per crop).
- ● Seed trays or containers: 2–4 shallow trays (3–4" deep) with drainage holes, or recycled containers (yogurt cups, egg cartons).
- ● Potting mix: Lightweight, seed-starting mix (avoid garden soil—it’s too dense!). A 5–10 lb bag should suffice for most setups.
- ● Watering can or spray bottle: A fine-mist spray bottle (8–16 oz) keeps seeds moist without disturbing them.
- ○ Clear plastic domes or plastic wrap: To create a mini greenhouse effect (optional but helpful for humidity).
- ● Labels and markers: Small plant tags or masking tape + permanent marker to track varieties.
- ● Gloves: A pair of gardening gloves to protect hands from cold and dirt.
- ● Trowel or spoon: For gently pressing seeds into the soil (a butter knife works in a pinch!).
- ○ Grow lights (optional): If your space lacks natural light, a 1–2 ft LED grow light can boost seedling strength.
- ● Cold frame or outdoor space: A sheltered spot (like a garage, porch, or unheated greenhouse) where temps stay between 35–50°F.
- ○ Heating mat (optional): For seeds needing warmth (e.g., tomatoes), a small 10x20" mat can help.
Step-by-Step instructions for cold sowing seeds
Skip the wait—these simple steps let you plant seeds in winter for stronger spring blooms.
🌱 Step 1: Choose the Right Seeds and Containers
Cold sowing works best with biennials and perennials like foxgloves, hollyhocks, and poppies—plants that need a cold period to germinate. Grab shallow trays or pots with drainage holes and fill them with 2-3 inches of moistened potting soil.
Press the soil down gently so it's firm but not packed. You want roots to have good contact with the soil without air pockets. I like to add a thin layer of sand or perlite to the top inch to improve drainage—this prevents soggy soil that can rot seeds before they even sprout.
💧 Step 2: Plant Seeds Directly in the Soil
Sow seeds twice as deep as their diameter—for tiny poppy seeds, that's just a sprinkle on top, while larger foxglove seeds go about ¼ inch deep. Space them ½ inch apart to avoid overcrowding later.
Cover lightly with soil or a fine mulch layer. Water gently until the soil is evenly moist but not saturated. I use a spray bottle for this step to avoid disturbing the seeds. The goal is to keep the soil damp, not drenched—overwatering can wash seeds away or create anaerobic conditions that prevent germination.
☀️ Step 3: Place Trays Outside for Winter Exposure
Move your trays to a sheltered spot outside where they'll receive natural winter light and cold. A north-facing porch or under a deciduous tree works well—they get light but aren't blasted by harsh winds. If you're in a very snowy climate, elevate trays on bricks or a wooden frame to prevent burial.
Leave them undisturbed until spring. The cold stratification process mimics natural conditions, breaking seed dormancy. You'll know it's working when you see tiny green shoots in early spring—often weeks before you could plant outdoors. I've had foxgloves pop up in March when the ground was still frozen!
🌿 Step 4: Monitor and Thin as Needed
Check trays occasionally during mild winter days to ensure soil isn't drying out. If it feels dry to the touch, water lightly—just enough to keep the surface moist. Avoid disturbing the seeds unless absolutely necessary, as cold-sown seeds are delicate.
Once seedlings emerge in spring, thin them to 1 inch apart using small scissors or your fingers. The strongest seedlings will have the deepest green leaves and sturdy stems. Transplant thinned seedlings directly into their final garden spot when they're 2-3 inches tall and all frost danger has passed.
⏰ Step 5: Harden Off and Plant in Spring
Two weeks before your last frost date, move trays to a shaded outdoor spot to acclimate. Gradually increase their sun exposure over 5-7 days. This process, called hardening off, helps seedlings adjust to outdoor conditions without shock.
Plant seedlings in their permanent location on a cool, cloudy day. Water deeply at the base to encourage root growth. Cold-sown plants often bloom earlier and more vigorously than store-bought seedlings because they've experienced natural winter conditions. You'll see the difference in their robust growth and vibrant flowers!
Tips & tricks for perfect cold sowing success
Here's what nobody tells you about making cold sowing work like a pro—these tricks will give you the strongest spring starts.
Seed Selection Matters: Not all seeds respond well to cold sowing! Stick to biennials and perennials like foxgloves, hollyhocks, and poppies—they actually need that cold period to germinate properly. Annuals like marigolds or sunflowers won't work here. I've tried cold sowing tomatoes by accident, and they just rotted in the soil. Trust me on this.
The Soil Depth Secret: When planting in Step 2, think of this rule: "Twice as deep as their diameter" means if your foxglove seeds are 1/8 inch thick, plant them 1/4 inch deep. For poppy seeds, that's just a light sprinkle on top. Pressing them too deep can prevent them from sprouting—especially important since these seeds are delicate after their winter nap.
Winter Shelter Strategy: In Step 3, that "sheltered spot" is crucial. I've learned the hard way that exposed trays can dry out or get buried under snow. A north-facing porch gets enough light without harsh winds, and a mesh cover (like window screen) can protect from heavy snowfall while still letting light through. This mimics natural winter conditions perfectly.
Thinning Technique: When you thin in Step 4, don't just pull seedlings—use small scissors to cut at soil level. This prevents disturbing the roots of nearby plants. I always thin to 1 inch apart, but give stronger seedlings a little more space (up to 1.5 inches) if they're looking particularly vigorous. The goal is to give each plant room to grow without competing.
Pro Tips for Cold Sowing Seeds
- Here's what nobody tells you about making cold sowing work like a pro—these tricks will give you the strongest spring starts.
- Seed Selection Matters: Not all seeds respond well to cold sowing!
- The Soil Depth Secret: When planting in Step 2, think of this rule: "Twice as deep as their diameter" means if your foxglove seeds are 1/8 inch thick, plant them 1/4 inch deep.
Frequently asked questions
Got questions about cold sowing seeds? You’re not alone!
This method can feel mysterious, but we’ve got answers to the most common concerns—from timing to troubleshooting. Let’s dive in.
What is cold sowing, and how is it different from regular sowing?
Cold sowing is a technique where you plant seeds in the fall or winter (without covering them with soil) so they stratify naturally in cold temperatures. This mimics the conditions many wild plants experience, breaking seed dormancy for spring germination. Unlike regular sowing, which often requires indoor starting or warm soil, cold sowing lets nature do the work—no greenhouse needed!
When is the best time to cold sow seeds?
The ideal window is typically 4–6 weeks before your first hard frost, but it depends on your climate. For most regions, late September to early November works well. If you’re in a milder zone, aim for cooler months (December–February). The key is ensuring seeds get cold but not frozen solid—think consistent 30–40°F (0–4°C) temps.
Which seeds can I cold sow, and which should I avoid?
Cold sowing works best for hard-coated or dormant seeds that benefit from stratification, like:
- Lettuce
- Spinach
- Calendula
- Sweet peas
- Some herbs (e.g., parsley, cilantro)
What happens if my seeds freeze or get buried under snow?
Don’t panic! Many cold-sown seeds are tougher than you think. A light dusting of snow acts like insulation, while heavy snow can even help press seeds into the soil. If temps drop below freezing, seeds may pause germination until conditions improve. Just ensure they’re in a protected spot (like under a cloche or mulch) to prevent heaving or drying out.
How do I know if cold sowing worked, or should I try again?
Success depends on patience! Germination can take 2–4 weeks longer than traditional sowing. If you see sprouts in early spring, it worked! If not, try:
- Planting seeds slightly deeper (¼ inch max).
- Using a thin layer of soil or mulch (1–2 inches) for extra moisture retention.
- Choosing a sunnier spot—some seeds need light to germinate.
Wrapping up and next steps
Cold sowing seeds is your secret weapon for a head start on spring gardening—no waiting, no fuss! By mimicking winter’s chill, you’ll unlock faster germination and hardier plants.
Whether you’re a seasoned gardener or just starting, this method proves that patience (and a little frost) can pay off in vibrant blooms.
Ready to put your new skills to the test? Start small—try a few cold-hardy veggies or flowers this season, then expand as you gain confidence. Grab your seeds, a tray, and a little winter magic, and let nature do the rest! 🌱❄️