
Lawn
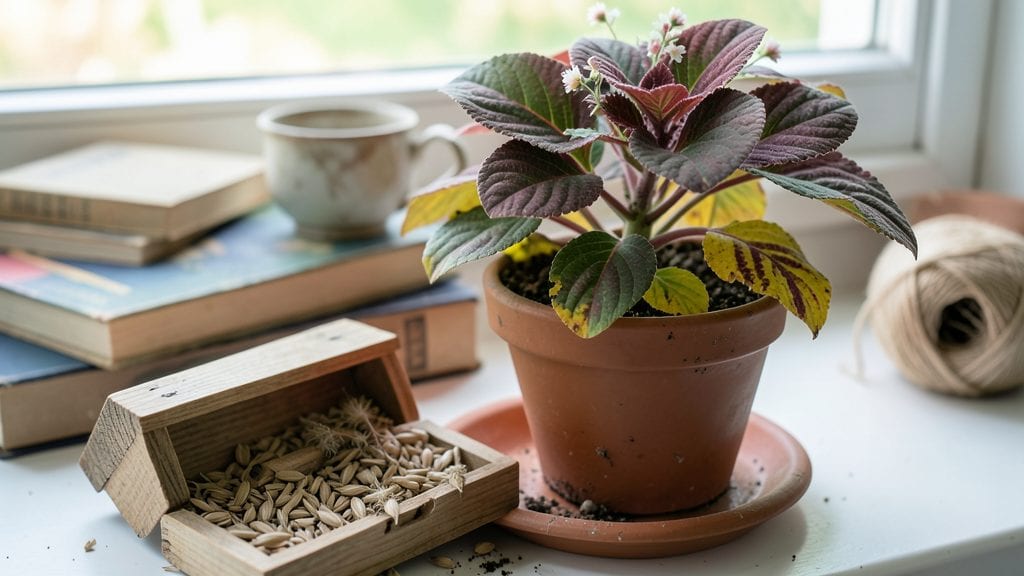
Mastering the art of coleus seed collection ensures your next batch of plants will burst with even bolder hues and lushness than this year’s favorites. 🌿 I’ve saved seeds from my showstopping varieties, and the payoff—identical worth the extra effort.
The key is selecting healthy parent plants, harvesting seeds at peak ripeness, and using cold stratification to break dormancy.
You’ll need just a few simple supplies: small paper bags for drying seeds, a refrigerator for stratification, and a warm spot for germination. The process takes about 8-12 weeks from collection to seedlings, but the payoff is plants that thrive better than store-bought starts.
Even if your first batch isn’t perfect, you’ll learn what works for your climate and light conditions.
By the time spring rolls around, you’ll have seedlings with the same bold foliage colors and compact growth you’ve come to love. The first flush of new leaves will be a showstopper, proving that seed-collected coleus can outshine nursery plants.
Plus, you’ll save money and reduce plastic waste from those flimsy seedling pots.
This method works for both hybrid and heirloom coleus, though hybrids may not always breed true. Start with your most reliable plants, and don’t be discouraged if germination rates are lower than expected—coleus seeds are finicky, but persistence pays off.
Here’s how to make it work for your garden next season.
📚 In This Guide
- What you need
- Instructions
- Tips and common mistakes
- Wrapping up and next steps
What you need
- ● Mature coleus plants (preferably with healthy, vibrant foliage and visible seed pods—look for brown, papery structures).
- ● Scissors or pruning shears (sterilized with rubbing alcohol to prevent disease).
- ● Paper bags or breathable seed envelopes (labeled with the coleus variety and date).
- ● Plastic storage bags (for temporary seed storage before stratification).
- ● Refrigerator or cold stratification setup (a cool, dark space (35–40°F) for 6–8 weeks).
- ○ Moistened paper towels or sphagnum moss (for optional humidity control during stratification).
- ● Seed tray or small pots (for germinating seeds post-stratification).
- ● Grow lights or sunny windowsill (to support seedling growth).
- ● Seed catalog or notebook (to track varieties, germination dates, and notes).
- ● Humidity dome or plastic wrap (to retain moisture during germination).
- ● Fine-mesh sieve (for cleaning seeds if debris is present).
Step-by-Step instructions for collecting and stratifying coleus seeds
Here's how to turn your favorite coleus blooms into next season's plants using a foolproof cold stratification method.
🌿 Step 1: Select and Harvest Mature Seed Heads
Wait until the seed pods on your coleus turn from green to brown and begin splitting open—this means they're fully mature. I like to harvest on a dry morning when the humidity is low, as damp seeds can mold during storage. Use clean, sharp scissors to snip the entire seed head, leaving about ½ inch of stem attached.
Place the harvested heads in a paper bag and let them dry indoors for 3-5 days in a warm, dry spot. You'll know they're ready when the pods crumble easily between your fingers. Avoid plastic bags—they trap moisture and encourage mold growth. Once dry, gently rub the pods between your palms to release the tiny, dust-like seeds.
💧 Step 2: Mix Seeds with Moist Sand for Stratification
Fill a small container with 1 part sand and 1 part perlite (from your materials list) and moisten it until it feels like a damp sponge—squeeze it gently, and just a few drops should come out. This moisture level is critical; too dry and seeds won't germinate, too wet and they'll rot.
Sprinkle the collected coleus seeds evenly over the sand mixture, then gently stir them in so they're surrounded but not buried. The goal is to mimic natural winter conditions where seeds experience alternating freeze-thaw cycles. Cover the container loosely with plastic wrap, leaving it slightly ajar for airflow. Place it in the refrigerator's crisper drawer, where temperatures hover around 35-40°F.
⏰ Step 3: Stratify for 6-8 Weeks
Check the container every 2 weeks, removing the plastic wrap to let excess moisture escape. The sand should never feel soggy—if it does, uncover it for a day or two to dry slightly. Coleus seeds need this cold treatment to break dormancy; without it, they may take months (or never) to sprout.
After 6-8 weeks, transfer the container to a warm spot (around 70°F) and keep the sand consistently moist. You'll see the first signs of germination in 2-4 weeks—tiny green sprouts pushing through the sand. This is your reward for patience; the stratification process mimics nature's way of timing germination for optimal growing conditions.
🌱 Step 4: Transplant Sprouted Seeds
Once the seedlings have 2-3 true leaves (not just the initial seed leaves), carefully lift them from the sand mixture using a small spoon or your fingers. Gently separate them, being mindful of delicate roots. Plant each seedling into its own 2-inch pot filled with the seed-starting mix, pressing lightly around the base to secure it.
Place the pots under a grow light or in a bright window, keeping the soil moist but not waterlogged. Coleus seedlings are sensitive to overwatering, so I use a spray bottle to mist the soil rather than pouring from above. Within 6-8 weeks, they'll be ready for transplanting into larger containers or the garden.
Tips & tricks for perfect coleus seed stratification
This foolproof method transforms your favorite coleus blooms into next season's plants—here's how to maximize success at every step.
Harvesting Timing: The 3-5 day drying period is crucial—don't rush it! I've learned the hard way that damp seeds mold within 24 hours. Place your paper bag in a spot with good airflow, like near an open window but away from direct sunlight. You'll know they're ready when the pods crumble like dry leaves between your fingers. This texture test is your best indicator of proper drying.
Moisture Balance: That "damp sponge" consistency in Step 2 is everything. Too dry and seeds won't germinate; too wet and they'll rot. I use a spray bottle to mist the sand mixture until it just holds together when squeezed—not dripping. Think of it like wringing out a damp washcloth—just enough moisture to keep things alive without creating a swamp. This balance mimics nature's perfect conditions.
Stratification Temperature: The 35-40°F range in your refrigerator's crisper drawer is ideal for coleus seeds. If your fridge runs cooler (below 35°F), transfer the container to a slightly warmer spot like the main fridge shelf. The goal is to simulate winter's gradual temperature shifts that break seed dormancy. I've found that seeds stratified at 40°F typically germinate faster than those at colder temperatures.
Germination Patience: Those 2-4 weeks of germination waiting in Step 3 can feel endless, but resist the urge to peek! Every time you remove the plastic wrap, you risk drying out the sand. Instead, check for condensation on the inside of the wrap—this tells you the moisture level is perfect without disturbing the seeds. The first tiny sprouts are worth every minute of waiting.
Pro Tips for Coleus Seed Collection
- This foolproof method transforms your favorite coleus blooms into next season's plants—here's how to maximize success at every step.
- Harvesting Timing: The 3-5 day drying period is crucial—don't rush it!
- Moisture Balance: That "damp sponge" consistency in Step 2 is everything.
Frequently asked questions
Got questions about saving coleus seeds for next season?
Here are answers to the most common ones—so you can collect, store, and grow with confidence!
When is the best time to collect coleus seeds?
Collect seeds after your coleus blooms (usually late summer to early fall). Wait until the seed pods turn brown and dry but haven’t split open—this ensures viability. If left too long, seeds scatter, so act fast!
Why does coleus seed need cold stratification?
Coleus seeds often need cold stratification (4–8 weeks in the fridge) to break dormancy. Without it, germination rates drop dramatically. This mimics winter conditions, tricking seeds into thinking spring is coming!
How do I store collected coleus seeds long-term?
Keep seeds in a cool, dry place (like a sealed envelope in the fridge) for up to 2 years. Add a desiccant packet to prevent moisture buildup. Label with the date—freshness matters!
What if my coleus doesn’t produce seeds?
Some coleus varieties are sterile (like many hybrids). If yours doesn’t bloom, try grafting or buying seeds from a nursery. Alternatively, propagate via stem cuttings—it’s easier and faster!
Why aren’t my seeds germinating?
Check these fixes:
- Freshness: Old seeds (over 1 year) may fail—test germination with a damp paper towel.
- Moisture: Keep soil consistently moist (not soggy) during germination.
- Light: Coleus seeds need bright, indirect light—no dark closets!
Wrapping up and next steps
Collecting and stratifying coleus seeds is your ticket to vibrant blooms and lush foliage next season—without the guesswork! 🌱 By mastering layered cold stratification, you’ll unlock consistent germination and stronger plants.
Whether you’re a seasoned gardener or just starting, this method ensures your hard work pays off in stunning, healthy growth.
Ready to grow your garden’s potential? Start by labeling those seed packets, then dive into stratification—your future coleus plants will thank you! 🌸