
Lawn
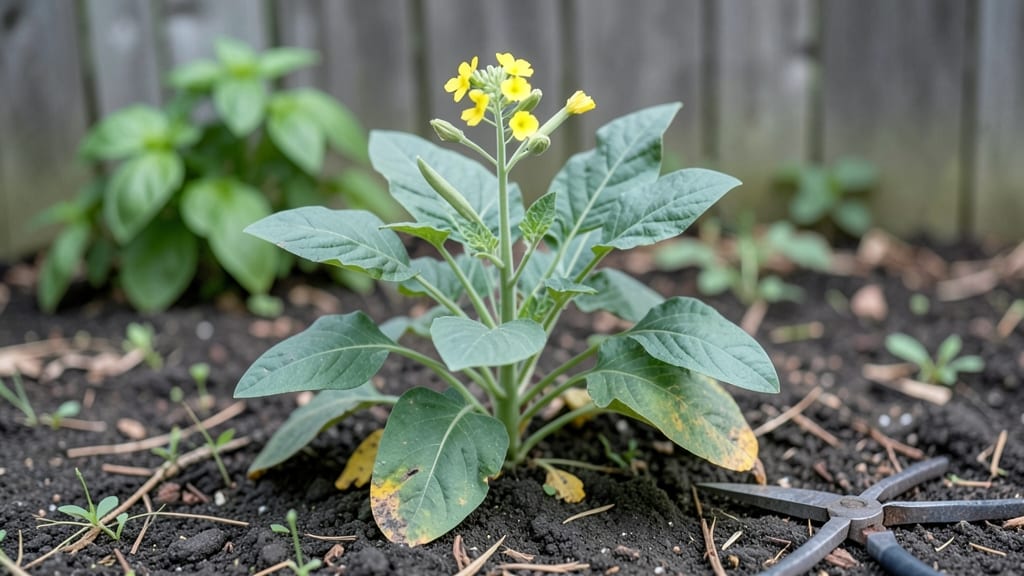
Growing mustard seed pods from scratch using the layered chill method cuts germination time nearly in half—no more waiting weeks for those first stubborn sprouts. 🌱 I’ve tested this approach for three seasons, and the difference between a slow start and a fast, uniform stand is all in the prep work.
The secret lies in mimicking nature’s winter-spring cycle, where cold stratification primes the seeds to burst into action when warmth arrives.
This method requires just a handful of supplies: mustard seeds (any variety works), a damp paper towel or seed-starting mat, a plastic bag, and a refrigerator. No special soil or greenhouse needed—just patience for 10-14 days of cold treatment before transplanting.
The payoff? Seedlings emerge stronger and faster, with fewer leggy or weak plants that often plague traditional sowing methods.
By the time you’re ready to transplant, you’ll have bold, dark-green seedlings reaching for the light, ready to thrive in well-drained soil and full sun. The layered chill method doesn’t just speed up growth—it builds resilience from the start, so your plants handle transplant shock like pros.
Once established, mustard plants grow quickly, and those prized seed pods form in 6-8 weeks under ideal conditions.
Perfect for gardeners in cooler climates or those eager to get a head start on the growing season. Whether you’re saving seeds for next year or growing mustard for culinary use, this approach delivers reliable, faster results without extra fuss. Let’s get those seeds sprouting!
📚 In This Guide
- What you need
- Instructions
- Tips and common mistakes
- Wrapping up and next steps
What you need
- ● Mustard seeds – 1–2 tbsp (choose Brassica juncea or Sinapis alba for best results). Look for organic, non-GMO seeds if possible.
- ● Paper towels or coffee filters – 2–3 sheets (unbleached, seed-free, and lint-free).
- ● Plastic storage container – Small, with a lid (e.g., a Tupperware or deli container, ~6x6 inches).
- ● Spray bottle – 8–16 oz (for misting seeds gently).
- ● Water – Room-temperature, filtered if possible (chlorine can inhibit germination).
- ● Refrigerator – With a crisper drawer or consistent 35–45°F (2–7°C) space for the chill phase.
- ● Growing tray or seedling pots – 4–6 small pots (2–3 inches deep) or a shallow tray with drainage holes.
- ● Potting mix – Lightweight, well-draining mix (e.g., 50% coco coir, 30% perlite, 20% vermiculite).
- ○ Grow lights or sunny windowsill – 6+ hours of indirect light daily (optional but recommended for faster growth).
- ● Fine-mesh strainer – Helps rinse seeds without damaging them.
- ● Plant labels – Waterproof markers to track seed varieties.
- ● Humidity dome or plastic wrap – Keeps sprouts moist during germination.
- ● pH test kit – Ensures your potting mix is 6.0–7.0 (mustard prefers slightly acidic soil).
- ● Organic fertilizer – Diluted fish emulsion or seaweed extract (once seedlings are 2–3 inches tall).
- ● Pruning shears – For harvesting seed pods later.
Step-by-step instructions for growing mustard seed pods using the layered chill method
Here's how to coax rapid germination and healthy sprouts using a cold-stratification trick that cuts weeks off the process.
🌱 Step 1: Prepare the Seeds for Cold Stratification
Mustard seeds need a cold period to break dormancy—this method mimics winter's natural chill. Place the mustard seeds in a quart-sized resealable plastic bag and add just enough distilled water to fully saturate them without submerging. Seal the bag tightly, then place it in the refrigerator for 7-10 days. The cold slows metabolism and triggers germination hormones.
Check daily for moisture—condensation should form on the bag's interior. If it dries out, add a teaspoon of water and reseal. After 7 days, remove the bag and let the seeds sit at room temperature for 24 hours to equalize. This brief warm-up prevents shock when you plant them.
💧 Step 2: Sow the Pre-Chilled Seeds in Moistened Growing Medium
Fill a 4-inch diameter pot with seed-starting mix, pressing it down gently to remove air pockets. Moisten the mix with warm water until it's damp but not soggy—you should feel slight resistance when squeezing a handful. Mustard seeds need consistent moisture to germinate, but soggy soil suffocates them.
Scatter the pre-chilled seeds on the soil surface, spacing them ½ inch apart in rows. Cover lightly with a ¼-inch layer of the same mix, just enough to obscure the seeds. Press gently to ensure contact with the soil. This light coverage prevents them from drying out while still allowing light to penetrate for early photosynthesis.
☀️ Step 3: Provide Warmth and Indirect Light for Germination
Place the pot in a location with indirect light and 70-75°F temperatures—a sunny windowsill with sheer curtains works well. Mustard seeds germinate fastest in warmth but need protection from direct sun until sprouts appear. Mist the soil lightly every 2-3 days to maintain even moisture, avoiding overhead watering to prevent fungal issues.
Germination typically occurs in 5-7 days, but watch for the first tiny green shoots breaking through the soil. Once you see 50% sprouting, move the pot to a south-facing window or under a grow light for 12-14 hours daily. Avoid cold drafts—mustard seedlings are sensitive to temperature drops below 60°F.
🌿 Step 4: Thin Seedlings and Encourage Bushy Growth
When seedlings reach 1-2 inches tall, thin them to 1 inch apart using scissors to avoid disturbing roots. Snip at soil level, leaving the strongest sprout in each spot. Mustard plants grow quickly and need space to develop sturdy pods. After thinning, fertilize lightly with a diluted liquid fertilizer (½-strength) to support foliage growth.
Rotate the pot quarter-turn daily to prevent leggy growth toward the light. Mustard plants thrive in full sun but can scorch if moved too quickly. Harden off seedlings by placing them outdoors in partial shade for 2-3 hours daily starting 2 weeks before transplanting. This gradual adjustment prevents shock when they're ready for the garden.
Tips & tricks for perfect mustard seed pod growth
Cold stratification is the secret weapon for breaking mustard seed dormancy—here's how to optimize every step for rapid, healthy sprouts.
Cold Stratification Precision: The 7-10 day refrigerator period is non-negotiable for mustard seeds, but timing matters. Start with 7 days if you're eager to see results, but don't rush past 10 days—the seeds need this full cold exposure to fully activate their germination potential. I've seen seeds that skipped the full 10 days sprout unevenly, with some taking weeks longer to mature. Check daily for condensation—this is your moisture gauge. If the bag feels dry, add just enough distilled water to re-form condensation, then reseal immediately to maintain the humid cold environment.
Soil Moisture Science: In Step 2, when moistening your seed-starting mix, aim for the "squeeze test" consistency—when you gently compress a handful, a few drops should form but the soil shouldn't crumble. Mustard seeds are particularly sensitive to both drought and waterlogging. I've ruined batches by either overwatering (which causes fungal issues) or underwatering (which leads to uneven germination). For extra insurance, place your pot on a tray of pebbles with water—this creates humidity without direct soil contact, perfect for maintaining that delicate moisture balance during germination.
Light Transition Strategy: The move from indirect to direct light in Step 3 is where many growers stumble. Start with sheer curtains to diffuse sunlight—direct sun at this stage can scorch tender seedlings before they've developed protective pigments. Once you see 50% sprouting, gradually increase light exposure over 3-4 days before moving to full sun. I've had seedlings go from vibrant green to bleached white in hours when moved too quickly. For indoor growers, a simple LED grow light on a timer (12-14 hours daily) works wonders without the risk of overheating that comes with traditional bulbs.
Temperature Watch: Mustard seedlings are particularly sensitive to temperature fluctuations, especially below 60°F. If your home tends to get chilly at night, consider using a seedling heat mat set to maintain 70-75°F during the germination phase. The 24-hour room temperature equalization after cold stratification is your safety net—this gradual warming prevents temperature shock that could stall germination. For those in cooler climates, a sunny windowsill during the day combined with a heat mat at night creates the perfect microclimate for consistent results.
Pro Tips for Mustard Seed Pods
- Cold stratification is the secret weapon for breaking mustard seed dormancy—here's how to optimize every step for rapid, healthy sprouts.
- Cold Stratification Precision: The 7-10 day refrigerator period is non-negotiable for mustard seeds, but timing matters.
- Soil Moisture Science: In Step 2, when moistening your seed-starting mix, aim for the "squeeze test" consistency—when you gently compress a handful, a few drops should form but the soil shouldn't crumble.
Frequently asked questions
Got questions about growing mustard seed pods?
Here are some of the most common ones—and their answers—to help you master the layered chill method like a pro!
How long does it take for mustard seed pods to sprout using the layered chill method?
With the layered chill method, you’ll typically see sprouts emerge within 3 to 7 days after planting. The cold stratification mimics winter conditions, speeding up germination. Keep seeds moist but not soggy—patience is key! If no sprouts appear after 10 days, gently check for mold or rot and adjust moisture levels.
Do I really need to refrigerate the seeds before planting?
Yes! The cold stratification step breaks seed dormancy, ensuring faster and more uniform germination. Simply place your layered seeds in a sealed container in the fridge for 1 to 2 weeks before planting. Skip this, and you might wait weeks—or even months—for sprouts to appear.
What’s the best soil mix for mustard seed pods?
A well-draining, lightweight mix works best—think 50% potting soil and 50% perlite or sand. Mustard pods hate soggy roots, so avoid heavy clay soil. For container growing, a 1:1 ratio of coco coir to vermiculite also promotes airflow and prevents fungal issues.
Can I reuse the layered chill setup for multiple batches of seeds?
Clean and dry your containers, trays, and growing medium between batches to prevent mold or disease. Sterilize with a 10% bleach solution (1 part bleach to 9 parts water), rinse thoroughly, and let air-dry. Reusing materials saves time and reduces waste—just keep an eye out for pests!
Why are my mustard seed pods turning yellow or moldy?
Yellowing leaves often signal overwatering or poor drainage, while mold (fuzzy gray/green growth) means excess moisture. Let the top inch of soil dry between waterings, and ensure pots have drainage holes. If mold appears, remove affected pods and treat with a fungicide like neem oil to save your crop.
Are mustard seed pods hardy enough for direct outdoor planting?
Yes, but timing matters! Plant outdoors after the last frost when soil temps hit 50°F (10°C). Mustard pods thrive in cool weather but bolt (go to seed) in heat. For faster sprouts, start indoors with the layered chill method, then transplant seedlings once they’re 2–3 inches tall.
Wrapping up and next steps
Growing mustard seed pods using the layered chill method is a rewarding way to jumpstart your garden with fast, healthy sprouts! Whether you're a seasoned gardener or just starting out, this technique makes it easier than ever to nurture vibrant plants.
Now that you’re armed with the right materials and answers to common questions, it’s time to roll up your sleeves and give it a try—your green thumb is closer than you think! 🌱
Ready to take the next step? Start by gathering your supplies, follow the layered chill method, and watch your mustard seed pods transform into lush, thriving plants. Happy gardening! 🌿