
Propagation
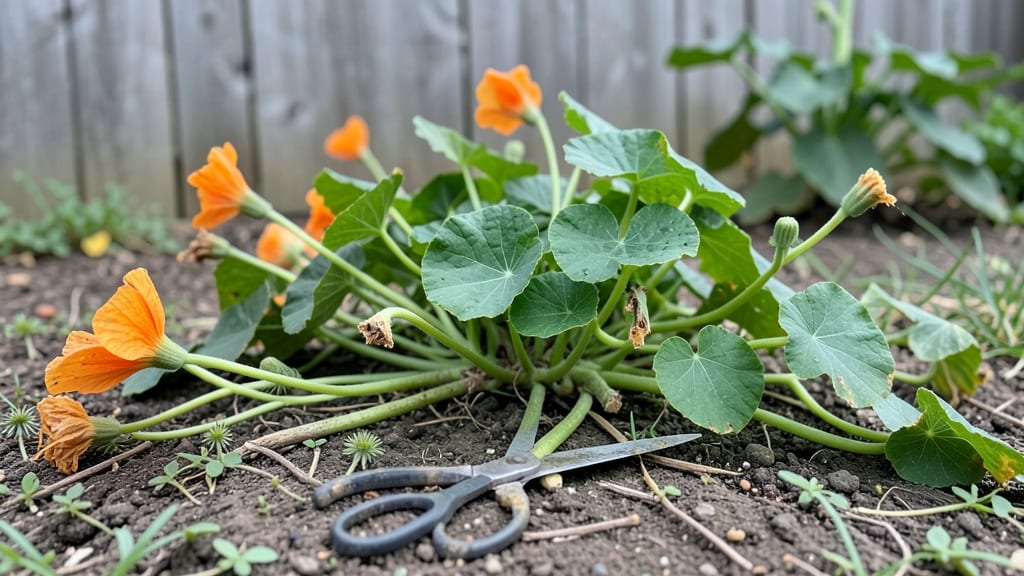
Saving nasturtium seeds for next year’s garden is like unlocking a free, fragrant future—no store-bought packets required. 🌻 I’ve collected seeds from my own plants for three seasons now, and the savings alone (not to mention the heirloom varieties) make it worth the effort.
The pods are easy to spot once you know what to look for: those papery, pea-shaped husks that swell from green to pale tan by late summer.
You’ll need just three things: a pair of scissors or pruners, a brown paper bag for drying, and patience (the hardest part is waiting for the pods to fully mature). Harvest when the pods turn crisp and start splitting open—this usually happens 4-6 weeks after flowering.
The key is timing: pick them before they burst open on their own and scatter seeds everywhere.
Once dried, the seeds inside are plump and ready to plant. Store them in an airtight container in a cool, dark place, and they’ll stay viable for up to five years.
Imagine next spring’s garden bursting with the same vibrant orange and red blooms—all from seeds you saved yourself. The best part? You’ll never buy nasturtiums again.
This method works for both annual and perennial nasturtiums, though annuals are easier for beginners. If you’ve ever wondered how to keep your favorite flowers growing without spending a dime, this is your answer. Let’s get those seeds saved!
📚 In This Guide
- What you need
- Instructions
- Tips and common mistakes
- Wrapping up and next steps
What you need
- ● Mature nasturtium plants: Healthy, fully bloomed plants with seed pods (let pods turn papery-brown before harvesting). Aim for at least 3-5 plants for a good seed yield.
- ● Pruning shears or sharp scissors: Clean, sterilized tools to snip seed pods without damaging the plant.
- ● Paper bags or brown lunch bags: 3-5 medium-sized bags (1 per pod) to dry seeds. No plastic—it traps moisture!
- ● Labeling tags or masking tape + marker: To mark seed varieties (e.g., "Alaska," "Jewel Mix") and harvest dates.
- ● Drying tray or clean cardboard box: A flat surface to spread pods for 1-2 weeks. Elevate slightly for airflow.
- ○ Fine-mesh sieve or sifter: Optional but helpful for separating seeds from chaff (a kitchen strainer works in a pinch!).
- ● Air-tight seed envelopes or small jars: For long-term storage (e.g., 3x5” envelopes or mason jars with lids).
- ● Desiccant packets: Place 1-2 in storage containers to absorb excess moisture.
- ● Humidity pack (silica gel + indicator): For ultra-dry storage (great for humid climates).
- ● Seed catalog or notebook: To log growing conditions, germination rates, or notes on plant performance.
- ● Glove or cloth: Protects hands from nasturtium’s mild irritant (some folks are sensitive to its sap!).
Step-by-Step guide to harvesting nasturtium seeds
Here's how to save seeds from your nasturtium plants for next season's vibrant blooms.
🌱 Step 1: Identify and Select Healthy Seed Pods
Wait until late summer or early fall when the flowers have faded and seed pods form. These pods look like tiny, round, green beans about 1 inch long. Choose pods that are fully developed but still firm to the touch—they should feel slightly crisp rather than soft or shriveled.
Look for pods on the healthiest plants with the most vibrant flowers this season. Avoid pods from plants that showed signs of disease or pest damage, as those seeds may not grow true. I like to pick pods from the strongest stems, usually the ones that bloomed first in the season.
🌿 Step 2: Harvest and Dry the Seed Pods
Gently twist the mature pods from the vine—they should pop off easily when ready. Place them in a single layer on a paper towel or mesh screen in a warm, dry spot with good airflow. A sunny windowsill works perfectly, but avoid direct sunlight that might overheat them.
Leave the pods to dry for about 2-3 weeks. You'll know they're ready when they turn brown and papery thin, and they rattle when shaken. If you hear seeds rattling inside, that's your signal they're fully dry. Don't rush this step—overly moist seeds won't store well.
🪴 Step 3: Extract and Store the Seeds
Once completely dry, gently crush each pod between your fingers or use a small hammer to break them open. Nasturtium seeds are large and flat, about the size of a pencil eraser. You'll find 3-5 seeds per pod, usually surrounded by a papery husk that you can easily remove.
Store the clean seeds in an airtight container like a small glass jar or envelope. Label it with the variety name and harvest date. Keep the container in a cool, dark place—your refrigerator's crisper drawer works well. Properly stored, nasturtium seeds remain viable for 3-5 years, though they germinate best when used within a year.
⏰ Step 4: Test Germination (Optional but Recommended)
Before planting all your saved seeds, do a quick germination test. Place 5-10 seeds between damp paper towels in a sealed plastic bag. Keep them in a warm spot (around 70°F) and check daily. Most should sprout within 7-14 days—if fewer than 50% germinate, you may want to supplement with fresh seeds.
This simple test gives you confidence in your seed viability and helps you plan how many to plant next season. Real talk: I've had years where some varieties germinated poorly, so testing saves me from disappointment when spring planting time arrives.
Tips & tricks for perfect nasturtium seed collection
Avoid these common mistakes to ensure you collect healthy, viable seeds that'll grow into next season's vibrant blooms.
Selection Secret: In Step 1, focus on pods that are firm but starting to turn slightly yellowish—this indicates they're mature but not yet overripe. I've learned the hard way that fully brown pods on the vine often mean the seeds inside have already started to degrade. Also, harvest on a dry morning after dew has evaporated to prevent moisture from getting trapped in the pods during drying.
Drying Strategy: The 2-3 week drying period in Step 2 is non-negotiable for seed viability. I recommend placing your pods in a location with a small fan providing gentle airflow—this speeds up drying without risking overheating. You'll know you've succeeded when the pods turn completely brown and make a rattling sound when shaken, like tiny maracas. This papery texture is your guarantee of good storage life.
Storage Wisdom: When storing your seeds in Step 3, consider adding a small packet of silica gel to your airtight container—it helps absorb any residual moisture. I've had seeds last their full 3-5 years when stored this way, with germination rates staying above 80%. Labeling with both the variety name AND harvest date is crucial, as different nasturtium varieties have slightly different germination requirements.
Germination Test Hack: For the optional test in Step 4, I've found that placing the damp paper towel setup on top of your refrigerator (not inside) maintains that perfect 70°F environment without needing a separate heat source. Most varieties will show sprouts within 7-10 days, but some heirloom types might take the full 14 days—patience pays off here!
Pro Tips for Collecting Nasturtium Seeds
- Avoid these common mistakes to ensure you collect healthy, viable seeds that'll grow into next season's vibrant blooms.
- Selection Secret: In Step 1, focus on pods that are firm but starting to turn slightly yellowish—this indicates they're mature but not yet overripe.
- Drying Strategy: The 2-3 week drying period in Step 2 is non-negotiable for seed viability.
Frequently asked questions
Got questions about collecting nasturtium seeds? You’re not alone!
Here are some of the most common queries—and their straightforward answers—to help you master the process like a pro.
When is the best time to harvest nasturtium seeds?
Collect seeds when the flower pods start turning yellow or brown but before they split open—usually 4–6 weeks after blooming. Snap pods off the vine and let them dry in a paper bag for 1–2 weeks. If you wait too long, seeds scatter, and you lose your harvest!
How long do nasturtium seeds stay viable for storage?
Nasturtium seeds remain viable for 2–4 years if stored properly in a cool, dry place (like a sealed envelope in the fridge). For best results, label your seeds with the variety and date—mistakes happen, and you’ll thank yourself next spring!
Can I collect seeds from store-bought nasturtium flowers?
Yes, but check the label first—some hybrid varieties (like ‘Alaska’ or ‘Empress’) may not produce true-to-type seeds. For guaranteed results, save seeds from heirloom or open-pollinated varieties. If unsure, start with seeds from a trusted nursery for consistency.
Why aren’t my nasturtiums producing seeds?
Common culprits include lack of pollinators (hand-pollinate with a soft brush if bees are scarce), over-fertilizing (too much nitrogen = more leaves, fewer flowers), or late planting (cool weather slows blooming). Try deadheading spent blooms to encourage more flowers—and seeds!
Are nasturtium seeds edible, or can I use them in cooking?
While the seeds themselves aren’t typically eaten, the young seed pods (harvested before hardening) are mildly peppery and edible—great for garnishes or pickling! For spicy kicks, use the leaves and flowers instead. Just avoid overconsumption (they contain mustard oils in small amounts).
Wrapping up and next steps
Collecting nasturtium seeds is a rewarding way to ensure vibrant blooms year after year—plus, it’s a fun, budget-friendly gardening skill! 🌱 With just a few simple steps, you’ll have fresh seeds ready for planting, saving money and connecting with nature’s cycle. Now that you’re equipped with the know-how, why not share your newfound expertise? Try swapping seeds with fellow gardeners or experimenting with heirloom varieties to expand your floral collection.
Happy growing!