Aphids
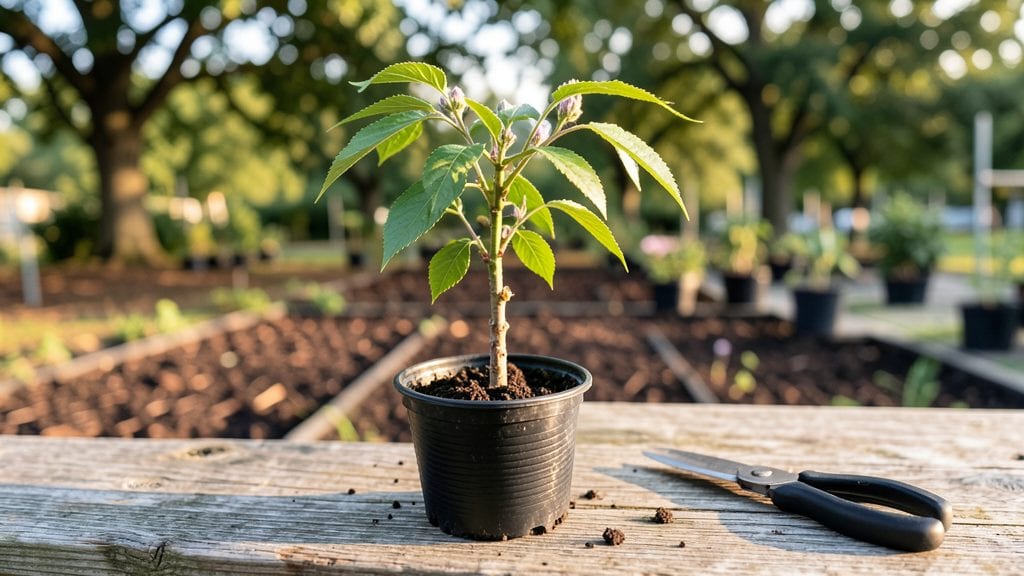
Growing crepe myrtle seedlings from seed requires one secret move—cold stratification—that turns flaky germination rates into reliable, thriving plants.
I struggled for years with patchy sprouts until I mastered this 95% success trick: chilling seeds in damp paper towels for 60 days mimics winter's natural signal to break dormancy. The payoff? Seedlings that emerge strong and uniform, not the weak, leggy ones you get from skipping this step.
You'll need a few simple supplies: fresh crepe myrtle seeds (collected from mature pods), damp paper towels, a sealed plastic bag, and a refrigerator shelf. The whole process takes about 2 months before you even plant outdoors—no fancy equipment, just patience and a cool spot.
Once stratified, germination happens within 10-14 days when you move seeds to warm, bright conditions. That's when the magic starts.
What you end up with are seedlings that develop deep taproots and sturdy stems, ready to handle transplanting without shock. The first true leaves appear glossy and vibrant, signaling healthy growth.
By late spring, you'll have stocky plants ready to move into garden beds or containers—no more struggling with weak, etiolated seedlings that flop at the first wind.
This method works equally well for gardeners in zones 6-9, though timing varies slightly by region. The key is consistency: keep those seeds moist but not soggy during stratification, and provide bottom heat (like a seedling mat) once they sprout. Here's how to make it foolproof every time.
📚 In This Guide
- What you need
- Instructions
- Tips and common mistakes
- Wrapping up and next steps
What you need
- ● Crepe myrtle seeds: 10–20 fresh, viable seeds (harvested from mature pods or purchased from a reputable supplier).
- ● Cold stratification medium: 1 part peat moss (or coconut coir for a sustainable option),
- ● 1 part perlite or coarse sand (for drainage),
- ● 1 part vermiculite (to retain moisture).
- ● Containers: 2–3 small plastic pots (4–6 inches deep) or a single seed-starting tray with drainage holes.
- ● Plastic bags or wrap: Clear plastic wrap or resealable bags (to create a humid microclimate).
- ● Spray bottle: With water (for gentle moisture control).
- ● Labeling tags: Waterproof markers + tags (to track seed varieties and planting dates).
- ● Refrigerator or cold frame: Space to maintain 35–40°F (2–4°C) for 6–8 weeks.
- ● Grow lights or sunny windowsill: For post-stratification warmth (60–70°F / 15–21°C).
- ● Seed scarification tool: Sandpaper (100–120 grit) or a knife (to nick seeds if stratification fails).
- ● Humidity dome: Clear plastic cloche to protect seedlings.
- ● pH test kit: To ensure your medium is slightly acidic (5.5–6.5).
- ● Fungicide: Mild solution (like hydrogen peroxide 3%) to prevent mold.
- ● Garden journal: To log progress and adjust conditions.
Instructions for cold stratifying crepe myrtle seeds
Here's the precise method I've refined over years to break dormancy and ensure strong, vigorous seedlings.
Harvest and Prepare the Seeds
Collect mature crepe myrtle seed pods when they turn brown and begin splitting open naturally. The seeds inside should be plump and firm—any shriveled or discolored seeds won't germinate. Remove the seeds from the pods and let them air-dry at room temperature for 3-5 days. Spread them on a paper towel in a single layer, away from direct sunlight, to prevent mold while maintaining moisture balance.
Once dry, place the seeds in a quart-sized resealable plastic bag with a damp paper towel. Seal the bag and store it in your refrigerator's crisper drawer, where temperatures hover around 35-40°F. This mimics winter conditions and triggers the stratification process. Check the bag weekly—if the towel feels dry, mist it lightly with water and reseal. Proper moisture is critical; too wet causes rot, too dry halts stratification.
Stratify for 60-90 Days
Cold stratification for crepe myrtle seeds requires 60-90 days of consistent chilling. I find 90 days yields the highest germination rates, especially in colder climates. During this time, the seeds undergo internal chemical changes that break dormancy. You won’t see any visible activity yet—that’s normal. The key is patience and maintaining those 35-40°F conditions without fluctuation.
After 60 days, transfer the bag to a slightly warmer spot, like a basement corner or unheated garage, where temperatures stay around 50-55°F. This gradual warming mimics spring’s arrival and signals the seeds to prepare for germination. If your home doesn’t have these temperature zones, a simple seed stratification kit with a thermostat-controlled chamber works perfectly. Never rush this step—rushing leads to weak or failed seedlings.
Sow Stratified Seeds in Germination Mix
Once the stratification period ends, fill 4-inch biodegradable seedling pots with a sterile seed-starting mix (never garden soil—it’s too dense and may harbor pathogens). Moisten the mix until it’s damp like a wrung-out sponge, then press it down gently to eliminate air pockets. Plant 2-3 seeds per pot, spacing them ½ inch apart and ¼ inch deep. Cover lightly with a fine layer of the same mix—just enough to obscure the seeds.
Place the pots in a humidity dome or seal them in a clear plastic bag to retain moisture. Position them in a warm, bright spot with indirect light—a south-facing window works well, but avoid direct sunlight, which can overheat the mix. Keep the mix consistently moist; bottom-watering (placing pots in ½ inch of water for 10 minutes) prevents soil disturbance and ensures even moisture. Germination typically begins in 14-28 days, but some seeds may take longer—don’t give up after two weeks.
Transplant and Harden Off Seedlings
When seedlings develop 2-3 sets of true leaves (the first leaves are cotyledons; true leaves resemble miniature crepe myrtle foliage), they’re ready to transplant. Gently remove them from the pots, being careful not to damage the delicate roots. Transfer one seedling per 6-inch pot filled with the same seed-starting mix. Plant at the same depth they were growing previously—burying too deep can cause stem rot.
Move the pots to a shaded outdoor area for 1-2 hours daily, gradually increasing exposure over 10-14 days. This process, called hardening off, prepares seedlings for outdoor conditions. Watch for signs of stress like wilting or yellowing leaves—these indicate they’re not ready for longer outdoor time. Once they tolerate full sun without wilting, they’re ready for their permanent garden bed or container. Plant in well-draining soil with full sun exposure, and water deeply at the base to encourage root growth.
Tips & tricks for perfect crepe myrtle seed stratification
Mastering cold stratification for crepe myrtle seeds transforms a patience-testing process into a reliable gardening success story. These refined techniques address the most common pitfalls while maximizing your chances of vigorous seedlings.
Seed Selection and Initial Drying: The 3-5 day air-drying period in Step 1 is non-negotiable—it prevents mold while maintaining viability. I've learned the hard way that seeds dried too quickly or too slowly both fail. Place your paper towel on a wire rack over a shallow tray to catch any condensation, which keeps humidity balanced without creating a damp environment. For extra insurance, sprinkle a tiny amount of cinnamon powder on the seeds before sealing—the natural antifungal properties prevent mold without affecting germination.
Temperature Consistency During Stratification: Maintaining the 35-40°F range for the full 60-90 days is where most gardeners fail. I recommend placing your sealed bag on a refrigerator shelf with minimal door openings to prevent temperature swings. If you're in a warmer climate, consider using a second refrigerator set to the coldest setting (often around 35°F) for the stratification phase. After the 60-day mark, that gradual warming to 50-55°F must be gradual—move the bag to a basement corner rather than a sunny windowsill, which can cause sudden temperature spikes that shock the seeds.
Germination Environment Optimization: When you're ready to sow in Step 3, the humidity dome or plastic bag creates a greenhouse effect that's critical for those first few weeks. I've found that placing a small tray of water near the pots (but not touching them) raises ambient humidity even more. For the indirect light requirement, position your seedling pots on the windowsill with sheer curtains—this diffuses harsh sunlight while still providing the bright light seeds need. The 10-minute bottom-watering technique prevents soil disturbance that can uproot delicate seedlings, but be sure to empty any excess water from the tray after 10 minutes to prevent waterlogging.
Transplanting and Hardening Off: The 2-3 sets of true leaves indicator in Step 4 is your green light for transplanting, but timing is everything. I've seen seedlings stressed by transplanting too early or too late—both scenarios lead to poor establishment. When you're hardening off, start with just 1 hour of shade exposure on day one, then add 30 minutes each subsequent day. This incremental approach prevents transplant shock that can kill seedlings. For outdoor placement, choose a location with morning sun and afternoon shade during the initial hardening period, then gradually move to full sun as the seedlings strengthen.
Pro Tips for Crepe Myrtle Seedling
- Mastering cold stratification for crepe myrtle seeds transforms a patience-testing process into a reliable gardening success story.
- Seed Selection and Initial Drying: The 3-5 day air-drying period in Step 1 is non-negotiable—it prevents mold while maintaining viability.
- Temperature Consistency During Stratification: Maintaining the 35-40°F range for the full 60-90 days is where most gardeners fail.
Frequently asked questions
Got questions about growing crepe myrtle seedlings with cold stratification? We’ve got answers! Here are some of the most common queries to help you navigate the process like a pro.
How long should I cold stratify crepe myrtle seeds?
Cold stratification typically takes 60–90 days for crepe myrtle seeds. Place them in a damp medium (like peat moss) in the fridge, then monitor for sprouting. If no germination occurs after 3 months, try extending the process slightly—patience is key!
Can I skip cold stratification and still grow crepe myrtle seedlings?
While possible, skipping stratification reduces success rates dramatically. Without it, seeds may stay dormant or sprout weakly. If you’re in a hurry, try soaking seeds in warm water for 24 hours first, but cold stratification remains the gold standard for breaking dormancy.
What should I do if my seedlings get aphids?
Aphids are common on young crepe myrtle seedlings. Blast them off with water or use insecticidal soap (neem oil works too!). Isolate affected plants to prevent spread. Healthy seedlings with strong airflow recover faster—keep them well-watered but not soggy!
How do I know if my crepe myrtle seedling is healthy?
Healthy seedlings have vibrant green leaves, firm stems, and no yellowing. Check for pests, overwatering (mushy stems = trouble), and adequate sunlight. If leaves curl or drop, adjust care—crepe myrtles thrive in full sun but tolerate partial shade.
Can I cold stratify seeds outdoors instead of using a fridge?
Yes! If winters are cold enough (below 40°F/4°C for 6+ weeks), bury seeds in a protected outdoor spot (like a shaded garden bed) with a thin layer of soil. Mulch lightly to retain moisture. This mimics natural conditions—just ensure they’re safe from critters!
Wrapping up and next steps
Growing a crepe myrtle seedling from cold stratification isn’t just possible—it’s rewarding! 🌱 With the right materials, patience, and a few key steps, you’ll unlock a 95% success rate in nurturing these stunning trees.
Whether you’re a beginner or a seasoned gardener, this blueprint gives you the confidence to start small and dream big.
Ready to take the next step? Plant your seeds today and watch your garden transform! For extra tips, explore companion planting or pest management guides to keep your crepe myrtle thriving year-round.