
Propagation
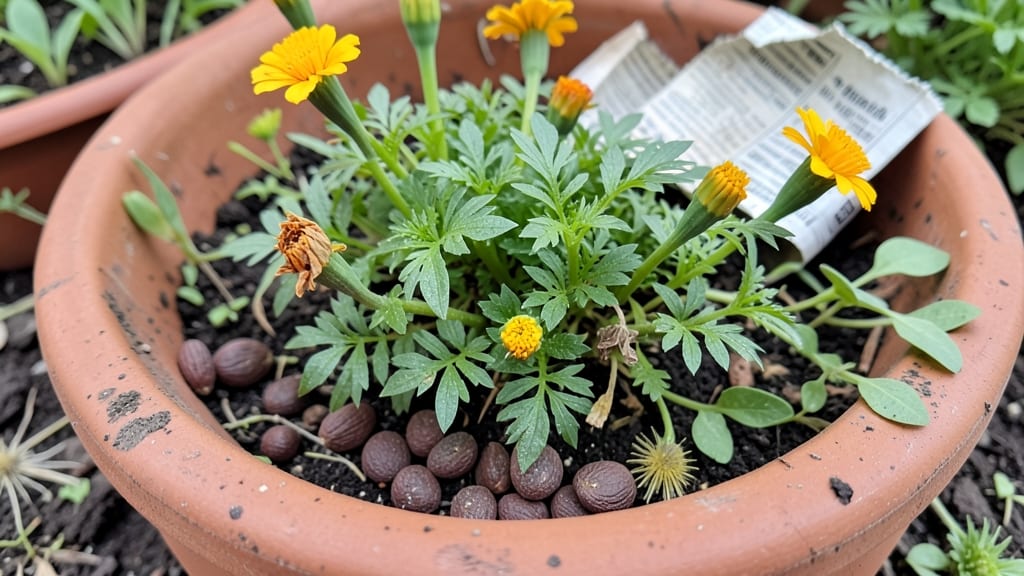
Dollar store seeds might look like a gamble, but I’ve grown shockingly lush zinnias, marigolds, and even tomatoes from them—without breaking the bank. The key isn’t luck; it’s knowing which seeds to pick, how to prep them right, and when to push through the challenges.
My first batch of dollar-store cosmos bloomed just as boldly as $4 packets, proving you don’t need deep pockets for a vibrant garden.
Start with flat-leafed seeds like sunflowers, zinnias, or beans—they’re more likely to be viable than tiny, crumbly packets. Soak them overnight to jumpstart germination, and plant in moist, warm soil where they’ll get at least 6 hours of sun daily.
Most dollar-store seeds won’t come with fancy coatings, so give them extra care: a clear plastic wrap over pots keeps humidity high until sprouts appear.
You’ll face lower germination rates, but that’s where creativity kicks in. Use companion planting—pair dollar-store marigolds with tomatoes to deter pests, or grow fast-sprouting radishes as markers for slower seeds.
Even if only half germinate, the savings let you plant twice as many varieties as a premium seed budget would allow. The payoff? A garden bursting with color and life, all for under $5 a season.
Fair warning: some seeds will flop, but that’s part of the adventure. Test a few packets first, adjust your soil mix, and soon you’ll spot the hidden gems—the packets that outperform pricier brands.
Once you master the basics, dollar-store seeds become your secret weapon for experimental, high-reward planting. Let’s turn those dollar bins into a gardener’s treasure trove.
📚 In This Guide
- What you need
- Instructions
- Tips and common mistakes
- Wrapping up and next steps
What you need
- ● Dollar store seeds: 1–2 packets of your chosen variety (e.g., marigolds, sunflowers, or herbs like basil). Check for freshness—look for seeds labeled "non-GMO" or "heirloom" if available.
- ● Seed-starting containers: Option 1: Egg cartons (cut into individual cups) – 12+ slots for small seeds.
- ● Option 2: Plastic cups (6–8 oz) – 5+ cups with drainage holes (poke them yourself if needed!).
- ● Option 3: Dollar store trays (like muffin tins or shallow plastic containers) – 1–2 trays with drainage.
- ● Potting mix: 1 bag (5–10 lbs) of seed-starting mix (sterilized, peat-based, or coconut coir blends work best). Avoid garden soil—it’s too dense!
- ● Watering can or spray bottle: A small spray bottle (for gentle watering) or a basic watering can with a fine rose attachment.
- ○ Drainage material: Optional but helpful—crushed gravel, perlite, or even coffee grounds (for moisture retention) in the bottom of containers.
- ● Labels & markers: Toothpicks or popsicle sticks + a permanent marker to track seed varieties.
- ● Grow lights or sunny windowsill: A basic LED grow light (or a south-facing window) for 12–16 hours/day of light.
- ○ Heat mat (optional): A small seedling heat mat ($10–$15) speeds up germination for slow starters like tomatoes.
- ● Fertilizer: Diluted liquid fertilizer (like fish emulsion) or worm castings for transplanting.
- ● Twine or clothespins: To create a DIY trellis for vining plants like beans or cucumbers.
How to grow a thriving garden from dollar store seeds
Here's how to transform inexpensive seeds into a vibrant seasonal display without breaking the bank.
Source and Select the Best Dollar Store Seeds
Start by scouting dollar stores for seed packets labeled "heirloom," "non-GMO," or "organic" to ensure better germination rates. Focus on fast-growing varieties like marigolds, zinnias, and sunflowers—these deliver quick visual rewards while you refine your technique. Avoid seeds with damaged packaging or those that feel damp, as these often fail to sprout or attract mold.
Check the back of each packet for a "days to maturity" estimate. Prioritize seeds that mature in 30-60 days—these give you blooms in a single season while keeping costs minimal. I always cross-reference with a planting calendar to ensure timing aligns with your local frost dates. For example, sunflowers with a 50-day maturity planted in early spring will bloom by midsummer.
Prepare Containers and Soil for Germination
Use 4-inch biodegradable pots or recycled containers with drainage holes to start seeds indoors or directly in the garden. Fill them with 2 gallons of sterile seed-starting mix—never garden soil, as it harbors diseases that can kill tender seedlings. Moisten the mix until it’s damp like a wrung-out sponge, then press it lightly into the container to eliminate air pockets.
Plant seeds at a depth equal to twice their diameter, measured from the widest point. For example, tiny marigold seeds go in ¼ inch deep, while larger sunflower seeds need ½ inch of coverage. Gently pat the soil surface to secure seeds without compacting it. Label each container with the seed type and planting date—dollar store packets often lack variety details, and you’ll want to track which ones thrive.
Optimize Light and Moisture for Germination
Place containers in a warm, bright spot where temperatures stay between 65-75°F. A seedling heat mat under trays speeds up germination, especially for slower starters like snapdragons. Keep the soil consistently moist by watering from the bottom—place trays in ½ inch of water for 10 minutes daily, then drain excess. Overhead watering can dislodge seeds or cause them to rot.
Cover containers loosely with plastic wrap or a humidity dome to retain moisture, but remove it as soon as sprouts appear—typically in 5-14 days, depending on the seed. Watch for first true leaves (the second set after the initial seed leaves) to confirm successful germination. If condensation forms on the plastic, ventilate briefly to prevent fungal growth. Dollar store seeds often have lower viability, so don’t be discouraged if only half sprout.
Harden Off and Transplant Seedlings
Two weeks before your last frost date, begin hardening off seedlings by moving them outdoors for 1-2 hours daily in a sheltered spot. Gradually increase exposure over 7-10 days until they tolerate full sun. This process toughens stems and prevents shock when transplanted. Avoid direct afternoon sun during this phase—it can scorch tender leaves.
Transplant seedlings into the garden or larger containers when they reach 2-3 inches tall and have 3-4 true leaves. Space them according to packet guidelines—crowding stresses plants and reduces bloom production. Water deeply at the base after transplanting to settle soil around roots. Mulch with 1 inch of straw to retain moisture and suppress weeds, a critical step for dollar store plants that may struggle in competitive conditions.
Maintain and Extend the Blooming Season
Once established, water dollar store perennials like coneflowers and black-eyed Susans 1 inch per week, prioritizing deep soakings over frequent shallow waterings. Feed them with ½ cup of 10-10-10 fertilizer every 4-6 weeks during the growing season to compensate for their lower nutrient content. Deadhead spent blooms regularly to encourage continuous flowering—this is especially important for annuals like zinnias, which reward prompt removal with nonstop color.
To prolong the season, succession plant fast growers like radishes or lettuce every 2-3 weeks in late summer for fall harvests. For perennials, cut back foliage in early spring to 2 inches above ground to stimulate fresh growth. Dollar store seeds often yield hardy, resilient plants—many surprise with second-year blooms if given proper care. Keep a garden journal to note which varieties perform best in your climate for future budget-friendly plantings.
Tips & tricks for perfect dollar store seed gardens
Transforming dollar store seeds into a thriving garden takes more than luck—it’s about strategic choices that maximize your budget while ensuring success. Here’s what I’ve learned from years of growing vibrant displays from inexpensive seeds.
Seed Selection Strategy: In Step 1, when choosing seeds, prioritize those labeled "heirloom" or "organic" for better germination rates. I’ve found that marigolds and zinnias consistently deliver the most reliable blooms for beginners. For the 30-60 day maturity range mentioned, focus on sunflowers—especially if you want quick, dramatic results. The 50-day sunflower variety planted in early spring will give you summer blooms, but check your local frost dates to avoid planting too early or late.
Germination Environment: The 65-75°F temperature range in Step 3 is crucial, but don’t assume your home maintains this consistently. I use a seedling heat mat under trays to ensure consistent warmth, especially for slower starters like snapdragons. For the 10-minute daily watering from the bottom, I recommend using a shallow tray with ½ inch of water—this method prevents overwatering while keeping roots moist. The key is consistency; dollar store seeds often have lower viability, so maintaining these conditions makes all the difference.
Transplanting Timing: When hardening off seedlings in Step 4, the gradual increase from 1-2 hours to full sun exposure over 7-10 days is essential. I’ve seen many beginners rush this process and end up with scorched leaves. Start with morning sun only, then gradually introduce afternoon exposure. For transplanting, wait until seedlings reach 2-3 inches tall with 3-4 true leaves—this ensures they’re strong enough to handle the transition without shock.
Long-Term Maintenance: The 1-inch weekly watering guideline in Step 5 works well, but I’ve found that mulching with 1 inch of straw isn’t just about moisture—it’s also a weed suppressor that gives your dollar store plants a fighting chance. For the ½ cup of 10-10-10 fertilizer every 4-6 weeks, I recommend mixing it with water first to prevent root burn. Deadheading spent blooms is especially important for annuals like zinnias—this simple step can double your flowering time by encouraging new growth.
Pro Tips for Dollar Store Seeds
- Transforming dollar store seeds into a thriving garden takes more than luck—it’s about strategic choices that maximize your budget while ensuring success.
- Seed Selection Strategy: In Step 1, when choosing seeds, prioritize those labeled "heirloom" or "organic" for better germination rates.
- Germination Environment: The 65-75°F temperature range in Step 3 is crucial, but don’t assume your home maintains this consistently.
Frequently asked questions
Are dollar store seeds really worth it?
While they may not offer heirloom or hybrid varieties, dollar store seeds are perfect for fast-growing, hardy plants like sunflowers, marigolds, or zucchini. They’re great for beginners, kids’ projects, or filling large garden spaces affordably. Just manage expectations—some may not be as disease-resistant as pricier seeds.
How long do dollar store seeds last?
Most seeds from dollar stores have a 1–2 year shelf life if stored properly in a cool, dry place. Check the package for a germination rate (ideally 80%+). For best results, plant them as soon as possible or store them in an airtight container with silica gel packets. Older seeds may sprout slower or less reliably.
Can I grow vegetables from dollar store seeds?
Yes! Many dollar stores carry seeds for easy-to-grow veggies like beans, peas, lettuce, and tomatoes. Look for packets labeled “organic” or “non-GMO” if that’s a priority. Just avoid rare or delicate varieties (e.g., heirloom tomatoes)—stick to fast-maturing, low-maintenance picks for best success.
What if my dollar store seeds don’t sprout?
Don’t panic! Try these fixes:
- Test viability: Soak a few seeds overnight—if they swell, they’re likely good.
- Adjust moisture: Keep soil consistently damp (not soggy) and use a spray bottle for delicate seeds.
- Check warmth: Most seeds need 65–75°F soil temps. Use a heat mat or place pots near a sunny window.
- Try a second batch: If all else fails, grab a new packet—sometimes quality varies by batch.
Are there better alternatives for cheap seeds?
If you want free or ultra-cheap seeds, explore these options:
- Seed swaps: Local gardening groups or libraries often host free seed exchanges.
- Online marketplaces: Check Facebook Marketplace or Craigslist for leftover seed packets.
- Save your own: Let veggies like tomatoes or peppers go to seed—just dry them and store for next year!
- Discount retailers: Stores like Tractor Supply or Home Depot frequently discount seeds at the end of the season.
Wrapping up and next steps
Dollar store seeds prove that growing a lush garden doesn’t have to break the bank! 🌱 From vibrant flowers to fresh herbs, these budget-friendly blooms bring joy without the high cost. Whether you're a seasoned gardener or just starting, there’s no better time to plant a seed—literally and figuratively.
Ready to turn your green thumb dreams into reality? Start small—pick a few seeds, grab your supplies, and begin your gardening journey today! Your future garden (and wallet) will thank you. 🌿