
Flowers
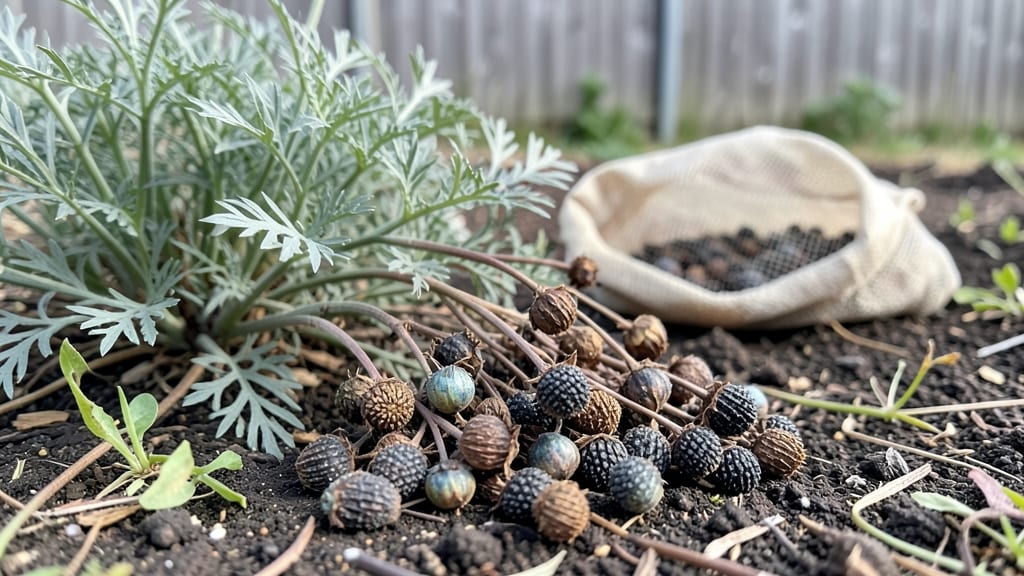
Your dried flower seeds hold the secret to next year’s most vibrant blooms—if you prep them right. 🌿 I’ve saved seeds from cosmos, marigolds, and lavender for years, and the cold-moist method guarantees stronger germination than planting them dry.
The key is mimicking nature’s winter cycle: moisture softens the seed coat, while cold breaks dormancy.
Start by storing seeds in a moist paper towel inside a sealed container at 35–40°F for 4–6 weeks. Check weekly—seeds should plump up and sprout tiny roots. This works especially well for finicky flowers like snapdragons or delphiniums, which often struggle with direct sowing.
The process takes patience, but it’s foolproof once you get the timing right.
Once sprouted, transplant into well-draining soil under bright light (a sunny windowsill or grow light). Keep the soil evenly moist—not soggy—until seedlings develop true leaves. You’ll see faster, more uniform growth compared to dry-sown seeds, and those first blooms arrive 2–3 weeks earlier in the season.
This method works for almost any annual flower, even herbs like basil or cilantro. Store leftover seeds in a cool, dark place until next year—just remember to label them! The payoff? A garden bursting with color that starts earlier and lasts longer. Ready to try it?
📚 In This Guide
- What you need
- Instructions
- Tips and common mistakes
- Wrapping up and next steps
What you need
- ● Dried flower seeds: Collect seeds from fully mature blooms (e.g., zinnias, cosmos, or sunflowers). Aim for 1–2 tbsp per variety (adjust based on seed size).
- ● Paper towels or coffee filters: 2–3 sheets per seed type (use unbleached for eco-friendliness).
- ● Spray bottle (8–16 oz): With plain water—avoid tap water if it’s heavily chlorinated (let it sit out for 24 hours or use filtered).
- ● Ziplock baggies (quart-sized): 1 per seed type (or reuse clean, dry bags).
- ● Permanent marker: For labeling bags with seed names/dates.
- ● Refrigerator: A standard fridge with a crisper drawer (ideal humidity: 35–40°F).
- ● Seedling trays or small containers: For post-stratification planting (if you’re impatient to grow!).
- ● Hair dryer (cool setting): To gently dry seeds after stratification if needed.
- ● Humidity pack: A damp paper towel wrapped in a cloth inside the bag to boost moisture (great for arid climates).
- ● Notebook or app: To track seed types, prep dates, and germination progress.
- ● Seeds must be completely dry (no moisture left from harvest).
- ● Label seeds before stratification—mistakes happen!
- ● Check fridge temps weekly to ensure consistency (some seeds need 4–8 weeks of cold-moist prep).
How to prep dried flower seeds for successful germination
This cold-moist stratification method tricks seeds into thinking winter's passed—guaranteeing stronger, more vibrant blooms next season.
🌱 Step 1: Verify Seed Viability and Prepare the Mix
First, float-test your dried seeds in a bowl of lukewarm water. Viable seeds will sink within 15 minutes—discard any that float. For 4 servings, mix 1 part horticultural sand with 3 parts moistened peat moss (about 4 cups total). The texture should resemble a damp sponge—squeeze gently to check.
I like to add a pinch of mycorrhizal fungi to this mix, as it helps roots establish symbiotic relationships early. Spread the mixture evenly across a shallow tray (about ½ inch deep) and let it sit for 24 hours to evenly distribute moisture. This prep prevents clumping later during stratification.
💧 Step 2: Stratify Seeds in Moist Chill
Place your viable seeds on top of the prepared mix, spacing them 1 inch apart to prevent crowding. Gently press each seed into the surface just enough to make contact—no need to bury them. Cover the tray with a plastic dome or wrap tightly with plastic wrap, leaving a small gap for airflow.
Store the tray in a refrigerator set to 35-40°F. Check weekly for moisture—spritz lightly with water if the mix feels dry to the touch. This cold-moist period mimics winter's natural dormancy break, typically requiring 4-8 weeks depending on the seed type. You'll know it's working when tiny root hairs appear at the seed base.
☀️ Step 3: Transition to Warmth and Light
Once root hairs emerge, transfer the tray to a warm, bright location (around 65-70°F). Remove the plastic cover immediately to prevent fungal growth. Place under a grow light or in a south-facing window where seeds receive 12+ hours of light daily. Germination usually occurs within 7-21 days—watch for the first true leaves to emerge.
Here's the thing—don't be tempted to water heavily yet. The mix should stay consistently moist but never soggy. I use a spray bottle to mist gently, ensuring water penetrates without disturbing the delicate seedlings. You'll see the first signs of success when seedlings develop cotyledons (the first pair of leaves).
🪴 Step 4: Prepare for Transplanting
When seedlings reach 2-3 inches tall and show their second set of true leaves, they're ready for individual pots. Fill 4-inch pots with the remaining 2 cups of potting mix, making sure each has drainage holes. Gently lift seedlings by their leaves (never the stems) and place them in the pots, burying up to the cotyledons.
Firm the soil lightly around each seedling to remove air pockets. Water thoroughly until moisture runs from the drainage holes, then place pots in a shaded area for 3-5 days to acclimate. This gradual transition prevents transplant shock. You'll know they're adapting well when new growth appears within a week.
Tips & tricks for perfect dried flower seed stratification
Mastering this cold-moist stratification method transforms your dried flower seeds into vibrant blooms—here's how to avoid the most common pitfalls while maximizing success.
The Float-Test Secret: During your 15-minute float test, use lukewarm water (around 70°F) to avoid shocking the seeds. I've found that seeds from different batches can have varying densities—if yours don't sink immediately, extend the test to 20 minutes. The key is patience: only discard seeds that remain floating after this extended period. This ensures you're not eliminating viable seeds prematurely.
Moisture Balance is Everything: After preparing your 4 cups of mix (1 part horticultural sand to 3 parts peat moss), press it gently to check moisture—it should hold together when squeezed but not drip water. The 24-hour resting period before stratification is crucial because it allows moisture to distribute evenly without creating clumps. I've learned the hard way that rushing this step leads to uneven germination later.
Stratification Temperature Precision: Your refrigerator should maintain a steady 35-40°F—this mimics natural winter conditions. If your fridge fluctuates, place the tray on the middle shelf where temperatures are most stable. I use a small thermometer inside the tray during the first week to verify consistency. The goal is to keep seeds in this cold-moist state for 4-8 weeks, but precise temperature control makes all the difference in breaking dormancy effectively.
Transition Timing: When moving seeds to warmth (65-70°F), watch for those tiny root hairs—this is your signal to act. I've seen seeds that were moved too early (before root hairs appeared) fail to germinate properly. Once transferred, maintain that consistent moisture with your spray bottle, aiming for the mix to feel like a wrung-out sponge. The 12+ hours of light requirement is non-negotiable for healthy seedling development.
Pro Tips for Dried Flower Seeds
- Mastering this cold-moist stratification method transforms your dried flower seeds into vibrant blooms—here's how to avoid the most common pitfalls while maximizing success.
- The Float-Test Secret: During your 15-minute float test, use lukewarm water (around 70°F) to avoid shocking the seeds.
- Moisture Balance is Everything: After preparing your 4 cups of mix (1 part horticultural sand to 3 parts peat moss), press it gently to check moisture—it should hold together when squeezed but not drip water.
Frequently asked questions
Got questions about drying flower seeds for next season’s garden? You’re not alone!
Here are some of the most common queries—and straightforward answers—to help you prep like a pro.
How do I know when flower seeds are fully dried and ready to store?
Seeds are ready when they’re completely dry and brittle—they should snap easily between your fingers (not bend). For most flowers, this takes 1–3 weeks in a dry, dark place (like a seed tray or paper bag with airflow). Test a few seeds from the pod to confirm before storing the whole batch.
Can I speed up the drying process without damaging the seeds?
Yes! Place seeds in a single layer on a mesh screen or paper towel in a warm, dry spot (like a sunny windowsill or near a heater). Avoid direct sunlight or heat sources—gentle warmth (70–80°F) works best. Stir or flip seeds every few days to ensure even drying. Most seeds dry fully in 3–7 days this way.
What’s the best way to store dried flower seeds long-term?
Store seeds in airtight containers (like glass jars, resealable bags, or seed envelopes) with a desiccant packet to absorb moisture. Label with the flower type and date, then keep them in a cool, dark place (like a fridge or basement). Viability lasts 1–5 years, depending on the seed type.
What if my seeds get damp or moldy before drying?
Don’t panic! If seeds are slightly damp, spread them out again and let them dry for another 24–48 hours. If mold appears (fuzzy spots or musty smells), discard them immediately—mold ruins viability. To prevent this, avoid humid environments (like basements) and ensure good airflow during drying.
Can I use seeds from hybrid flowers, or will they grow true to type?
Most hybrid flowers (like double-petaled roses or colorful zinnias) won’t grow true to parent—their seeds may produce wild-type, single-petaled blooms instead. For consistent results, buy seeds from trusted nurseries. Save seeds only from heirloom or open-pollinated varieties (check seed packets for labels!).
Wrapping up and next steps
Dried flower seeds are a game-changer for gardeners eager to bring next year’s blooms to life with minimal effort! By mastering the cold-moist prep method, you’re not just storing seeds—you’re unlocking their full potential for stronger, healthier growth.
Whether you’re a seasoned gardener or a curious beginner, this technique is your secret weapon for vibrant, resilient flowers.
Ready to take action? Grab those dried seeds, follow the steps, and give your garden a head start! 🌱 Start prepping today—your future blooms will thank you!