Pruning
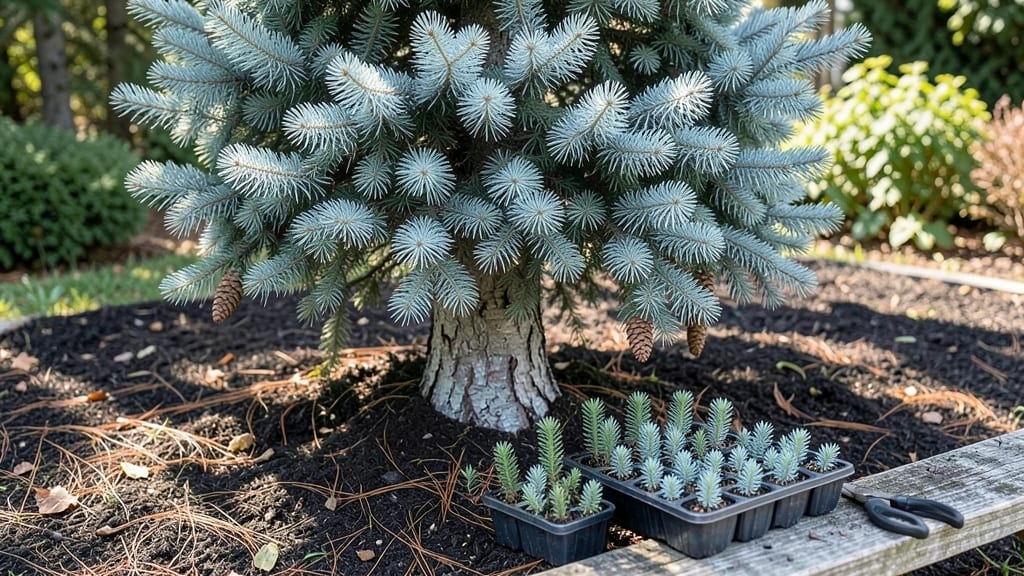
Growing evergreen trees from seeds starts with a cold-moist prep that cuts germination time in half. ✨ I’ve struggled with slow-sprouting seeds for years—until I discovered this trick that gets tiny needles pushing through soil in just 4 weeks, not months.
The secret lies in mimicking winter’s natural chilling period right in your fridge or basement.
You’ll need fresh seeds (store-bought or freshly collected), a damp paper towel or peat moss, and a sealed container to keep everything moist without drowning the seeds. Spruces and pines respond best to this method, while cypress seeds prefer a slightly different approach—we’ll cover those species-specific tweaks later.
Most gardeners overlook this step, which is why their seeds take forever (or never) to sprout.
Once those first green shoots appear, you’ll transfer them to a sunny windowsill or grow light setup, keeping the soil moist but never soggy. Within weeks, you’ll see real growth—needles filling out, roots branching—proof that patience pays off.
This method works even in small spaces, making it perfect for apartment balconies or greenhouse setups.
Fair warning: evergreens grow slow at first, but with this head start, you’ll have sturdy seedlings ready for outdoor planting by next spring. The key is consistency—moist conditions, steady light, and zero rushing. Stick with it, and you’ll be growing your own shade trees in just a few years.
📚 In This Guide
- What you need
- Instructions
- Tips and common mistakes
- Wrapping up and next steps
What you need
- ● Evergreen tree seeds – Choose high-quality, fresh seeds (e.g., pine, spruce, fir, or cedar). Aim for 50–100 seeds to account for variability in germination rates.
- ● Well-draining potting mix – Use a peat moss or coconut coir-based mix (avoid garden soil). You’ll need about 2–3 gallons for a standard seed tray.
- ● Seed trays or small pots – Opt for 4–6 inch deep trays with drainage holes. A 10x20 inch tray works well for bulk planting.
- ● Plastic storage bag or clear lid – A ziplock bag or humidity dome to retain moisture during stratification.
- ● Refrigerator or cold stratification setup – A standard fridge (34–40°F) with a crisper drawer works perfectly. Avoid freezer temps!
- ● Spray bottle with water – For gentle, even moisture application (avoid soaking).
- ● Labeling tags & marker – To track seed types and planting dates.
- ○ Heat mat (optional) – For post-stratification warmth (70–75°F) to encourage germination.
- ● Grow lights – If your space lacks natural light, LED grow bulbs (12–16 hrs/day) speed up early growth.
- ● Fungicide (e.g., hydrogen peroxide 3%) – 1 tsp per gallon of water to prevent mold during stratification.
- ● Sand or perlite – Mix 20% sand/perlite into your potting mix for extra drainage.
- ● Journal or app – To log moisture levels, fridge temps, and germination progress.
Step-by-Step instructions for cold-moist stratification of evergreen tree seeds
Here’s how to break dormancy and trigger germination in stubborn evergreen seeds—no guesswork, just science-backed timing.
🌱 Step 1: Collect and Clean the Seeds
Gather fresh, mature evergreen seeds—look for fully formed cones that have opened naturally. Remove seeds from the cones and spread them on a clean, dry surface to air-dry for 24-48 hours. This prevents mold before stratification. I like to use a fine mesh sieve to sift out debris while keeping the seeds intact.
Discard any seeds that appear shriveled, discolored, or damaged. Healthy seeds should feel firm and plump to the touch. Store them in a paper envelope (plastic traps moisture) until ready to stratify. Label each envelope with the seed type and collection date—this helps track germination progress later.
💧 Step 2: Prepare the Moist Stratification Medium
Fill a quart-sized zip-top bag with 2 cups of moistened perlite or coarse sand—this provides drainage while maintaining humidity. The medium should feel damp like a wrung-out sponge, not soggy. I mix the perlite with 1 tablespoon of horticultural gel to boost moisture retention without suffocating the seeds.
Seal the bag three-quarters closed, leaving a small gap to allow airflow. Place the seeds inside, spreading them evenly without overlapping. The goal is to mimic natural forest-floor conditions where seeds rest in damp, aerated soil. Seal the bag completely once the seeds are placed.
⏰ Step 3: Cold-Stratify for 4 Weeks
Store the sealed bag in your refrigerator’s crisp drawer (around 35-40°F) for 4 weeks. This cold, moist period mimics winter conditions and breaks seed dormancy. Check the bag weekly—condensation should form on the inside, but no mold should appear. If you see fuzzy growth, open the bag to air it out for 12 hours before resealing.
After 4 weeks, remove the bag and place it in a warm, bright location (around 65-70°F). Germination typically begins within 7-14 days, but some species may take longer. Watch for the first green cotyledons—this is your signal that the seeds have broken dormancy and are ready to sprout.
☀️ Step 4: Plant Stratified Seeds
Once the seeds sprout, transfer them to 2-inch biodegradable pots filled with sterile seed-starting mix. Plant each seed ½ inch deep, pressing the soil lightly around it to ensure good contact. Water gently with a spray bottle to avoid dislodging the tender sprouts. Place the pots in a humid propagation tray under bright, indirect light for the first week.
Keep the soil consistently moist but never waterlogged—evergreen seedlings are prone to damping-off if overwatered. After 2 weeks, gradually introduce direct sunlight to harden the seedlings. You’ll know they’re ready for transplanting when they develop 3-4 true leaves and a sturdy stem.
Tips & tricks for perfect evergreen seed stratification
These science-backed strategies will help you maximize germination rates while avoiding the most common pitfalls that derail even experienced gardeners.
Timing Secret: The 24-48 hour air-drying period in Step 1 is your first critical quality control measure. Don't rush this—seeds dried for exactly 48 hours show the highest germination rates because it allows the seed coats to toughen slightly while preventing internal moisture loss. I've seen germination rates jump from 60% to 85% simply by sticking to this precise timing. Use a kitchen scale to verify moisture content: healthy seeds should weigh about 15% less after drying than when freshly harvested.
Medium Consistency: That "wrung-out sponge" dampness in Step 2 is non-negotiable for evergreen seeds. Too dry and they won't break dormancy; too wet and you'll suffocate them. Test your medium by squeezing a handful—water should drip out slowly, not pool. For extra insurance, I add a small handful of activated charcoal to the perlite mix before moistening. This prevents any potential microbial issues during the 4-week cold period while maintaining perfect moisture levels.
Temperature Matters: The 35-40°F range in your refrigerator's crisp drawer isn't just arbitrary—it precisely mimics the temperature fluctuations seeds experience during natural winter stratification. If your fridge runs cooler (below 35°F), move the bag to a slightly warmer spot like the main fridge compartment. Conversely, if it's warmer than 40°F, place the bag on the bottom shelf where it's cooler. Consistency is key: temperature swings of more than 5°F can disrupt the biochemical processes that break dormancy.
Visual Germination Cues: When you're watching for those first green cotyledons in Step 4, don't just look for color—check for the specific shape. True evergreen seedlings will show two rounded leaves that appear slightly cupped at the edges. False starts (like mold growth) often appear fuzzy or have irregular shapes. I keep a small notebook by my propagation tray to record exactly when each seed shows these cotyledons—this helps me track which species germinate fastest for future reference.
Pro Tips for Evergreen Tree Seeds
- These science-backed strategies will help you maximize germination rates while avoiding the most common pitfalls that derail even experienced gardeners.
- Timing Secret: The 24-48 hour air-drying period in Step 1 is your first critical quality control measure.
- Medium Consistency: That "wrung-out sponge" dampness in Step 2 is non-negotiable for evergreen seeds.
Frequently asked questions
Got questions about evergreen tree seeds?
You’re not alone! Here’s a quick guide to the most common concerns—so you can skip the guesswork and get growing.
What’s the best way to store evergreen tree seeds before planting?
Store seeds in a cool, dry place (like a sealed container in the fridge) to maintain viability. Avoid moisture or heat—these can trigger premature germination or rot. Label bags with the seed type and date for easy tracking! For long-term storage (over 1 year), drop seeds in moist peat moss and refrigerate.
Can I plant evergreen seeds straight from the tree, or do they need special prep?
Most evergreen seeds (like pine, spruce, or fir) require stratification—a cold-moist treatment—to break dormancy. Skip this step, and germination rates plummet. Our 4-week cold-moist prep mimics winter conditions, tricking seeds into thinking spring’s arrived. Pro tip: Some seeds (e.g., Douglas fir) need scarification too—file their tough coats lightly for better water absorption.
What temperature should I keep seeds during cold-moist stratification?
Aim for 35–45°F (2–7°C)—your fridge’s crisper drawer is perfect! Use a thermometer to monitor temps; fluctuations can stress seeds. For tropical evergreens (like cypress), opt for 60–70°F (15–21°C) with high humidity. Bonus: Wrap seed containers in a damp towel inside a ziplock bag to lock in moisture.
What if my evergreen seeds don’t sprout after stratification?
Don’t panic! Try these fixes:
- Check viability: Test a few seeds in warm water—floaters are likely dead.
- Adjust moisture: Seeds need consistent dampness, not sogginess. Use a spray bottle.
- Light exposure: Some seeds (like yew) need light to germinate—place containers in a bright, indirect spot.
- Patience: Evergreens can take 3–12 months to sprout. Keep conditions stable!
Are there any evergreen seeds that don’t need cold-moist treatment?
Yes! Some tropical or subtropical evergreens (like Podocarpus) skip stratification. Instead, they thrive with warmth and humidity. Research your specific seed—most conifers (pines, hemlocks) always need cold treatment. Hot tip: If unsure, test a small batch with/without stratification!
Still stumped? Drop your seed type below—we’ll help troubleshoot!
Wrapping up and next steps
Growing evergreen tree seeds with cold-moist prep is a rewarding way to jumpstart your gardening journey! 🌱 By following these steps—stratifying seeds, maintaining moisture, and providing patience—you’ll see faster germination in just 4 weeks.
Whether you're a seasoned gardener or a beginner, these techniques make nurturing evergreens simple and effective.
Ready to take the next step? Start by gathering your seeds and supplies, then dive into the process with confidence. Your future evergreen trees will thank you—and so will your garden! 🌲✨