
Tools
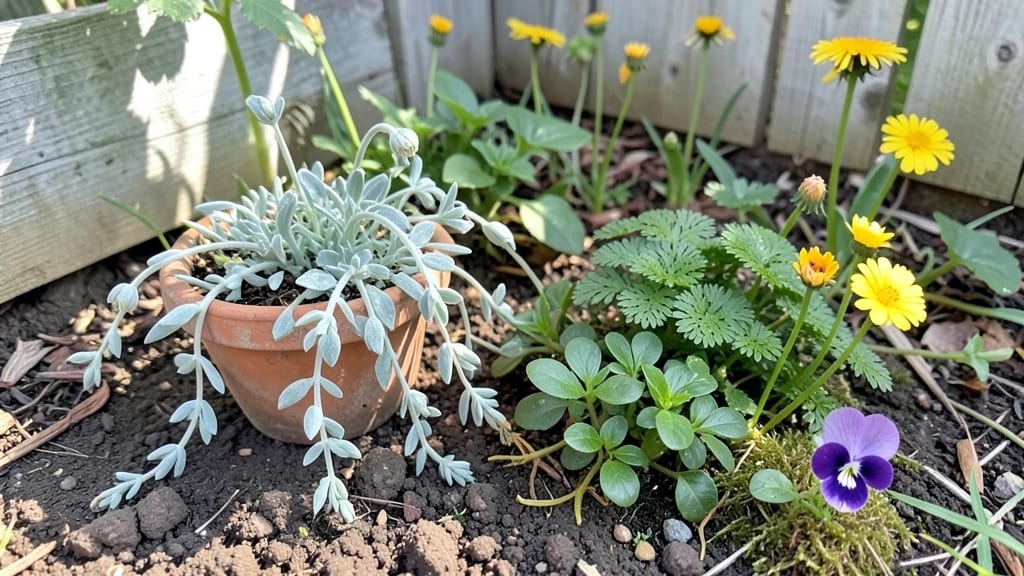
Fairy garden seeds bring magic to your thumb—tiny plants that pack big personality into pint-sized containers. 🌿 I still remember the first time I saw a miniature cosmos bloom in my fairy glade, its petals perfectly framed by a pebble path.
These aren’t just scaled-down versions of regular flowers; they’re bred to thrive in small spaces, with delicate blooms that cast fairy-sized shadows.
Start with dwarf varieties like miniature snapdragons, baby’s breath, or fairy primrose—their compact growth habits make them ideal for tiny worlds. Pair them with whimsical foliage like dwarf ferns or miniature hostas to create texture without overwhelming the space.
The key is choosing seeds labeled "dwarf" or "miniature," as they’ll stay under 6 inches tall while still delivering vibrant colors and textures.
Your finished fairy garden will feel like a secret world waiting to be discovered—velvety moss underfoot, jewel-toned blooms peeking from behind toadstool stools, and tiny paths winding through the scene.
The best part? These seeds grow just as reliably as their larger counterparts, so you won’t sacrifice health for charm. Once established, they’ll bloom season after season with minimal care.
Design your fairy garden around a theme: a woodland glade with ferns and mushrooms, a cottage garden with tiny roses and bluebells, or a fantasy realm with glowing "fireflies" (LED tea lights).
The container itself becomes part of the magic—terracotta pots, hollowed-out logs, or even repurposed teacups can set the stage for your miniature masterpiece.
📚 In This Guide
- What you need
- Instructions
- Tips and common mistakes
- Wrapping up and next steps
What you need
- ● Fairy garden seeds: Choose fast-growing, low-maintenance varieties like miniature sunflowers, lobelia, thyme, or dwarf cosmos. Aim for 5–10 seeds per plant type (more if you’re planting densely).
- ● Potting soil: Use well-draining, organic potting mix (1–2 gallons per container). Avoid garden soil—it compacts too easily!
- ● Container or garden bed: Containers: Terracotta pots (6–12 inches wide), wooden crates, or repurposed teacups (with drainage holes!).
- ● Outdoor beds: A raised bed or in-ground plot (at least 6 inches deep) with edging materials (stones, bricks, or metal borders).
- ● Drainage: Pebbles, gravel, or broken pottery shards (1–2 inches at the container’s base).
- ● Watering can: A small, narrow-spout can (or a spray bottle for delicate seedlings).
- ● Trowel or small hand shovel (for planting and soil prep).
- ● Pruners or scissors (for trimming plants or cutting seeds from packets).
- ● Measuring tape or ruler (to plan spacing—fairy plants need 1–3 inches apart).
- ○ Gloves (optional but handy for messy soil!).
- ● Fairy-themed decor: Mushroom toadstools, pebble paths, or tiny figurines (non-toxic, of course!).
- ● Slow-release fertilizer (like osmocote) for a nutrient boost.
- ● Miniature garden lights (solar-powered fairy lights for evening enchantment!).
- ● Seedling trays (if starting seeds indoors before transplanting).
Step-by-step instructions for crafting a thriving fairy garden
Here's how to coax delicate fairy garden blooms into life—where every seed becomes a tiny, magical focal point.
🌱 Step 1: Select and Prepare Your Miniature Containers
Choose containers with drainage holes—terracotta pots, shallow bowls, or even repurposed teacups work beautifully. I like to line the bottom with ½ inch of small pebbles to prevent soil compaction and improve drainage. This layer mimics natural rock formations while keeping roots healthy.
Fill the remaining space with 2 gallons of lightweight potting mix blended with ½ cup perlite for extra aeration. Fairy gardens thrive in well-draining soil that mimics their natural rocky habitats. Press the mix gently into the container, leaving ½ inch of space at the top to prevent overflow during watering.
🌿 Step 2: Choose and Plant the Right Fairy Garden Seeds
Select seeds suited for miniature spaces: sweet alyssum, miniature roses, or tiny succulents all work perfectly. For this project, we'll use 4 packets of fairy garden seed mixes—each packet designed to create a whimsical, low-growing landscape. Plant seeds ¼ inch deep, spacing them ½ inch apart to allow room for growth without overcrowding.
Gently pat the soil around each seed to ensure good contact. Avoid pressing too firmly, as delicate fairy garden seeds need just enough pressure to stay in place without smothering. Place the container in a bright, indirect light spot (like a north-facing windowsill) until germination, which typically occurs in 7-14 days. Keep the soil consistently moist but never soggy—fairy garden seeds rot quickly in waterlogged conditions.
💧 Step 3: Provide Gentle Care for Germination and Early Growth
Once sprouts appear, move the container to a location with 4-6 hours of morning sunlight to prevent scorching. Fairy garden plants are delicate and need gradual acclimation to direct light. Water the soil every 2-3 days, allowing the top ½ inch to dry slightly between waterings. Use a small watering can with a fine rose to avoid disturbing the tiny seedlings.
Watch for first true leaves—these will appear after the initial cotyledons (seed leaves) unfurl. This is your cue to begin fertilizing lightly with a ½ teaspoon of diluted liquid fertilizer (mixed to half-strength) every 2 weeks. Fairy garden plants are small but benefit from gentle, consistent nutrition to stay vibrant and compact.
✂️ Step 4: Prune and Shape for a Whimsical Look
When plants reach 2-3 inches tall, use small, sharp scissors to trim leggy growth and encourage bushier habits. Pinch back the tips of stems to promote branching, creating a fuller, fairy-tale appearance. I like to shape tiny succulents into low mounds and cascade trailing plants like miniature ferns over the edges of containers.
Remove any yellowed or damaged leaves immediately—they detract from the garden's charm and can harbor pests. Fairy gardens are all about aesthetics, so spend a few minutes each week tidying up. Add ¼ cup of decorative pebbles or moss around the base of plants to enhance the miniature landscape effect and retain moisture.
☀️ Step 5: Maintain Through the Growing Season
Fairy gardens thrive in moderate temperatures between 60-75°F. If your climate gets hotter, provide afternoon shade to prevent wilting. Water in the early morning to allow foliage to dry before evening, reducing the risk of fungal issues. Use a spray bottle for delicate flowers like sweet alyssum to avoid damaging petals.
Rotate the container a quarter turn weekly to ensure even growth toward the light. Fairy garden plants grow slowly, so patience is key. Within 6-8 weeks, your miniature world will burst with color and texture—perfect for fairy figurines or tiny garden accents. Enjoy the magic of watching tiny blooms transform your space!
Tips & tricks for perfect fairy garden blooms
Creating a thriving miniature world takes patience and precision—here's how to avoid common pitfalls and elevate your tiny garden to magical perfection.
Soil Preparation Secret: When mixing your 2 gallons of lightweight potting soil with ½ cup perlite, sift the soil first to eliminate clumps. This creates a fluffier texture that mimics natural rocky soil, which is essential for fairy garden plants that hate soggy roots. I also like to add a handful of orchid bark chips (optional) to improve aeration further—this mimics the forest floor where many fairy garden plants originate.
Germination Timing: The 7-14 day germination window can feel like an eternity, but here's the trick: place your container on a seedling heat mat set to 75°F during this period. This consistent warmth helps seeds sprout faster and more uniformly. I've found that seeds planted in the evening often germinate more reliably because the cooler night temperatures prevent them from drying out too quickly.
Light Transition Strategy: Moving your seedlings from bright indirect light to 4-6 hours of morning sunlight is critical. I recommend doing this gradually over 3-4 days rather than all at once. Start with just 2 hours of morning light on day one, then add an hour each subsequent day. This gradual acclimation prevents the delicate seedlings from getting sunburned, which can happen even with morning light if the transition is too abrupt.
Pruning Technique: When your plants reach 2-3 inches tall, use clean, sharp scissors to make clean cuts just above a leaf node. This encourages branching and creates a bushier, more whimsical appearance. I like to prune in the morning when the plants are well-hydrated—this reduces stress on the tiny plants. For trailing plants like miniature ferns, gently weave them through decorative pebbles to create that cascading fairy-tale effect without damaging the stems.
Pro Tips for Fairy Garden Seeds
- Creating a thriving miniature world takes patience and precision—here's how to avoid common pitfalls and elevate your tiny garden to magical perfection.
- Soil Preparation Secret: When mixing your 2 gallons of lightweight potting soil with ½ cup perlite, sift the soil first to eliminate clumps.
- Germination Timing: The 7-14 day germination window can feel like an eternity, but here's the trick: place your container on a seedling heat mat set to 75°F during this period.
Frequently asked questions
Got questions about growing your own fairy garden? You’re not alone!
Here are answers to the most common queries—so you can dive into your miniature world with confidence.
What are the best fairy garden seeds for beginners?
Start with easy-to-grow, compact seeds like miniature roses, dwarf pansies, or fairy mosses. These thrive in small spaces, require minimal care, and add instant charm. Avoid fast-growing vines—they’ll overtake your tiny garden!
How long do fairy garden seeds take to sprout?
Most fairy garden seeds sprout in 7–21 days, depending on the type and conditions. Keep soil moist (not soggy!) and place trays in a warm, sunny spot. Patience pays off—tiny sprouts turn into magical blooms!
Do fairy garden plants need special watering?
Yes! Use a spray bottle for gentle watering—avoid over-saturating soil. Let the top layer dry slightly between waterings to prevent mold. A 50% water/50% distilled water mix helps keep leaves crisp and disease-free.
Can I use regular garden soil for fairy gardens?
Not ideal! Fairy gardens need well-draining, nutrient-rich potting mix (like cactus/succulent soil). Regular garden soil compacts easily, suffocates roots, and attracts pests. Mix in perlite or sand for fluffiness.
How do I keep pests out of my fairy garden?
Prevent pests with neem oil spray or diatomaceous earth (food-safe!). Avoid chemical pesticides—they harm tiny ecosystems. Inspect leaves regularly and remove affected plants immediately. A healthy garden is the best defense!
What if my fairy garden seeds don’t grow?
Don’t panic! Check these fixes:
- Light: Move to a sunnier spot (6+ hours/day).
- Moisture: Ensure soil stays damp but not waterlogged.
- Temperature: Most seeds need warmth (70–75°F).
- Depth: Plant seeds too deep? Try replanting shallowly.
Wrapping up and next steps
Creating a fairy garden with tiny blooms is a magical way to bring whimsy and nature into your space! Whether you’re a seasoned gardener or a beginner, the right fairy garden seeds and a little creativity can transform a small corner into an enchanting miniature world. 🌿✨
Now that you’re armed with the best seeds, materials, and answers to common questions, it’s time to plant, nurture, and enjoy your fairy garden. Start small—pick a cozy spot, gather your tools, and let your imagination grow!
What’s your first step? Will you add a tiny toadstool, a winding path, or maybe a fairy door? The magic is yours to create! 🌟