
Propagation
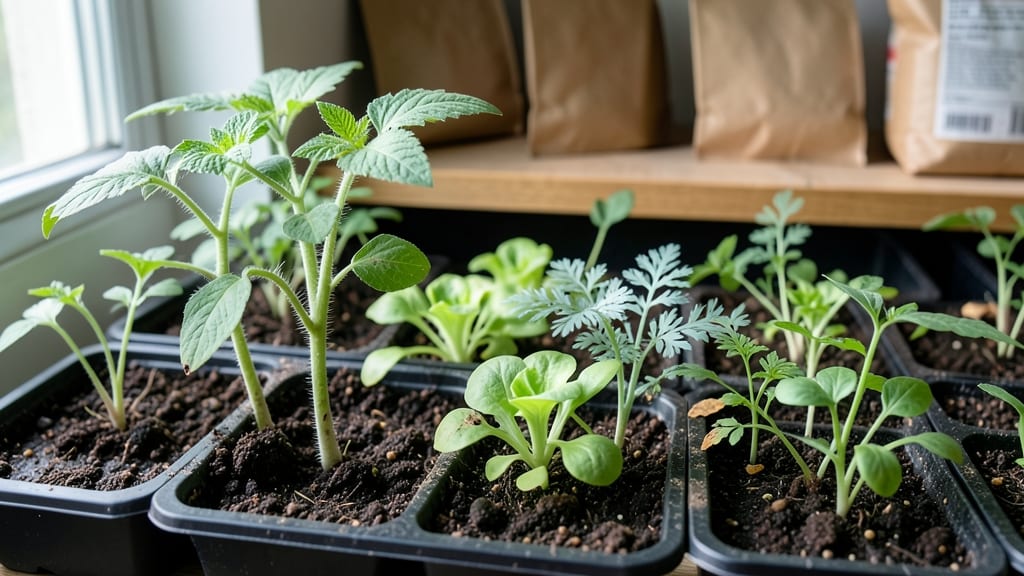
Starting food from seeds is where every harvest begins—whether you're growing crisp lettuce in 30 days or heirloom tomatoes that feed you all summer. 🌱 I remember my first time watching those tiny sprouts push through soil, and it changed how I saw gardening forever.
The magic isn't just in the seeds themselves but in how they transform your space and your table with just sunlight, water, and patience.
You don't need fancy supplies to begin. A simple tray, some seed-starting mix, and a bright windowsill or grow light are all it takes to get fast-growing crops like radishes, spinach, or green onions in the ground within two weeks.
Even slow starters like peppers and eggplants just need the right warmth and consistency—no green thumbs required. The key is matching each seed's needs to what you can provide, and I'll show you exactly how.
By the time you're pinching off those first baby leaves or harvesting your first homegrown bean, you'll understand why seed-growing feels like unlocking a secret garden. The flavors, the satisfaction, and the way fresh herbs smell when you brush past them—it's a game-changer for any kitchen.
Plus, you'll save money and avoid the mystery ingredients in store-bought produce.
This works for city balconies, suburban backyards, or even a sunny kitchen counter. The only limit is what you want to grow. Let's get those seeds sprouting and turn your space into a harvest hub!
📚 In This Guide
- What you need
- Instructions
- Tips and common mistakes
- Wrapping up and next steps
What you need
- ● Seeds: Choose high-quality, non-GMO seeds suited to your climate. Start with easy-to-grow varieties like: Leafy greens (e.g., lettuce, spinach, kale)
- ● Herbs (basil, cilantro, dill)
- ● Root veggies (radishes, carrots, beets)
- ● Microgreens (broccoli, sunflower, pea shoots)
- ● Growing Containers: Seed trays (biodegradable or plastic, 10x20 inches)
- ● Pots (4-6 inches deep, with drainage holes)
- ● Window boxes or raised beds (for larger plants)
- ● Growing Medium: Seed-starting mix (sterile, lightweight, and well-draining)
- ● Potting soil (for transplanting seedlings)
- ● Watering Tools: Spray bottle (for delicate seedlings)
- ● Watering can with a fine rose nozzle
- ● Basic Tools: Trowel or small hand shovel
- ● Pruners (for harvesting)
- ● Measuring tape or ruler (for spacing seeds)
- ○ Lighting (Optional but Helpful): Grow lights (LED or fluorescent, 12-16 hours/day for seedlings)
- ● Sunny windowsill (south-facing for maximum light)
- ○ Climate Control (Optional): Heat mat (for germinating cold-sensitive seeds)
- ● Humidity dome or plastic wrap (to retain moisture)
- ● A dedicated space (indoor or outdoor) with access to natural light or artificial lighting.
- ● Basic knowledge of seed-packet instructions (planting depth, spacing, and care tips).
- ● Patience and consistency—seeds need regular care to thrive! 🌱
Step-by-step instructions for starting food crops from seeds
Here's how to turn tiny seeds into a year-round harvest with minimal fuss.
🌱 Step 1: Select and Prepare Your Seeds
Choose seeds labeled for your growing zone—check the packet for days to maturity to plan harvest timing. I like to soak seeds overnight in lukewarm water for 12 hours before planting; this softens the outer shell and speeds germination. Just don't soak too long—24 hours max, or they'll rot.
For seeds like tomatoes or beans, a quick 5-minute soak works. For tiny seeds like lettuce or carrots, mix them with a little sand in a shallow dish to prevent clumping. This ensures even spacing when you transfer them to soil. Label each container with the seed type and planting date—you'll thank yourself later.
🪴 Step 2: Fill Containers with Light, Fertile Soil
Use a seed-starting mix (not garden soil) to fill your containers to within ½ inch of the rim. Press down lightly to remove air pockets but don't compact it—you want soil that holds moisture but still lets roots breathe. I like to add a handful of perlite to the mix for extra drainage.
Water the soil until it's damp but not soggy. You'll know it's right when a handful forms a loose ball that crumbles easily. Avoid overwatering now—you're prepping for seeds, not germinating yet. If the soil feels dry on top after a few days, give it a light mist with a spray bottle.
💧 Step 3: Plant Seeds at the Right Depth and Cover
Follow the packet's depth guidelines—usually 2-3 times the seed's diameter. Tiny seeds like basil go in ¼ inch deep, while larger ones like beans need 1 inch. I use a toothpick to make small holes and drop seeds in one by one. Cover lightly with soil and pat down gently.
Mist the surface with water until it looks evenly damp. Don't use a watering can—it'll wash seeds away or bury them too deep. Place containers in a warm spot (around 70-75°F) and cover with plastic wrap or a humidity dome. Check daily for condensation; if it's heavy, lift the cover for 10 minutes to prevent mold.
☀️ Step 4: Provide Light and Monitor Germination
Once seeds sprout (usually 5-14 days, depending on the type), remove the cover immediately. Place seedlings under a grow light or in a south-facing window where they get 12-16 hours of light daily. Without enough light, they'll stretch toward the sun and become weak.
Water from the bottom by setting containers in a tray of ½ inch of water for 10 minutes. This prevents damping-off disease, which kills young seedlings by rotting their stems. You'll know they're getting enough water when the soil feels damp 1 inch down but not waterlogged.
✂️ Step 5: Thin and Transplant for Strong Growth
When seedlings have 2-3 true leaves (not just the first tiny ones), thin them so they're 2-3 inches apart. Use scissors to snip unwanted seedlings at soil level—pulling can disturb roots. For leafy greens, harvest the thinned seedlings by snipping at the base and adding them to salads.
After 4-6 weeks, transplant seedlings to larger containers or the garden, burying them to the first set of true leaves. This encourages strong root growth. Harden them off first by placing them outside for 1-2 hours daily for a week before moving them permanently.
Tips & tricks for perfect seed starting
Here's what I learned after years of growing from seeds—and how to avoid the common pitfalls that trip up beginners.
Soaking Secrets: The 12-hour overnight soak works wonders for most seeds, but timing is everything. Place seeds in a bowl of lukewarm water (not hot) and let them soak at room temperature. For seeds like beans that only need 5 minutes, set a timer—over-soaking can actually damage them. After soaking, drain immediately and plant right away to prevent drying out.
Soil Science: That ½ inch gap between soil and container rim isn't just for looks—it prevents soil from spilling when you water. I like to use clear containers so I can monitor root growth without disturbing the soil. For extra drainage, add a layer of pebbles at the bottom before adding your seed-starting mix. This creates air pockets that prevent root rot.
Lighting Strategy: Those 12-16 hours of light are non-negotiable for strong seedlings. If you don't have a grow light, place your seedlings within 6 inches of a south-facing window. Rotate containers daily so all sides get even light—uneven exposure causes lopsided growth. I notice seedlings stretch dramatically when they're light-deprived, so keep an eye out for that classic "leggy" look.
Transplant Timing: The 4-6 week window for transplanting might seem flexible, but don't rush it. Seedlings need strong roots before going outdoors. Look for sturdy stems and dark green leaves as signs they're ready. For the 1-2 hour hardening off process, start with just 30 minutes on the first day—gradually increase time to avoid shocking tender seedlings.
Pro Tips for Food From Seeds
- Here's what I learned after years of growing from seeds—and how to avoid the common pitfalls that trip up beginners.
- Soaking Secrets: The 12-hour overnight soak works wonders for most seeds, but timing is everything.
- Soil Science: That ½ inch gap between soil and container rim isn't just for looks—it prevents soil from spilling when you water.
Frequently asked questions
Got questions about growing food from seeds? You’re not alone!
Whether you're a beginner or just curious about maximizing your harvest, here are some of the most common questions—and answers—to help you get started with confidence.
How long does it take for seeds to sprout?
Sprouting time varies by seed type. Fast growers like radishes or beans may sprout in 3–7 days, while slower seeds (e.g., tomatoes or peppers) can take 1–3 weeks. Check the seed packet for specifics—most include ideal germination temps and days to sprout. Patience is key!
Do seeds need light to germinate?
Nope! Seeds germinate best in darkness—they need moisture, warmth, and oxygen, not light. Once they’ve sprouted (1–2 inches tall), move them to a sunny spot or under grow lights. Overwatering or exposing them to light too soon can stunt growth.
Can I grow food from seeds if I don’t have a garden?
Try container gardening—herbs like basil or lettuce thrive in pots on a balcony. For urban spaces, vertical gardens or hydroponics work too. Even microgreens sprout in shallow trays on a windowsill. Start small and scale up!
What’s the best way to store seeds for next year?
Keep seeds in a cool (35–40°F), dry place like a sealed jar or envelope in the fridge. Avoid humidity or direct sunlight. Label seeds with the date—most stay viable for 1–5 years, depending on the type (e.g., beans last 3–4 years; onions, 1–2).
Why aren’t my seeds sprouting?
Common culprits: old seeds, incorrect moisture (too dry/wet), or wrong soil temps. Test a few seeds in a damp paper towel—if they don’t sprout in 7–10 days, they may be non-viable. Adjust care (e.g., warmth, light) and try again!
Wrapping up and next steps
From tiny seeds to bountiful harvests, growing your own food is one of the most rewarding adventures you can take! 🌱 Whether you're a seasoned gardener or just starting out, the key takeaway is that almost any seed can become a meal—with the right knowledge and a little patience.
You’ve got the tools, the answers to common questions, and now, the confidence to turn your space into a thriving food source year-round.
Ready to take the next step? Start small—pick one or two seeds you love, plant them, and watch your green thumb grow! Share your progress, experiment with new varieties, and soon, you’ll be enjoying fresh, homegrown food straight from your own backyard. Happy growing! 🌟