
Propagation
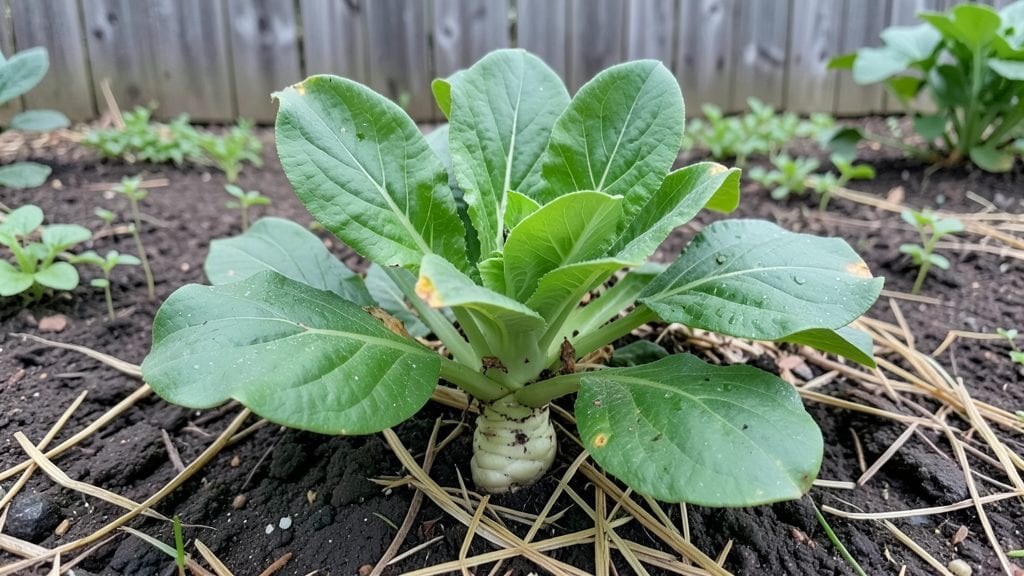
Growing wasabi from the root seeds lets you cultivate that signature fiery kick in your own backyard—if you're willing to play the long game. 🌱 I started with tiny seeds last spring and now have plants pushing through the soil, though it took patience (and a few failed batches) to get here.
The payoff? Fresh wasabi for sushi, sauces, or even home remedies, straight from your garden.
You'll need a cool, shaded spot with moist, well-draining soil—think dappled forest light or a north-facing bed. Wasabi seeds are finicky: plant them just ¼ inch deep in early spring, keep the soil consistently damp (not soggy), and expect germination in 4-8 weeks.
The real challenge? Slow growth—these plants take 2-3 years to mature, but the wait is worth it for that signature heat.
Once established, your wasabi will reward you with dark green, arrow-shaped leaves and, eventually, the rhizomes you can harvest. The key is consistent moisture—drought stress kills them fast—and protecting them from slugs, which adore young seedlings.
With the right care, you'll have a thriving patch that outpaces store-bought wasabi in flavor and potency.
If seeds feel too slow, consider rhizome divisions from mature plants—they grow faster but require more upfront investment. Either way, wasabi thrives in zones 5-8, so check your frost dates before planting. Here’s how to get those first sprouts without losing hope along the way.
📚 In This Guide
- What you need
- Instructions
- Tips and common mistakes
- Wrapping up and next steps
What you need
- ● Ready to grow your own fiery wasabi harvest? Here’s everything you’ll need to get started—whether you’re a seasoned gardener or a curious beginner! 🌱✨
- ● Pro tip: 💡 Sterilize tools with rubbing alcohol to prevent mold or disease—wasabi is sensitive to fungal issues!
Step-by-Step instructions for cultivating wasabi root from seeds
Growing wasabi from seeds is a rewarding challenge—here’s how to coax these fiery rhizomes from tiny starts.
🌱 Step 1: Prepare Seeds and Germinate in Warmth
Wasabi seeds need warmth and patience—they germinate slowly, often taking 4-8 weeks to sprout. Soak seeds in lukewarm water for 24 hours to soften the tough outer coating. Place them in a damp paper towel inside a sealed plastic bag, then position the bag on top of a seedling heat mat set to 75-80°F.
Check daily for moisture—seeds should stay damp but not soggy. You’ll know germination is underway when tiny white roots appear, followed by a small sprout. This is the moment that matters: once sprouts reach ½ inch tall, they’re ready for transplanting.
💧 Step 2: Transplant Sprouted Seeds to Moisture-Retentive Medium
Fill a 4-inch pot with a mix of 50% peat moss and 50% perlite—wasabi roots thrive in airy, well-draining soil that mimics their natural humid, shaded habitat. Gently place each sprout ½ inch deep, spacing them 2 inches apart to avoid overcrowding.
Water thoroughly until moisture seeps from the drainage hole, then cover the pot with a clear plastic dome or wrap to maintain humidity. Keep the soil consistently damp—never waterlogged—since wasabi roots rot easily. You’ll see new leaves emerge within 2-3 weeks, signaling healthy growth.
☀️ Step 3: Provide Indirect Light and Cool Temperatures
Wasabi plants despise direct sun—their natural understory habitat means they prefer bright, indirect light. Position your pot near an east-facing window or under a grow light on a 12-hour photoperiod, keeping it 12-18 inches away to prevent leaf scorch.
Maintain temperatures between 60-70°F—wasabi won’t tolerate heat above 75°F. If your home runs warmer, move the pot to a cooler spot or use a small fan to circulate air. You’ll notice strong, glossy leaves forming in 6-8 weeks, a sign the plant is thriving.
🪴 Step 4: Repot and Encourage Rhizome Development
When seedlings develop 4-6 true leaves, transplant them into 6-inch pots filled with the same peat-perlite mix. Gently loosen the roots before placing them 1 inch deep in the new soil. Water lightly to settle the mix, then reduce humidity gradually by removing the plastic cover over 5 days.
Fertilize lightly every 4 weeks with a diluted fish emulsion (5-10-5) to support rhizome growth. Keep the soil moist but not soggy—wasabi roots need consistent moisture to develop their signature heat. You’ll start seeing small rhizomes forming after 3-4 months, though full harvest takes 12-18 months.
⏰ Step 5: Harvest and Store Mature Rhizomes
Wasabi rhizomes are ready to harvest when they reach 2-3 inches long and develop a firm, glossy texture. Gently dig around the roots with a small trowel, being careful not to damage the plant. Rinse off excess soil and store fresh rhizomes in a plastic bag in the refrigerator for up to 2 weeks.
For long-term storage, freeze rhizomes whole or slice them thinly. Rehydrate in cold water before use to restore their signature kick. If you’re growing multiple plants, stagger harvests to ensure a steady supply—wasabi’s slow growth means patience is key.
Tips & tricks for cultivating wasabi root from seeds
Patience and precision are your best tools when nurturing wasabi from seeds—these subtle tweaks will help you avoid common pitfalls and maximize your fiery harvest.
Germination Secret: The 24-hour soak in lukewarm water isn't just about softening the seed coat—it's about mimicking the natural moisture cycle wasabi experiences in its mountain stream habitats. Use distilled water if your tap water is heavily chlorinated, as chlorine can inhibit germination. Place the sealed bag in a dark location to prevent premature sprouting before roots establish.
Soil Science: That 50-50 peat moss and perlite mix is non-negotiable for wasabi's delicate roots. The peat retains moisture while the perlite prevents compaction, creating the perfect aeration wasabi craves. For Step 2, consider adding a thin layer of horticultural charcoal to the mix—it naturally filters impurities and prevents fungal issues that can plague wasabi's sensitive root systems.
Light Management: Wasabi's preference for bright, indirect light is often misunderstood. While it needs plenty of light, direct sunlight will scorch those delicate leaves. The 12-18 inch distance from grow lights is crucial—think of it as creating a dappled forest floor effect. If using natural light, rotate your pots weekly to ensure even growth, as wasabi will naturally lean toward the light source.
Temperature Troubleshooting: Maintaining that 60-70°F range is critical, but every home has hot spots. If your kitchen consistently exceeds 75°F, consider moving your wasabi to a basement or cool closet during daylight hours. A small USB-powered fan circulating air around the plants can help maintain that perfect temperature without disturbing the roots. Remember, wasabi's natural habitat is cool mountain streams—replicate those conditions as closely as possible.
Pro Tips for Wasabi Root Seeds
- Patience and precision are your best tools when nurturing wasabi from seeds—these subtle tweaks will help you avoid common pitfalls and maximize your fiery harvest.
- Germination Secret: The 24-hour soak in lukewarm water isn't just about softening the seed coat—it's about mimicking the natural moisture cycle wasabi experiences in its mountain stream habitats.
- Soil Science: That 50-50 peat moss and perlite mix is non-negotiable for wasabi's delicate roots.
Frequently asked questions
Got questions about growing wasabi from seeds? You’re not alone!
Here are answers to the most common queries—from patience tips to troubleshooting—so you can dive into your fiery harvest with confidence.
How long does it take for wasabi root seeds to germinate?
Wasabi seeds are notoriously slow to sprout—count on 4–12 weeks (or even longer!) for germination. Patience is key! Keep soil moist (not soggy) and maintain temps between 65–75°F (18–24°C). A humidity dome or plastic wrap can help speed things up. Pro tip: Soak seeds in warm water for 24 hours before planting to kickstart the process.
Can I grow wasabi indoors, or do I need a garden?
Wasabi thrives indoors with the right setup. Use a deep container (12+ inches) with well-draining soil, place it near a bright, indirect light source (or under grow lights), and keep humidity high. A cool basement or greenhouse mimics its natural shady, damp habitat. Just avoid drafts—wasabi hates temperature swings!
Why aren’t my wasabi seeds sprouting? Troubleshooting tips.
If your seeds are MIA, check these common culprits:
- Cold soil: Wasabi loves cool temps—below 60°F (15°C) stalls germination. Use a heat mat if needed.
- Dry soil: Seeds need constant moisture (like a damp sponge). Mist daily or use a spray bottle.
- Old seeds: Wasabi seeds lose viability quickly—plant fresh seeds within 1–2 years for best results.
- Low humidity: Try a plastic tent or pebble tray to boost moisture around seeds.
Are there faster alternatives to growing wasabi from seed?
Yes! If you’re craving wasabi fast, consider:
- Micropropagation: Buy cloned wasabi rhizomes from specialty nurseries (ready in 6–12 months).
- Horseradish hybrids: While not true wasabi, ‘Copenhagen’ horseradish offers a milder, faster-growing alternative (harvest in 3–4 months).
- Grafting: Advanced gardeners can graft wasabi onto horseradish roots for quicker growth.
What’s the ideal temperature for growing wasabi?
Wasabi is a cool-weather plant—think shady Japanese forests! Keep it happy with:
- Daytime: 65–75°F (18–24°C)
- Nighttime: 55–65°F (13–18°C)
- Avoid: Heat above 80°F (27°C) or frost (below 32°F/0°C).
Wrapping up and next steps
Growing wasabi root seeds is a rewarding journey that brings bold flavors and lush greenery to your garden—and it’s easier than you think! 🌱 With just a little patience and the right care, you can transform tiny seeds into fiery, aromatic plants in weeks.
Whether you’re a seasoned gardener or a curious beginner, this spicy adventure is well worth the effort.
Ready to dive in? Start by gathering your supplies, following the steps with confidence, and soon you’ll be harvesting your own homegrown wasabi. Your taste buds—and your garden—will thank you! 🌿