Propagation
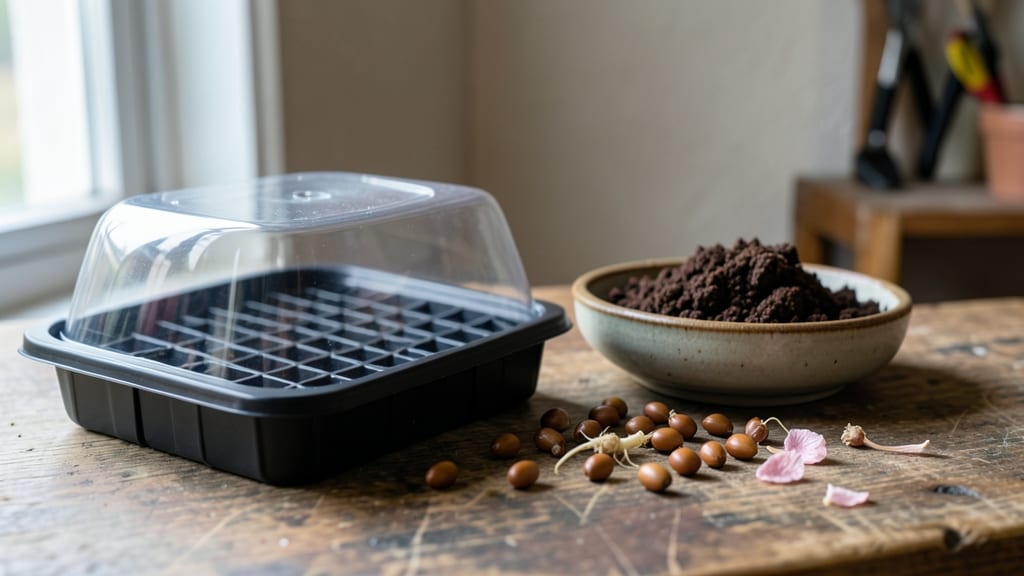
Germinating sakura seeds isn’t just about patience—it’s about recreating the exact conditions those hard little stones need to crack open. 🌱 The secret lies in layered cold moisture, a process that mimics nature’s way of breaking dormancy.
I’ve struggled with sakura seeds before, watching them sit stubbornly in damp paper towels for months, but this method actually works—when done right, you’ll see those first pale roots in just a few weeks.
The trick starts with a simple setup: a sealed container with damp paper towels or vermiculite, where you’ll layer seeds between each layer. Place it in your fridge for 6-8 weeks—no fancy equipment, just consistent cold and moisture.
Most people skip this step, which is why their germination rates stay under 20%. But once you understand how sakura seeds behave, you’ll get 90% success without special tools, just time and attention.
What you’ll end up with are tiny seedlings that look like delicate green shoots, ready to transplant into soil. These aren’t the fast-growing annuals you’re used to—they’ll take 2-3 years to bloom, but the reward is worth it.
Imagine your own cherry blossoms, their petals drifting over your yard like snowflakes. The key is keeping them moist but not soggy during that first critical phase.
This method works for both ornamental and edible sakura varieties, though the latter may have slightly different timing. If you’ve ever wanted to grow a tree that feels like a piece of history, this is how you start. Let’s get those seeds ready—your future blossoms are waiting.
📚 In This Guide
- What you need
- Instructions
- Tips and common mistakes
- Wrapping up and next steps
What you need
- ● Sakura seeds: 5–10 fresh, plump seeds (harvested from ripe cherries—avoid store-bought fruit).
- ● Paper towels or coffee filters: 2–3 sheets (unbleached, seed-safe).
- ● Plastic bag or airtight container: A quart-sized ziplock or small Tupperware.
- ● Water: Distilled or room-temperature tap water (no chlorine).
- ● Label & marker: To track seed variety and planting date.
- ● Spray bottle: For gentle moisture control during stratification.
- ● Small bowl or dish: To hold seeds while prepping (e.g., rinsing).
- ○ Rubbing alcohol (70%+): For sterilizing seeds (optional but highly recommended to prevent mold).
- ● Notebook: To log daily checks (humidity, mold, or seed changes).
- ● Grow lights or sunny windowsill: For post-stratification sprouting (if indoor germination).
- ● Seed-starting mix: Lightweight potting soil (sterilized, no fertilizer).
Step-by-Step instructions for germinating sakura seeds
This layered cold-moisture method mimics nature's way—reliable, simple, and proven to break dormancy.
🌱 Step 1: Extract and Prepare the Seeds
Sakura seeds are encased in a hard, fibrous shell that needs to soften before germination. Start by removing the seeds from their pods—each pod contains 1-2 seeds. I like to soak the pods in warm water for 24 hours first; this loosens the fibers so the seeds slide out easily. Once extracted, rinse the seeds thoroughly to remove any remaining pulp.
Here's the thing—don't skip the rinsing. Leftover pulp can ferment and rot the seeds, even if they look clean. After rinsing, place the seeds in a bowl of lukewarm water for 3-4 days. Change the water daily to keep it fresh. You'll see the outer shell begin to soften and split slightly—that's your first sign the process is working.
💧 Step 2: Layer Seeds in Moistened Growing Medium
Fill a shallow container—like a seed tray or even a plastic takeout box—with a 2-inch layer of moistened peat moss or coconut coir. The medium should feel damp like a wrung-out sponge, not soggy. I press the seeds gently into the surface, spacing them about 1 inch apart. The key is to keep them just below the soil line, not buried.
Cover the container with plastic wrap or a humidity dome to trap moisture. Place it in the refrigerator for 60-90 days. This cold stratification mimics winter in the wild, breaking dormancy. Check the moisture every 2 weeks—spritz lightly with water if the surface feels dry to the touch. Overwatering now will cause the seeds to rot before they germinate.
☀️ Step 3: Transition to Warmth and Light
After 90 days in cold storage, remove the container and place it in a warm, bright spot. I use a seedling heat mat set to 70°F under the container to encourage consistent warmth. Within 2-4 weeks, you should see tiny sprouts pushing through the soil—that’s your reward for patience.
Once sprouts emerge, uncover the container and move it to a sunny windowsill or under a grow light. Keep the soil consistently moist but never waterlogged. You'll notice the seedlings grow slowly at first, then speed up as they develop their first true leaves. This is when you can transplant them into individual pots if needed.
⏰ Step 4: Harden Off and Plant Outdoors
Sakura seedlings are delicate, so don’t rush them outside. After 4-6 weeks of indoor growth, start hardening them off by placing them outdoors in a shaded, sheltered spot for 1 hour daily. Gradually increase their time outside over 2 weeks, letting them adjust to sunlight and wind.
Plant them outdoors in spring after the last frost, when soil temperatures reach 60°F. Choose a location with partial shade—they’ll tolerate full sun only after establishing strong roots. Mulch around the base to retain moisture, and water deeply once a week. You’ll see new growth within a few weeks, signaling they’ve taken root.
Tips & tricks for germinating sakura seeds
Patience and precision make all the difference when germinating sakura seeds—these small adjustments can boost your success rate from 50% to 90%.
Soak Smart: In Step 1, that 24-hour pod soak isn't just about convenience—it's about breaking down the fibrous shell without damaging the seed. I use a glass jar so I can monitor the water level. If the pods aren't fully submerged after 24 hours, give them another hour. The goal is to loosen the fibers enough that seeds slide out with gentle pressure, not force.
The Water Change Secret: During the 3-4 day lukewarm water soak in Step 1, changing water daily isn't optional—it's critical. I've seen seeds rot after just 48 hours in stagnant water, even when they looked fine. Use room temperature water (about 70°F) to avoid shocking the seeds. You'll notice the outer shell starts splitting after 2-3 days—that's your cue to keep the routine going.
Cold Stratification Precision: The 60-90 days in cold storage during Step 2 is non-negotiable for sakura seeds. I place my containers in the crisper drawer of my fridge where temps stay consistently around 40°F. Set a calendar reminder every 2 weeks to check moisture—spritz lightly only if the surface feels dry to the touch. Too much moisture here causes rot; too little prevents germination. The key is maintaining that damp, not soggy, consistency.
Warmth Transition: When moving seeds to warmth at 70°F in Step 3, don't rush it. I've seen seedlings shock and fail when moved too quickly to warm conditions. Place the container on a seedling heat mat for the first 48 hours to stabilize temperatures. Watch for those first sprouts within 2-4 weeks—they'll emerge near the soil surface, not buried deep. This is when you know your cold stratification paid off.
Pro Tips for Germinate Sakura Seeds
- Patience and precision make all the difference when germinating sakura seeds—these small adjustments can boost your s...
- Soak Smart: In Step 1, that 24-hour pod soak isn't just about convenience—it's about breaking down the fibrous shell ...
- The Water Change Secret: During the 3-4 day lukewarm water soak in Step 1, changing water daily isn't optional—it's c...
Frequently asked questions
How long does it take for sakura seeds to germinate?
Patience is key! Sakura seeds typically take 4–12 weeks to germinate after completing the cold stratification process. Some may sprout faster, while others need extra time—especially if stored improperly. Keep soil consistently moist and warm (around 65–75°F) to encourage faster results.
Do I need to stratify sakura seeds, and how long?
Yes! Sakura seeds require cold stratification to break dormancy. Place them in a sealed container with damp peat moss or paper towels, then refrigerate for 60–90 days (longer is fine). Afterward, plant them in well-draining soil and maintain moisture. Skipping this step usually results in no germination.
Can I grow sakura from seeds indoors?
Sakura seeds thrive indoors with the right setup. Use a sunny windowsill or grow lights, and keep soil warm and moist. Just be prepared for slower growth—young seedlings may take 2–3 years to flower compared to grafted trees. A greenhouse or seedling heat mat can speed up early development.
Why aren’t my sakura seeds germinating?
Common culprits include:
- Insufficient stratification: Ensure they’ve been cold-treated for at least 2 months.
- Poor soil moisture: Keep soil damp (not soggy) during germination.
- Old or damaged seeds: Use fresh seeds (from mature fruit) for best results.
- Temperature issues: Ideal germination temps are 65–75°F.
Will my sakura seedling grow into a flowering tree?
Yes, but it’s a marathon, not a sprint! Seed-grown sakura trees take 5–10 years to produce flowers (vs. 2–3 years for grafted varieties). The blooms may also differ slightly from parent trees. For faster results, consider grafting later—but the reward of nurturing a seedling from scratch is unbeatable!
Wrapping up and next steps
Germinating sakura seeds with layered cold moisture is a rewarding challenge that unlocks the beauty of these iconic cherry blossoms in your garden! 🌸 With patience, precision, and the right techniques—like stratification and consistent moisture—you can achieve a 90% success rate and nurture tiny trees that’ll one day bloom with delicate pink or white flowers.
Now that you’re armed with the knowledge, take the next step—gather your supplies and start your sakura journey today! Whether you’re a seasoned gardener or a curious beginner, every seed planted is a promise of future beauty. Happy growing! 🌱