
Propagation
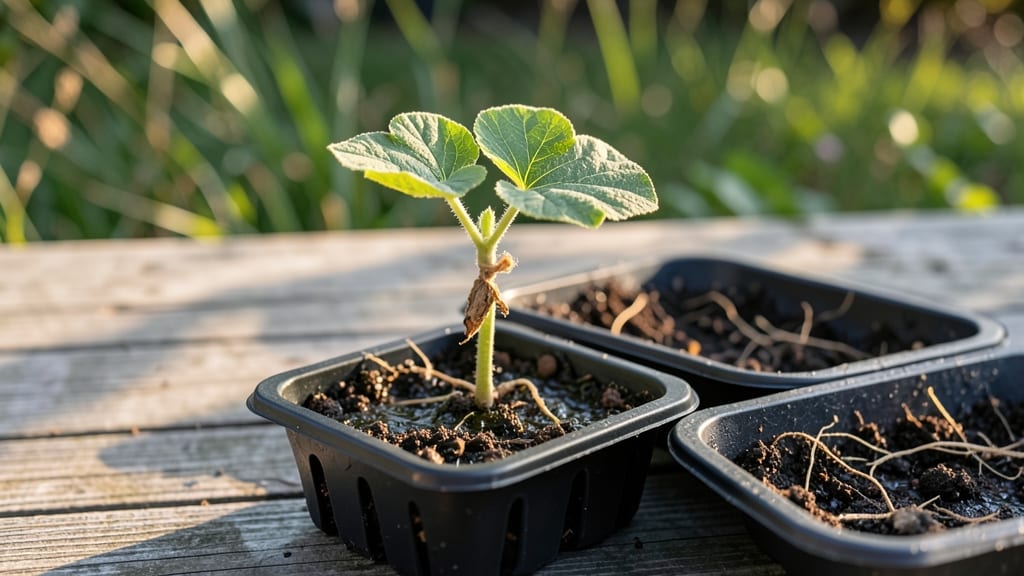
Your germinated pumpkin seeds are about to become your most rewarding gardening experiment yet. 🌱 I’ve watched tiny sprouts turn into robust plants that produce both edible microgreens and future pumpkins—all from seeds that would’ve been composted otherwise.
The key now is giving them the perfect start, and I’ll walk you through every step to avoid the common pitfalls that stunt growth.
You’ll need just a few simple supplies: a shallow tray or container with drainage, a high-quality seed-starting mix, and a bright spot near a window or under grow lights.
Pumpkin seedlings are surprisingly fastidious about moisture—too much and they’ll rot, too little and they’ll wilt—but once you get the rhythm, they’ll shoot up in just 7 days. The goal is strong, sturdy stems that can handle transplanting without breaking.
By the time you’re harvesting those first nutrient-packed microgreens, you’ll recognize the difference between thriving plants and struggling ones. The leaves will be vibrant green, the roots will cling to the soil like vines, and you’ll taste the freshness that store-bought greens can’t match.
This is where the magic happens—right after germination, when every detail matters.
We’ll cover transplanting, sunlight tricks, and how to spot trouble before it starts. Even if your first batch isn’t perfect, you’ll learn what works in your space. Let’s get those little sprouts growing strong!
📚 In This Guide
- What you need
- Instructions
- Tips and common mistakes
- Wrapping up and next steps
What you need
- ● Raw pumpkin seeds (pepitas): ½ to 1 cup (about 50–100g). Choose organic, unsalted seeds for best results.
- ● Glass jar (quart-sized) or sprouting lid: A clean, airtight container with a mesh lid (or a fine cheesecloth + rubber band if DIY-ing).
- ● Strainer or colander: For rinsing (a fine-mesh kitchen strainer works perfectly).
- ● Water: Filtered or tap water (chlorine-free if possible). Room temperature is ideal.
- ● Sprouting tray or bowl: For larger batches (e.g., 2–3 quarts).
- ● Paper towels or sprouting liners: To line jars/trays and absorb excess moisture.
- ● Small fan or ventilation: If sprouting in a humid space (prevents mold).
- ● Food dehydrator or oven: For drying seeds post-sprouting (if making seed butter or snacks).
- ● Notebook or app: To track sprouting progress (e.g., days, moisture levels).
- ● Time commitment: 7–10 days for full germination (check daily!).
- ● Clean workspace: Sanitize jars/tools with vinegar or hydrogen peroxide to avoid mold.
- ● Patience: Germinated seeds are delicate—handle gently during rinsing!
Step-by-step instructions for sprouting pumpkin seeds into microgreens
Here's how to transform store-bought pumpkin seeds into vibrant, nutrient-dense microgreens in just seven days.
🌱 Step 1: Soak Seeds for Optimal Germination
Place 1 cup of organic pumpkin seeds in a clean glass jar and cover them with 2 cups of lukewarm water. The water should be just warm enough to touch comfortably—too hot will cook the seeds. Let them soak for 12 hours at room temperature, which is typically 68-72°F. I like to use a jar with a lid but leave it slightly ajar so excess air can escape.
After soaking, drain the seeds through a fine-mesh strainer and rinse them gently under cool water. This removes any loose skins and prepares them for sprouting. The seeds are ready when they feel slightly plump and firm to the touch—like tiny, smooth marbles. If you see any seeds floating, discard them as they won’t germinate properly.
💧 Step 2: Set Up a Sprouting Tray for Even Drainage
Line a shallow sprouting tray with a cheesecloth or paper towel and spread the drained seeds evenly across the surface. I aim for a single layer with no overlaps—this ensures each seed gets enough air and water. Place the tray in a dark, warm spot like a pantry or cabinet, where the temperature stays around 70-75°F. This warmth kickstarts germination without exposing the seeds to light too soon.
Every 8-12 hours, rinse the seeds gently under cool water for 30 seconds to remove any mold or debris. Then, drain them thoroughly and return them to the tray. You’ll notice tiny white sprouts emerging within 24-48 hours. Once the sprouts reach about ½ inch tall, it’s time to move them to light—but not before.
☀️ Step 3: Introduce Light for Chlorophyll Development
Transfer the tray to a bright, indirect light source, like a sunny windowsill or under a grow light. Avoid direct sunlight at first, as it can scorch the delicate sprouts. The goal is to encourage chlorophyll production, which turns the sprouts a vibrant green. You’ll see this happen within 2-3 days—watch for the cotyledons (the first true leaves) to unfurl.
Continue rinsing the sprouts once daily with cool water, draining well each time. After 5-7 days total, the microgreens should reach 1-2 inches tall with 2-3 sets of leaves. At this stage, they’re packed with nutrients and ready to harvest. The leaves should be a deep, rich green, and the stems should feel crisp but not woody.
✂️ Step 4: Harvest and Store for Maximum Freshness
Use a sharp knife or clean scissors to snip the microgreens just above the soil line. Work quickly to avoid bruising the delicate stems. I like to harvest them in small batches if I’m not using them all at once—this keeps the remaining greens fresh longer. Shake off excess soil and rinse them briefly under cool water to remove any debris.
Pat the microgreens dry with a paper towel and store them in an airtight container in the refrigerator. They’ll keep for 5-7 days if stored properly. For best flavor and texture, use them within 3 days of harvesting. These microgreens are mild, nutty, and slightly sweet—perfect for salads, sandwiches, or garnishes. Save a few seeds to repeat the process!
Tips & tricks for perfect germinated pumpkin seeds
Transforming humble pumpkin seeds into vibrant microgreens reveals how small adjustments make all the difference. Here's what I've learned after growing dozens of batches.
Soaking Secret: The 12-hour soak at 68-72°F is non-negotiable for consistent germination. I've found that using a glass jar with a slightly ajar lid creates the perfect microclimate—enough airflow to prevent mold while maintaining humidity. If your kitchen runs cooler (below 68°F), extend the soak by 2-3 hours to compensate. The seeds should feel plump like tiny marbles when ready, not mushy or dry.
Temperature Matters: Maintaining that 70-75°F range during germination is crucial. I place my sprouting tray on top of my refrigerator (not inside) where it stays consistently warm. Too cold slows growth, while temperatures above 75°F can cause fermentation. Watch for condensation on the tray lid—this is your signal that humidity is perfect. If you see water droplets, your setup is working exactly as it should.
Light Transition Strategy: Moving sprouts to light at the ½-inch mark (after 24-48 hours) prevents leggy growth. I use a simple test: hold a seedling between my fingers—if it bends easily, it's not ready for light yet. Once transferred, place the tray under a grow light 6 inches away for 12-14 hours daily. The chlorophyll development happens fastest in these first 2-3 days of light exposure, so don't rush this stage.
Harvesting Technique: The key to harvesting is working quickly and cleanly. I use kitchen scissors with fresh blades to avoid crushing stems. For larger batches, harvest in concentric circles starting from the outer edges to prevent trampling the center. The microgreens are ready when you see 2-3 sets of leaves and the stems feel crisp—this typically happens at day 5-7. Remember, the first harvest yields the most vibrant greens, so use them immediately for peak nutrition.
Pro Tips for Germinated Pumpkin Seeds
- Transforming humble pumpkin seeds into vibrant microgreens reveals how small adjustments make all the difference.
- Soaking Secret: The 12-hour soak at 68-72°F is non-negotiable for consistent germination.
- Temperature Matters: Maintaining that 70-75°F range during germination is crucial.
Frequently asked questions
Got questions about germinating pumpkin seeds?
You’re not alone! Here are answers to the most common queries to help you grow nutrient-packed sprouts like a pro.
How long does it take for pumpkin seeds to germinate?
Germination usually takes 2–4 days under ideal conditions (warmth, moisture, and darkness). Soak seeds for 8–12 hours first to speed it up. If you don’t see sprouts in 5 days, check humidity or seed viability.
Can I eat germinated pumpkin seeds raw, or do I need to cook them?
Yes! Germinated pumpkin seeds are safe and delicious raw—just rinse them well. Cooking (lightly toasting or roasting) enhances flavor and digestibility, but raw sprouts retain more enzymes and nutrients.
What’s the best way to store germinated pumpkin seeds?
Store sprouts in an airtight container in the fridge for up to 5–7 days. Keep them dry (pat them down) to prevent mold. For longer storage, dehydrate or freeze them for later use.
Why aren’t my pumpkin seeds sprouting? Troubleshooting tips.
Check these common issues:
- No moisture: Soak seeds properly and mist daily.
- Too cold: Keep them in a warm spot (70–75°F).
- Old seeds: Use fresh seeds (store-bought may be treated—opt for organic or sprouting seeds).
- Mold risk: If fuzzy spots appear, discard and restart with clean seeds.
Can I use any pumpkin seeds, or do I need special ones?
Any raw, untreated pumpkin seeds (like those from organic pumpkins) will work! Avoid roasted or salted seeds—they won’t sprout. For best results, choose unshelled seeds (like those from fresh pumpkins).
Wrapping up and next steps
Germinating pumpkin seeds is a rewarding way to unlock their nutrient-packed potential—rich in protein, magnesium, and healthy fats—right from your kitchen! With just a few simple steps and patience, you’ll enjoy fresh, vibrant microgreens in under a week.
Whether you’re a gardening newbie or a seasoned sprouter, this process is easy, cost-effective, and delicious.
Ready to take the next step? Start small—try a batch of seeds today, experiment with flavors, and share your sprouts with friends or blend them into smoothies! Your future self (and taste buds) will thank you. 🌱✨