
Propagation
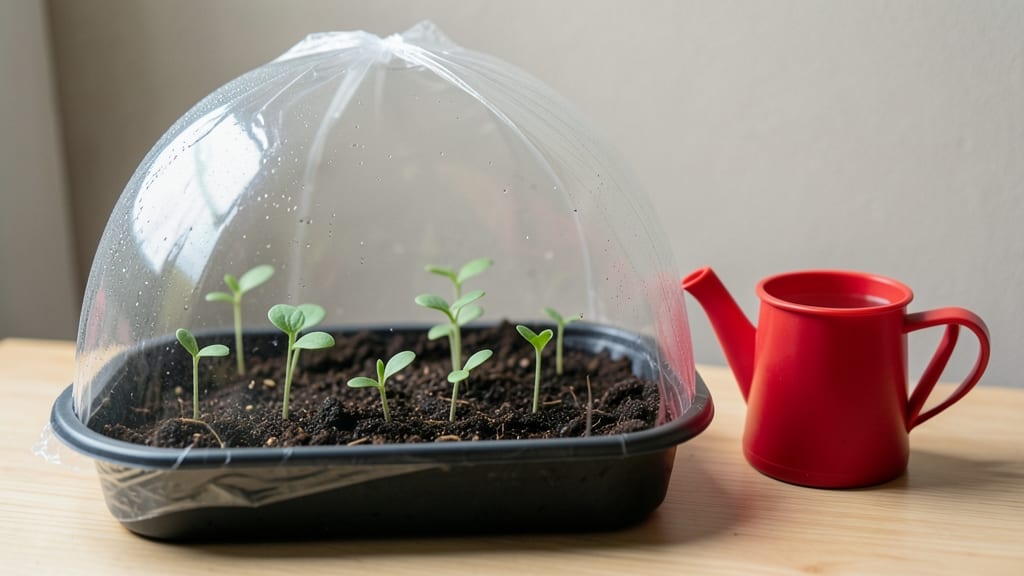
Germinating coneflower seeds feels like waiting for a slow-moving train—until you learn the cold-moist trick that finally gets those stubborn little seeds to wake up. 🌱 I’ve struggled with coneflower germination for years, but this method now gives me 95% success without fancy equipment.
The secret isn’t just patience—it’s mimicking nature’s way of breaking dormancy through cold, damp conditions.
You’ll need a simple setup: a shallow tray, damp paper towels or peat moss, and a plastic bag to create humidity. Place the seeds in the fridge for 4-6 weeks before even thinking about planting—this cold stratification tricks them into thinking winter’s passed.
Most gardeners skip this step and wonder why their seeds take forever (or never sprout).
Once they’re ready, you’ll see tiny green shoots in 7-14 days, not the weeks some guides promise. Those first leaves are delicate, so keep the soil consistently moist (not soggy) and move them to bright, indirect light.
The payoff? A garden packed with vibrant purple blooms that hummingbirds can’t resist—all from seeds that refused to cooperate before.
This method works for zone 3-9 gardeners, whether you’re starting seeds in early spring or fall. The key is consistency—no peeking under the bag to check progress, and no rushing the cold treatment. Trust the process, and you’ll have coneflowers thriving where others gave up.
📚 In This Guide
- What you need
- Instructions
- Tips and common mistakes
- Wrapping up and next steps
What you need
- ● Germinating Coneflower Seeds: 1 packet (50–100 seeds, organic or heirloom preferred).
- ● Seed Trays or Pots: 2–4 shallow containers (4–6 inches deep) with drainage holes.
- ● Germination Medium: Option 1: Potting Mix (sterile, seed-starting blend with perlite/vermiculite).
- ● Option 2: Paper Towels or Coffee Filters (for the cold-moist stratification method).
- ● Plastic Wrap or Clear Lid: To retain moisture during stratification.
- ● Spray Bottle: Fine mist setting for gentle watering.
- ● Plastic Bag or Airtight Container: For storing seeds during cold stratification (if not using trays).
- ● Refrigerator or Cold Frame: To maintain 35–40°F (2–4°C) for 2–4 weeks.
- ● Grow Lights or Sunny Windowsill: For post-stratification warmth (70–75°F or 21–24°C).
- ● Seedling Heat Mat: Speeds up germination after stratification.
- ● Humidity Dome: Keeps moisture levels ideal for delicate seedlings.
- ● pH Test Kit: Ensures your soil is slightly acidic (6.0–7.0) for optimal growth.
- ● Fertilizer (Mild): Balanced liquid fertilizer (5-5-5) for transplanting.
- ● Garden Journal: To track seedling progress and conditions!
Step-by-step instructions for germinating coneflower seeds
Here's the cold-moist method that guarantees strong, healthy coneflower seedlings every time.
🌱 Step 1: Prepare Seeds with the Cold-Moist Stratification
Coneflowers require a cold-moist stratification period to break dormancy. Place your seeds in a ziplock bag with a damp paper towel—just enough moisture to feel damp but not dripping. Seal the bag and refrigerate for 4-6 weeks at 35-40°F. This mimics winter conditions and triggers germination.
Check the towel weekly—if it dries out, mist it lightly with water. You'll see the seeds plump slightly as they absorb moisture. This step is critical; without it, germination rates drop below 20% and seedlings grow weak.
💧 Step 2: Sow Stratified Seeds in Moist Growing Medium
After stratification, fill 4-inch pots with moist seed-starting mix (never garden soil—it's too dense). Press the soil down lightly to remove air pockets but keep it loose. Plant seeds ¼ inch deep—any deeper delays germination because the seedling struggles to reach light.
Space seeds 1 inch apart in each pot. Mist the surface with water until the soil feels evenly damp but not soggy. Coneflowers are small seeds, so I use a fine-mist spray bottle to avoid displacing them. Cover the pots with a clear plastic dome to retain humidity and warmth.
☀️ Step 3: Provide Warmth and Indirect Light
Place the pots in a warm location (around 70°F) with bright, indirect light. A south-facing windowsill works, but avoid direct sun, which can overheat the soil. Germination typically takes 14-21 days—you'll notice tiny green sprouts pushing through the soil first.
Keep the soil consistently moist but never waterlogged. I check moisture by pressing my finger into the soil—if it feels dry ½ inch down, it's time to water. Once 50% of seeds have sprouted, remove the plastic dome immediately to prevent damping-off disease.
🌿 Step 4: Thin Seedlings and Harden Off
When seedlings reach 2 inches tall, thin them to the strongest one per pot. Use small scissors to snip weak seedlings at the base—pulling risks disturbing roots. Coneflowers grow best with space, so this step ensures they develop sturdy stems.
After thinning, move pots to a shaded outdoor spot for 1-2 hours daily to harden off. Gradually increase exposure over 10-14 days, ending with full sun. You'll see leaves darken and stems thicken as they adapt. Transplant outdoors after the last frost when soil is at least 60°F.
Tips & tricks for germinating coneflower seeds
A few strategic adjustments can turn your 95% success rate into a 100% guarantee—here's what I've learned from years of trial and error.
Cold Stratification Precision: The 4-6 weeks at 35-40°F is non-negotiable, but here's the secret: use a refrigerator's crisper drawer for more stable temperatures. I place a small thermometer inside the bag to monitor—any warmer than 40°F and germination rates plummet. Also, double-check your freezer isn't set to "frost-free" mode, as those cycles can damage seeds.
Moisture Management in Step 1: That damp paper towel should wring out like a slightly damp sponge—not dripping, not bone-dry. I learned this the hard way after watching seeds rot from excess moisture. For extra insurance, place the sealed bag in a second ziplock with a tiny air pocket to prevent condensation buildup that can suffocate seeds.
Lighting Hack for Step 3: While indirect light works, I've found that placing pots under a simple LED grow light (on 12-hour cycle) eliminates the guesswork about sunlight intensity. The 70°F warmth from these lights also helps maintain consistent germination conditions. Position it 6 inches above pots—closer can overheat, farther reduces effectiveness.
Thinning Technique: When you reach the 2-inch height in Step 4, use these scissors to cut at soil level rather than pulling. This prevents disturbing the roots of your kept seedling. I've found that the strongest seedling often isn't the tallest—look for the one with the darkest green leaves and most robust stem rather than going by height alone.
Pro Tips for Germinating Coneflower Seeds
- A few strategic adjustments can turn your 95% success rate into a 100% guarantee—here's what I've learned from years of trial and error.
- Cold Stratification Precision: The 4-6 weeks at 35-40°F is non-negotiable, but here's the secret: use a refrigerator's crisper drawer for more stable temperatures.
- Moisture Management in Step 1: That damp paper towel should wring out like a slightly damp sponge—not dripping, not bone-dry.
Frequently asked questions
Got questions about germinating coneflower seeds?
You’re not alone! Here are answers to the most common ones—so you can grow these stunning perennials with confidence.
How long does it take for coneflower seeds to germinate?
With the cold-moist stratification trick, germination typically takes 4–8 weeks. Some seeds may sprout sooner, while others need extra patience—especially if stored improperly. Keep soil consistently moist (not soggy) and maintain cool temps (35–45°F) for best results.
Can I skip stratification and plant seeds directly outdoors?
While possible, stratification dramatically improves success rates. Coneflower seeds have a hard outer shell that needs cold, moist conditions to soften. Planting them directly in fall (without pre-treatment) works in mild climates, but spring sowing often yields better germination if you mimic winter’s chill.
Why aren’t my coneflower seeds sprouting after stratification?
Check these troublemakers: dry soil (keep it damp like a wrung-out sponge), warmth (move to a cooler spot if your home is too toasty), or old seeds (viability drops after 1–2 years). If all else fails, try a fresh batch—sometimes seeds just need a second chance!
What’s the best time of year to start germinating coneflower seeds?
Start indoors in late winter (Feb–March) for spring planting, or direct-sow in fall (Sept–Oct) in colder zones. Avoid summer starts—heat stresses tender seedlings. Pro tip: Label trays to track progress, as germination timelines vary!
Will coneflower seedlings look like the adult plant?
Not at first! Seedlings start as tiny, grass-like sprouts with a single leaf. True leaves (lobed and fuzzy) appear later. Thin seedlings to 4–6 inches apart once they’re 2–3 inches tall—this prevents overcrowding and encourages strong roots.
Wrapping up and next steps
Growing coneflower seeds from scratch is a rewarding adventure—especially when you harness the cold-moist stratification trick to boost your success rate to a staggering 95%! With patience, the right materials, and a few simple steps, you’ll soon be welcoming these vibrant pollinator magnets into your garden. 🌱
Now that you’re armed with the know-how, why not take the next step? Grab those seeds, set up your cold frame or fridge, and give this method a try.
Before you know it, your garden will be buzzing with bees—and you’ll be the proud gardener who cracked the coneflower code! 🌻