Vegetables
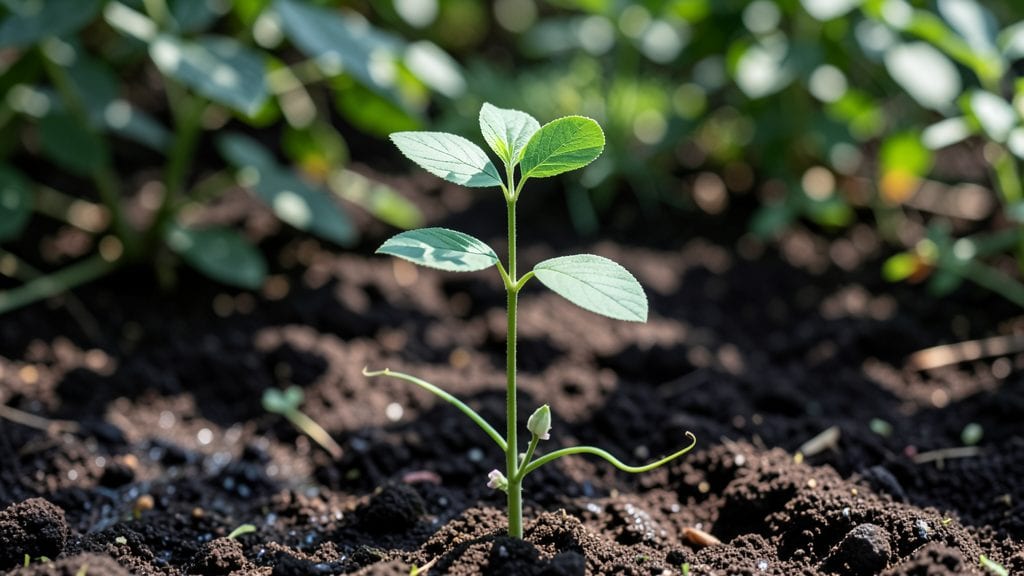
Your green beans seedlings need layered soil moisture to grow into sturdy plants that produce bushels of pods. I learned this the hard way after watching my first batch flop from uneven watering—now my seedlings stand tall and thrive from the first transplant.
The secret isn’t just watering; it’s creating the perfect soil environment where roots can breathe and absorb moisture consistently.
Start with loose, well-draining soil mixed with compost to hold moisture without drowning roots. A 5-gallon pot or raised bed works perfectly, and keep the soil 1-2 inches moist at all times—never soggy, never dry.
Seedlings hate stress, so use a spray bottle for gentle watering and avoid overhead streams that disrupt their delicate stems. Within 10-14 days, you’ll see strong stems and vibrant leaves signaling healthy growth.
By mastering this moisture balance, you’ll transplant confidently into the garden when soil warms to 60°F—no more leggy, weak seedlings that collapse under their own weight.
The payoff? Bursting vines covered in pods by mid-summer, all because you gave them the right start. Let’s get those roots drinking deep and strong.
This method works for both bush and pole varieties, and the same principles apply whether you’re growing in containers or straight in the ground. The key is consistency—once you nail the moisture layer, your green beans will reward you with abundant harvests all season long.
📚 In This Guide
- What you need
- Instructions
- Tips and common mistakes
- Wrapping up and next steps
What you need
- ● Green bean seeds: 10–20 seeds (choose heirloom or hybrid varieties like 'Blue Lake' or 'Contender').
- ● Seed-starting trays or biodegradable pots: 1–2 trays (2–3 inches deep) or 4–6 pots (2–3 inches in diameter).
- ● Well-draining potting mix: 2–3 quarts (preferably seed-starting mix with perlite or vermiculite).
- ● Spray bottle or watering can with a fine rose: For gentle moisture control.
- ● Plastic wrap or humidity dome: To retain moisture during germination.
- ● Grow lights or sunny windowsill: 12–16 hours of light daily (LED or fluorescent grow lights work best).
- ○ Thermometer (optional but helpful): To monitor soil temperature (ideal: 70–85°F for germination).
- ● Layered soil components: Coco coir, peat moss, and perlite (mix for custom moisture layers).
- ● Seedling heat mat: For faster germination in cooler climates.
- ● Fertilizer (low-dose): Balanced organic fertilizer (5-5-5) once seedlings sprout.
- ● Plant labels or markers: To track varieties and planting dates.
- ● Tweezers or small spoon: For careful seed placement.
Step-by-Step instructions for cultivating green bean seedlings with optimal moisture
Green beans thrive when their roots stay consistently moist but never soggy—this layered approach ensures strong, disease-resistant seedlings.
Prepare Containers and Moisture-Retentive Soil Mix
Use the 4-inch deep biodegradable pots to give roots room to establish without overcrowding. Fill each pot halfway with 2 gallons of seed-starting mix, pressing lightly to eliminate air pockets but avoiding compaction. The mix should crumble easily between your fingers—if it clumps, add ½ cup perlite to improve aeration.
Moisten the mix thoroughly with warm water until it feels like a wrung-out sponge: damp throughout but not dripping. This initial moisture jumpstarts root development. I like to let the water soak in for 10 minutes, then check again—you want the top inch to feel cool to the touch, not warm from excess water.
Sow Seeds at Proper Depth for Even Germination
Plant 2 seeds per pot at a depth of ½ inch, using the seed packet to measure spacing. The reason for two seeds is that one may fail to sprout—green beans are sensitive to uneven moisture during germination. Space seeds 1 inch apart in the pot to prevent competition later.
Cover lightly with the remaining 1 gallon of seed-starting mix, sifting it through your fingers to avoid burying seeds too deeply. Press the soil surface gently around the seeds but don’t firm it down—you want the top layer to stay loose so moisture can penetrate evenly. Water again with a spray bottle until the surface looks uniformly damp.
Maintain Layered Moisture for Germination
Place the pots in a humidity dome or cover with plastic wrap to trap warmth and moisture. Green beans germinate best at 70-75°F, so a seedling heat mat helps if your home runs cooler. Check moisture daily—the soil should never dry out completely, but it shouldn’t feel saturated either.
Here’s the trick: Water from the bottom by placing pots in 1 inch of standing water for 10 minutes every other day. This encourages roots to grow downward while keeping the surface layer just damp enough. You’ll know it’s working when the first true leaves appear—usually within 7-10 days—and the seedlings stand upright without wilting.
Transition to Balanced Moisture as Seedlings Grow
Once seedlings show 2 sets of true leaves, remove the humidity dome and switch to top-watering with a gentle spray. Water when the top inch of soil feels dry to the touch, but avoid soaking the leaves—this prevents fungal diseases like damping-off. I water in the morning so excess moisture evaporates by evening.
At this stage, fertilize lightly with ½ teaspoon of balanced fertilizer dissolved in 1 quart of water to support leaf growth. Green beans are heavy feeders, but too much fertilizer now will burn tender roots. You’ll see strong stems and vibrant leaves within 2 weeks—that’s your sign the moisture balance is perfect.
Harden Off for Transplant Readiness
Two weeks before your last frost date, start hardening off seedlings by placing them outside in partial shade for 1 hour daily, gradually increasing exposure. The goal is to toughen stems so they withstand transplant shock. Keep the soil evenly moist during this period—roots will dry out faster in windy conditions.
Before transplanting, ensure the soil in the garden is warm (at least 60°F) and well-drained. Water the seedlings 12 hours before moving to reduce stress. You’ll know they’re ready when they stand firm when gently tugged—no wilting or yellowing leaves. Plant at the same depth as the pots to avoid burying the stem, which can cause rot.
Tips & tricks for perfect green bean seedling cultivation
A few subtle adjustments can transform your green bean seedlings from fragile sprouts to robust, transplant-ready plants. These are the details that make all the difference when moisture is the critical factor.
Soil Texture is Everything: The 10-minute soak in Step 1 isn't just about moisture—it's about creating the perfect crumbly texture. After adding perlite to your 2 gallons of seed-starting mix, press it gently but firmly to eliminate air pockets. The mix should hold together when squeezed but still crumble easily. If it feels like wet sand, you've overcompacted; if it falls apart completely, add another ¼ cup of perlite. This texture balance is what prevents both waterlogging and drying out.
Temperature Control During Germination: Those 70-75°F ideal conditions in Step 3 aren't just numbers—they're the sweet spot where green bean seeds germinate reliably. If your home runs cooler, invest in a seedling heat mat ($15-20) that sits under your pots. I've seen germination rates drop by 40% when seeds sit at 65°F instead of 70°F. The difference shows up within those first 7-10 days—seeds at optimal temperature sprout uniformly, while cooler conditions create patchy germination.
Watering Technique Matters: The bottom-watering method in Step 3 might seem counterintuitive, but it's the key to preventing damping-off disease. When you place pots in 1 inch of standing water for 10 minutes every other day, you're encouraging roots to grow downward rather than staying shallow. The visual cue to watch for is the water level in the tray—it should drop noticeably after 10 minutes, indicating the soil has absorbed what it needs without becoming waterlogged. This method also keeps the surface layer just damp enough to prevent fungal growth.
Transplant Readiness Check: The 12-hour pre-transplant watering in Step 5 isn't just about hydration—it's about root strength. Water your seedlings this long before moving them to give roots time to absorb moisture deeply. When you gently tug on a seedling and it resists without pulling out of the pot, you've got strong roots ready for transplant. Yellowing leaves or stems that bend easily mean they're not ready—keep them in their pots for another day or two.
Pro Tips for Green Beans Seedling
- A few subtle adjustments can transform your green bean seedlings from fragile sprouts to robust, transplant-ready plants.
- Soil Texture is Everything: The 10-minute soak in Step 1 isn't just about moisture—it's about creating the perfect crumbly texture.
- Temperature Control During Germination: Those 70-75°F ideal conditions in Step 3 aren't just numbers—they're the sweet spot where green bean seeds germinate reliably.
Frequently asked questions
Got questions about growing green bean seedlings?
You’re not alone! Here are answers to the most common concerns—so you can start strong and avoid pitfalls.
How long does it take for green bean seedlings to sprout?
Green bean seeds typically sprout in 7–14 days after planting, depending on soil temperature and moisture. Keep the soil consistently moist (not soggy) and warm (around 70°F/21°C) for the fastest germination. If you’ve waited 2 weeks with no signs of life, try replanting—some seeds just take longer!
What’s the best soil moisture level for green bean seedlings?
Seedlings thrive with layered moisture: the top inch of soil should dry slightly between waterings, but the deeper layers must stay damp. Overwatering can drown roots, while underwatering stunts growth. Use a moisture meter or stick your finger 1–2 inches down—if it’s dry, water gently until it drains from the bottom.
Why are my green bean seedlings wilting or turning yellow?
Wilting or yellowing usually signals overwatering, underwatering, or pests. Check for:
- Mushy stems → Fungal disease (reduce water, improve drainage).
- Crispy edges → Underwatering (increase humidity with a cloche).
- Holes or chewed leaves → Aphids or slugs (spray neem oil or use diatomaceous earth).
Can I plant green bean seeds directly in the garden, or should I start indoors?
Green beans are tender to cold, so start indoors 2–3 weeks before your last frost if your growing season is short. For warm climates, direct-sow seeds 1–2 inches deep after soil reaches 60°F/15°C. Seedlings transplant well, but avoid disturbing roots—harden them off for 7–10 days before moving outdoors.
What’s a good alternative if my green bean seeds won’t germinate?
Try these troubleshooting steps:
- Test seed viability: Soak seeds in water overnight—floating ones are likely bad.
- Adjust temperature: Use a seedling heat mat if your soil is too cool.
- Try a different variety: Some heirloom beans (like ‘Blue Lake’) germinate more reliably.
- Use a starter fertilizer: A pinch of fish emulsion or seaweed extract can kickstart growth.
Wrapping up and next steps
Growing strong green bean seedlings starts with the right care—especially layered soil moisture to keep roots happy and plants thriving! 🌱 By following these steps, you’ll set the stage for healthy, productive plants that reward you with a bountiful harvest.
Now that you’re armed with the knowledge, roll up your sleeves and get planting! Your garden (and taste buds) will thank you.
Next step: Grab your supplies, prep your soil, and watch those seedlings sprout with confidence. Happy growing! 🌿