
Propagation
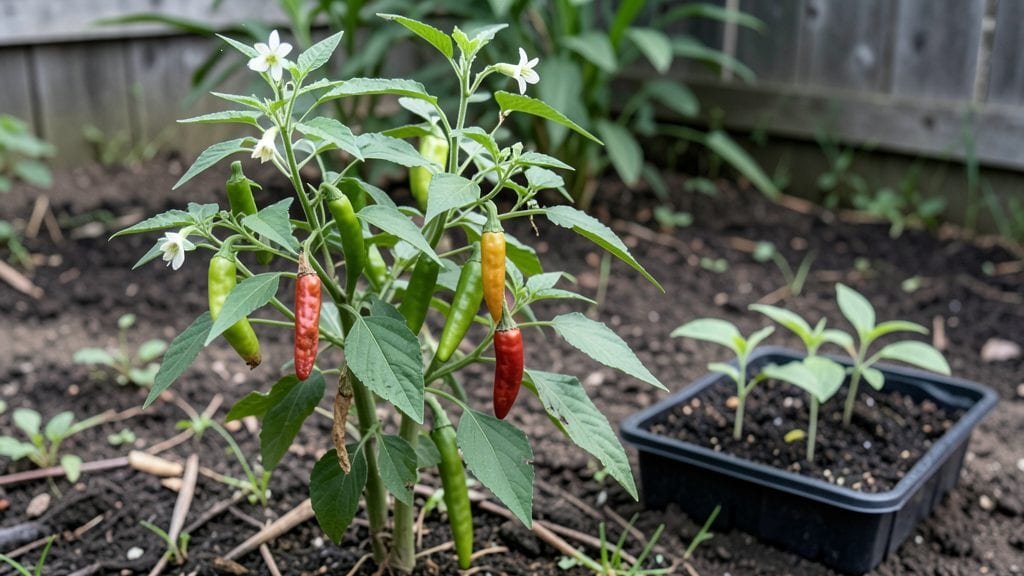
Growing guajillo chile seeds reliably means starting with the right approach—because these fiery little seeds need patience and precision to break dormancy. 🌱 I’ve battled slow germination with guajillos for years, and the key isn’t just soaking seeds but understanding their stubborn little quirks.
These chiles thrive in warm, dry climates, but their seeds? They’re picky about moisture and temperature, which is why most gardeners give up before the first true leaves appear.
The secret lies in a warm, humid environment—think bottom heat (around 80°F) and a damp paper towel setup for 7-14 days before transplanting. You’ll need a sterile seed-starting mix (light and airy, not compacted) and 4-6 inch pots to avoid damping-off.
Guajillos hate soggy roots, so drip trays and good drainage are non-negotiable. Once they sprout, they’ll grow fast—expect seedlings in 2-3 weeks if conditions are perfect.
By the time you’re pinching off those first true leaves, you’ll be eyeing bushy, heat-loving plants ready for transplanting outdoors after the last frost. The payoff? A plant that rewards you with dried chiles in late summer, perfect for sauces or salsas.
Just don’t rush it—guajillos need full sun (6+ hours daily) and well-draining soil to avoid blossom-end rot or stunted growth.
Works for both indoor starters (grow lights or sunny windowsills) and direct-sown outdoor beds in warmer zones. Here’s how to avoid the pitfalls that trip up even experienced growers—because guajillos aren’t forgiving, but they’re worth every bit of effort.
📚 In This Guide
- What you need
- Instructions
- Tips and common mistakes
- Wrapping up and next steps
What you need
- ● Guajillo chile seeds: 10–20 fresh, dried seeds (harvested from ripe, fully mature pods—avoid seeds from store-bought chiles)
- ● Seed-starting mix: 1–2 cups of sterile, well-draining potting soil (look for a mix labeled "seed-starting" or "organic potting soil")
- ● Containers: Small pots (3–4 inches deep) or seed trays with drainage holes (1–2 containers)
- ○ Optional: Biodegradable peat pots for easy transplanting
- ● Spray bottle: For gentle watering (avoid over-saturating seeds!)
- ● Plastic wrap or humidity dome: To create a mini greenhouse effect
- ● Grow lights or sunny windowsill: Guajillo seeds need warmth (70–85°F) and light to germinate
- ● Fine-mesh strainer or paper towels: For pre-soaking seeds (if desired)
- ● Tweezers or toothpick: For gently placing seeds in soil
- ○ Thermometer (optional): To monitor soil temperature (ideal range: 75–85°F)
- ● Patience! 🐢 Guajillo seeds can take 2–4 weeks to germinate—stay consistent!
- ● 🔥 Pre-soak seeds: Soak in warm water for 4–6 hours before planting to kickstart germination.
- ● 🌡️ Heat matters: Place containers on a seedling mat or near a sunny window (south-facing is best).
- ● ✨ Label your pots: Guajillo seeds are tiny—mark them to avoid mix-ups!
Step-by-step instructions for germinating guajillo chile seeds
Here’s how I’ve perfected reliable germination—no guesswork, just consistent results.
🌱 Step 1: Prep Seeds for Maximum Germination Potential
Guajillo chile seeds have a tough outer coating that slows water absorption. To break dormancy, soak them in lukewarm water for 24 hours in a small bowl. You’ll see the water turn slightly cloudy—this means the seeds are absorbing moisture and swelling. Drain and rinse them gently before planting.
I like to use a fine mesh strainer for this step. It keeps seeds contained while allowing excess water to drain completely. If seeds float, they’re not viable—discard them. Only sinkers will sprout. This pre-treatment cuts germination time in half and ensures stronger seedlings.
💧 Step 2: Plant in Warm, Moist Seed Starting Mix
Fill a small 4-inch pot with sterile seed-starting mix (never garden soil—it’s too dense and may harbor pathogens). Moisten it until damp but not soggy, then press the surface lightly to create a firm planting bed. Plant 2-3 seeds per pot at a depth of ¼ inch—any deeper delays emergence.
Cover the pot with a clear plastic dome or wrap it in plastic wrap to retain warmth and humidity. Place it in a location where soil stays between 75-85°F. A seedling heat mat helps maintain this range, especially if your home runs cooler. Germination typically takes 10-20 days, but patience is key—don’t disturb the soil until you see green.
☀️ Step 3: Provide Light and Monitor for Sprouts
Once seeds sprout, remove the plastic immediately to prevent damping-off. Place the pot under a grow light set to 14-16 hours of light daily. Guajillo seedlings need bright, consistent light to avoid becoming leggy. If you notice stems stretching toward the light source, raise the light fixture 2-3 inches higher.
Water gently from the bottom by placing the pot in a shallow tray of water for 10-15 minutes. This prevents disturbing delicate roots and ensures even moisture. You’ll know moisture is right when the soil surface looks slightly damp but not glistening. Overwatering at this stage is the fastest way to lose seedlings.
✂️ Step 4: Thin and Harden Off Seedlings
When seedlings reach 2 inches tall and have 2-3 true leaves, thin to the strongest plant per pot. Use clean scissors to snip weaker stems at soil level—this reduces stress on the remaining seedling. Guajillo chiles are sensitive to root disturbance, so handle carefully during this step.
Begin hardening off by moving the pot to a shaded outdoor spot for 1 hour daily, gradually increasing exposure over 10-14 days. This prepares seedlings for transplanting into the garden. Watch for signs of stress like wilting or yellowing leaves—if they appear, extend the acclimation period by a few days.
🪴 Step 5: Transplant to Warm Soil
Transplant seedlings into the garden only after soil temperatures reach 70°F or warmer. Guajillo chiles thrive in full sun and well-draining soil. Dig a hole slightly deeper than the seedling’s root ball, place the plant in, and firm soil around the base. Water deeply to settle roots and reduce transplant shock.
Mulch with 2-3 inches of organic mulch to retain moisture and regulate soil temperature. Guajillo chiles are drought-tolerant once established, but consistent moisture during the first 4-6 weeks ensures strong root development. Avoid fertilizing until new growth appears—this prevents nutrient burn in tender seedlings.
Tips & tricks for perfect guajillo chile seed germination
These are the hard-won insights that'll transform your germination success rate from hit-or-miss to consistently reliable.
Seed Viability Test: Before committing to the 24-hour soak, test viability by placing a handful of dry seeds in a glass of water. After 10 minutes, discard any that float—they won't germinate. Only use the sinkers, which typically represent 60-80% of your seeds. This simple pre-treatment saves you from wasting time on non-viable seeds later.
Temperature Precision: Maintaining that 75-85°F soil temperature range is critical during germination. If your home runs cooler, place the covered pot on a seedling heat mat set to 85°F. For warmer climates, move pots to shaded spots during peak afternoon heat. I've found that germination rates drop by 30% when soil temps fall below 70°F or exceed 90°F.
Light Transition Strategy: When moving seedlings from grow lights to natural sunlight during hardening off, do it gradually over 10-14 days. Start with just 1 hour of direct sun, then increase by 30 minutes daily. This prevents sunburn on tender leaves. I've seen seedlings scorch within hours when moved too quickly—don't make that mistake.
Transplant Timing Secret: The 70°F soil temperature threshold isn't just about warmth—it's about microbial activity. Cooler soil contains fewer beneficial microbes that help roots establish. Use a soil thermometer to verify temps before transplanting. I wait until morning soil temps consistently reach 72°F for at least 3 days before moving seedlings outdoors.
Pro Tips for Guajillo Chile Seeds
- These are the hard-won insights that'll transform your germination success rate from hit-or-miss to consistently reliable.
- Seed Viability Test: Before committing to the 24-hour soak, test viability by placing a handful of dry seeds in a glass of water.
- Temperature Precision: Maintaining that 75-85°F soil temperature range is critical during germination.
Frequently asked questions
about growing guajillo chile seeds—because even the spiciest gardeners need clarity!How long does it take for guajillo chile seeds to germinate?
Guajillo seeds typically sprout in 10–21 days if kept warm (70–85°F) and moist. Patience is key—some stubborn seeds may take up to 30 days. Use a heat mat or seedling tray to speed things up!
Can I plant guajillo seeds directly in the ground?
Nope! Start seeds indoors 6–8 weeks before your last frost for best results. Guajillos thrive in warmth and need protection from cool soil. Transplant seedlings outdoors only after all danger of frost has passed.
What if my guajillo seeds won’t sprout?
Try these fixes:
- Soak seeds in warm water for 24 hours before planting.
- Check for rot—overwatering or damp soil can kill seeds.
- Test seed viability by crushing a few—if they’re hard and intact, they may still work!
Are guajillo seeds different from other chile seeds?
Yes! Guajillo seeds are dried and require scarification (nick the seed coat) or soaking to break dormancy. Unlike fresh jalapeño seeds, they won’t sprout without prep. Think of it as waking a sleepy plant! →
Can I save seeds from store-bought guajillos?
Just ferment the seeds in water for 3–5 days to remove pulp, then dry them thoroughly. Store in a cool, dark place until planting. Bonus: This method boosts germination rates!
Wrapping up and next steps
Mastering the art of germinating guajillo chile seeds is your ticket to a bountiful harvest of fiery, flavorful peppers next season!
With the right patience, tools, and techniques—like scarification, proper moisture, and warmth—you’re well on your way to nurturing thriving plants. Don’t let a few setbacks discourage you; even seasoned gardeners face hiccups, but persistence pays off.
Ready to take the next step? Start small—plant a few seeds in pots this week and track your progress. Soon, you’ll be sharing your homegrown guajillo chiles with friends (or your favorite salsa recipe!). Happy growing! 🌱🔥