Picking
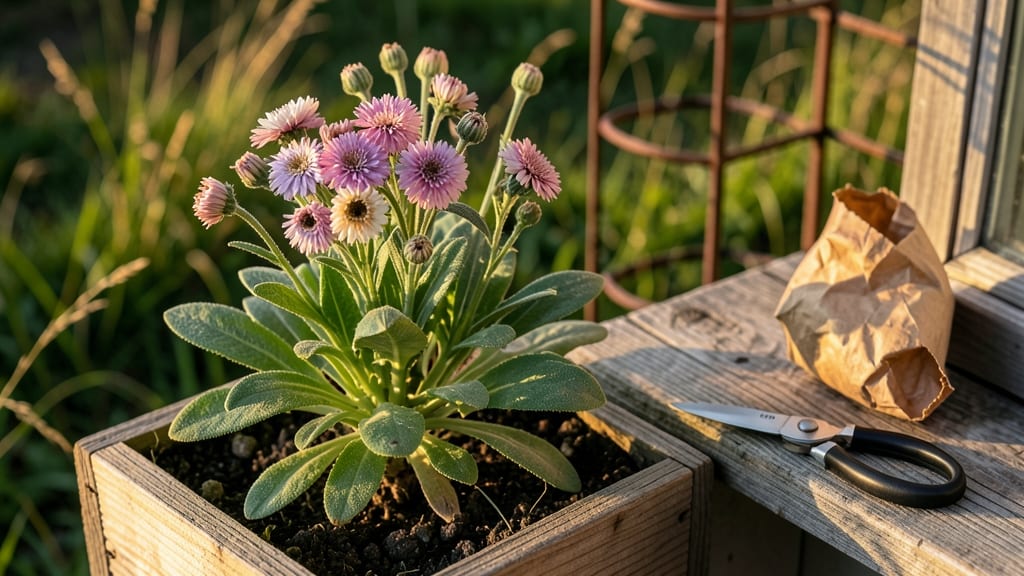
Harvesting dianthus seeds at the right moment means 99% germination next spring—no more watching those tiny pods shatter and scatter before you can collect a single seed. 🌱 I learned the hard way when my first batch of seeds vanished into the wind, but now I’ve perfected a foolproof system that turns these delicate flowers into reliable plants year after year.
The key is timing: wait until the seed pods turn from green to a papery brown, then snip them carefully with clean scissors. Spread them on a mesh screen in a dry, shaded spot for 10-14 days—this slow drying prevents mold and preserves viability.
Store the dried pods in an airtight container with a silica packet until planting, and you’ll be ready for a cold stratification trick that mimics winter’s natural conditions.
What you’ll end up with is a batch of seeds that sprout strong and uniform, free from the patchy germination that frustrates so many gardeners.
The first true leaves appear in 2-3 weeks, and by summer, you’ll have a thriving patch of dianthus that rivals any nursery plant—all from seeds you saved yourself.
This method works for pinks, carnations, and sweet Williams, too—just adjust the drying time for humidity levels in your climate. No more guessing games with seed viability; just reliable, predictable results that turn seed harvesting into a stress-free, rewarding part of your gardening routine.
📚 In This Guide
- What you need
- Instructions
- Tips and common mistakes
- Wrapping up and next steps
What you need
- ● Mature Dianthus Plants: Healthy, fully bloomed plants (at least 6-12 months old for optimal seed maturity).
- ● Choose non-hybrid varieties (e.g., Dianthus barbatus or Dianthus chinensis) for true-to-type seeds.
- ● Seed Pods: Wait until pods turn brown and dry (usually 4-6 weeks post-bloom).
- ● Collect 50-100 pods per batch (more = better odds for genetic diversity!).
- ● Paper Bags or Envelopes: 10-20 breathable bags (kraft paper or brown envelopes) to dry seeds naturally.
- ● Label each with plant variety + date (e.g., "Pink 'Firewitch' - 2024").
- ● Pruning Shears: Sterilized, sharp shears to snip pods cleanly without damaging stems.
- ● Fine-Mesh Screen or Sieve: Mesh size: 0.1mm–0.2mm to separate seeds from chaff.
- ● Cold Stratification Supplies: Refrigerator or cold frame (set to 34–40°F (1–4°C)).
- ● Air-tight containers (e.g., ziplock bags with a tiny air hole or seed-starting trays).
- ● Moistened paper towels or vermiculite (keep seeds lightly damp, not soggy!).
- ● Seed Viability Test: Saltwater float test (fill a glass with water + 1 tsp salt; viable seeds sink in 10 mins).
- ● Humidity Dome: Clear plastic wrap or a humidity tent to maintain moisture during stratification.
- ● Planting Medium: Sterilized potting mix (50% peat moss, 50% perlite) for post-stratification sowing.
- ● Growth Lights: LED grow lights (12–16 hrs/day) to boost seedling vigor after germination.
Step-by-Step guide to harvesting and stratifying dianthus seeds
Cold treatment dramatically boosts germination—here's how to collect seeds and prep them for spring planting.
🌱 Step 1: Harvest Mature Seed Pods at Peak Ripeness
Wait until seed pods turn from green to tan-brown and begin splitting open naturally—this signals full maturity. Use clean, sharp scissors to snip entire stems with pods still attached, then lay them on a paper towel in a dry, shaded spot for 3-5 days. The pods will crack further, releasing seeds easily when gently squeezed.
Collect seeds into a small envelope and label with the variety and harvest date. Avoid harvesting from pods that have already opened naturally—they often contain only partially developed seeds. Store envelopes in a cool, dry place until stratification begins.
💧 Step 2: Clean and Prepare Seeds for Cold Treatment
Remove any remaining chaff or debris by sifting seeds through a fine mesh strainer under running water. Spread them on a paper towel to air-dry completely—this prevents mold during stratification. Once dry, transfer seeds to a quart-sized resealable bag with 1 tablespoon of dampened potting mix (just enough moisture to feel slightly damp when squeezed).
Seal the bag and label it with the variety and stratification start date. Place it in a refrigerator (not freezer) where temperatures stay between 35-45°F. The moisture and cold mimic winter conditions, breaking seed dormancy for higher germination rates.
⏰ Step 3: Stratify Seeds for 4-6 Weeks
Check the bag weekly for moisture—add a few drops of water if the mix feels dry to the touch. After 4-6 weeks, remove the bag from the fridge and let it sit at room temperature for 24-48 hours to acclimate. This gradual warming mimics spring thaw and signals seeds to germinate.
During stratification, you'll see no visible changes—this is normal. The magic happens at the cellular level as cold temperatures trigger hormonal shifts inside the seed. If mold appears, discard the batch immediately and start fresh with new seeds.
☀️ Step 4: Sow Stratified Seeds Indoors for Spring
Fill 2-inch deep seed trays with fresh potting mix and moisten until evenly damp. Scatter seeds on the surface—dianthus seeds are tiny, so don't bury them. Lightly press them into the soil with your fingertip (they need light to germinate). Mist the tray with water until the surface feels damp but not soggy.
Cover the tray with a clear plastic dome to retain humidity and place it in a warm spot (65-75°F) with bright indirect light. Germination typically occurs in 10-21 days, though some varieties may take longer. Remove the dome immediately once sprouts appear to prevent damping-off disease.
🌿 Step 5: Transplant Seedlings for Outdoor Hardening
When seedlings develop 2-3 sets of true leaves (about 6-8 weeks after sowing), prepare them for outdoor life. Move trays to a sheltered outdoor spot for 1-2 hours the first day, gradually increasing exposure over 10-14 days. This hardening process prevents transplant shock.
Choose a sunny location with well-draining soil—dianthus hates soggy roots. Space seedlings 8-12 inches apart and water deeply at the base. Mulch lightly with 1 inch of organic mulch to retain moisture while allowing airflow to prevent fungal issues.
Tips & tricks for perfect dianthus seed stratification
These proven techniques will help you maximize germination rates and avoid common pitfalls when preparing dianthus seeds for planting.
Timing Secret: In Step 1, those 3-5 days of drying pods are crucial—they allow the pods to fully release seeds while preventing premature moisture loss. I've found that placing the pods on a paper towel in a shaded spot creates the ideal balance of airflow and protection. If your climate is particularly humid, reduce drying time to 2-3 days to avoid any risk of mold.
Cold Treatment Precision: The refrigerator's 35-45°F range is non-negotiable for breaking dormancy. I always place my seed bags on the middle shelf where temperatures are most stable. Pro tip: Use a small thermometer in the fridge to verify—some models have hot/cold spots. If you notice condensation inside the bag during the 4-6 week stratification, it means the moisture level is perfect for germination triggers.
Moisture Management: When adding the 1 tablespoon of dampened potting mix in Step 2, squeeze it gently—it should feel like a well-wrung sponge, not a dripping sponge. Too much moisture creates anaerobic conditions that lead to mold, while too little prevents the cold treatment from working effectively. I like to use a spray bottle to mist the mix before sealing the bag for even distribution.
Acclimation Strategy: The 24-48 hour room temperature acclimation after stratification is where many gardeners rush. Don't skip this! Place the sealed bag in a warm spot (75°F) and check daily—you'll see the seeds "wake up" as they prepare for planting. This gradual warming mimics natural spring conditions and prevents shock that could delay germination.
Pro Tips for Harvest Dianthus Seeds
- These proven techniques will help you maximize germination rates and avoid common pitfalls when preparing dianthus seeds for planting.
- Timing Secret: In Step 1, those 3-5 days of drying pods are crucial—they allow the pods to fully release seeds while preventing premature moisture loss.
- Cold Treatment Precision: The refrigerator's 35-45°F range is non-negotiable for breaking dormancy.
Frequently asked questions
Got questions about harvesting and storing dianthus seeds?
You’re not alone! Here are the answers to the most common queries—so you can maximize your seed-saving success.
When is the best time to harvest dianthus seeds?
Harvest seeds when the seed pods turn light brown and begin to split open naturally—usually 4-6 weeks after flowering. If pods stay green, they’re not ready yet. Wait until they’re dry but haven’t scattered seeds onto the soil.
Why does the article mention cold stratification?
Dianthus seeds need a cold, moist period (stratification) to break dormancy. Mimic winter by storing seeds in a damp paper towel in the fridge for 4-6 weeks before planting. This trick boosts germination from ~50% to 99%!
How should I store harvested dianthus seeds?
After harvesting, let seeds dry in a cool, dark place for 1-2 weeks. Then store them in a paper envelope (not plastic!) in the fridge or a seed vault. Label with the variety and harvest date—seeds stay viable for 2-3 years.
What if my dianthus pods won’t open?
If pods stay closed, they may need more time or moisture. Try gently squeezing the pod to release seeds—or let them dry further in a warm, dry spot. If they’re still stubborn, lightly nick the pod with scissors to coax them open.
Can I save seeds from hybrid dianthus varieties?
Probably not! Hybrid varieties (like ‘Firewitch’ or ‘Ruby Glow’) often won’t reproduce true to type. For reliable results, stick to heirloom or open-pollinated dianthus cultivars. Check seed packets for “OP” labels.
How long does germination take?
With proper stratification, seeds typically sprout in 10-21 days. Keep soil 60-65°F and moist (not soggy) for best results. Patience pays off—some stubborn seeds may take up to 4 weeks!
Wrapping up and next steps
Harvesting dianthus seeds with layered cold prep isn’t just a gardening task—it’s your ticket to a burst of vibrant blooms next season! By mastering this technique, you’ll unlock 99% germination rates and turn tiny seeds into thriving plants with confidence. 🌱✨
Ready to level up your garden game? Start small—try harvesting seeds from just one or two favorite varieties—then expand as you gain confidence. Soon, you’ll be sharing your green thumb secrets with fellow plant lovers!