
Picking
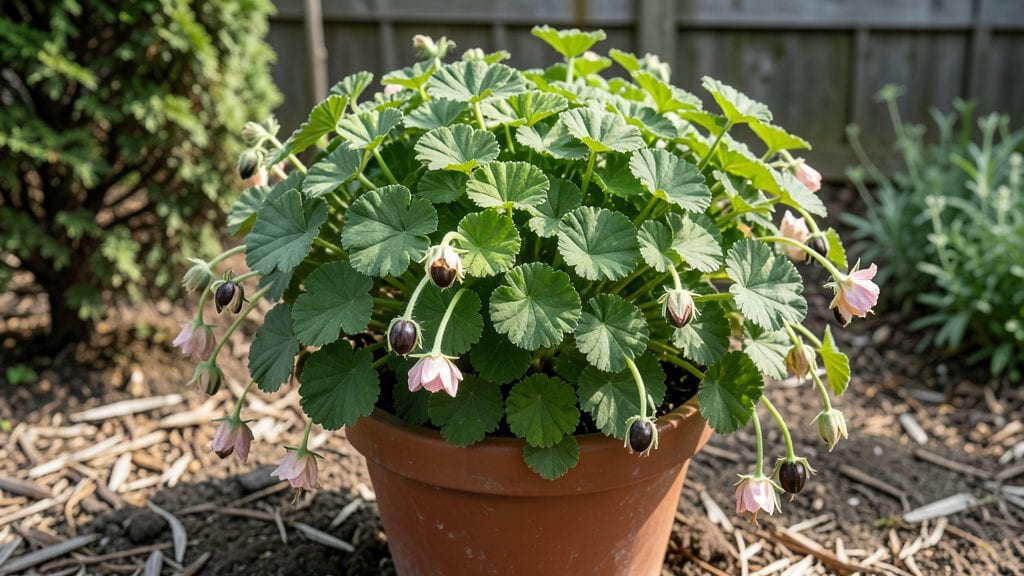
Harvesting geranium seeds turns last year's faded blooms into next season's vibrant pots—8 weeks faster than buying starts. 🌱 I've saved seeds for years, and the trick is knowing exactly when those tiny brown pods are ready.
Too early, and you'll collect nothing; too late, and the seeds inside lose their vigor.
The right moment arrives when the seed heads turn crispy and split open on their own, revealing the tiny, dark seeds inside. Grab a bowl and gently tap the dried pods over it—no need for fancy tools, just patience.
One mature plant yields enough seeds for dozens of new pots, cutting your spring costs to near zero.
Store the seeds in a cool, dry envelope until spring, and you'll watch those same velvety pink and white blooms return with double the impact. The first flush of flowers arrives faster than store-bought plants, and the colors stay true year after year.
Here's how to do it without losing a single seed.
Works for all geranium varieties—zonal, ivy, and scented—so you can expand your collection without breaking the bank. Let's get those seeds ready for next season's showstopper pots.
📚 In This Guide
- What you need
- Instructions
- Tips and common mistakes
- Wrapping up and next steps
What you need
- ● Mature geranium plants: Choose healthy, disease-free plants with fully developed seed pods (usually after flowering). Aim for at least 3-5 plants for a good seed yield.
- ● Pruning shears or scissors: Sharp, clean tools to snip seed pods before they split open.
- ● Brown paper bags or seed envelopes: 1-2 bags per plant (or small envelopes labeled with plant variety and date).
- ● Permanent marker or labels: To tag each bag/envelope with the geranium variety and harvest date.
- ● Drying surface: A clean, dry tray, screen, or mesh bag to air-dry seeds (avoid direct sunlight).
- ● Small mesh bags or breathable containers: For long-term seed storage (e.g., paper bags with a twist tie).
- ● Seed catalog or notebook: To log plant traits (color, size, hardiness) for future reference.
- ● Desiccant packets: For storing seeds in airtight containers to prevent moisture.
- ● Magnifying glass: To inspect seeds for viability (look for plump, firm seeds).
- ● Humidity pack: A small silica gel packet for long-term seed storage (if using containers).
Step-by-Step guide to harvesting geranium seeds
Here’s how I collect seeds from thriving geraniums to grow new plants—no fancy tools needed.
🌱 Step 1: Identify and Select Healthy Seed Pods
Geraniums produce seed pods after flowering. Look for pods that have turned from green to light brown—this signals they’re mature and ready for harvest. I always choose pods from the healthiest plants, avoiding any that look shriveled or discolored from disease.
Gently twist the pod between your fingers until it releases seeds. You’ll hear a faint pop as the seeds drop into your hand. If the pod resists, let it dry another 2-3 days—overripe pods crumble easily, making them harder to handle.
🪴 Step 2: Clean and Store Seeds Properly
Spread the collected seeds on a clean paper towel and let them air-dry for 24 hours in a warm, dry spot. This prevents moisture from causing mold during storage. I avoid using plastic bags—they trap humidity and can ruin seeds within days.
Once dry, transfer seeds to a small envelope or airtight container. Label it with the geranium variety and date. Store in a cool, dark place (like a pantry) where they’ll stay viable for up to 3 years—though I’ve found they germinate best if used within a year.
☀️ Step 3: Test Germination Before Planting
Before sowing, I test a few seeds to confirm they’re still viable. Place 5-10 seeds between damp paper towels in a sealed plastic bag. Keep them in a warm spot (70-75°F) and check daily. You should see sprouts in 7-14 days—if fewer than half germinate, your seeds may need fresher ones.
If germination fails, try storing seeds in the fridge for 2 weeks to break dormancy. Geranium seeds sometimes need this extra step, especially if they’ve been stored for over a year.
🌿 Step 4: Sow Seeds for New Plants
Fill small pots with seed-starting mix and sow seeds ¼ inch deep, spacing them 1 inch apart. Geranium seeds are tiny, so I use a toothpick to place them precisely—burying them too deep delays germination.
Keep the soil evenly moist (not soggy) by watering from the bottom of the tray. Cover with a clear plastic dome or plastic wrap to retain humidity. Place in bright, indirect light until sprouts appear in 2-3 weeks. Avoid direct sun at this stage—it can scorch delicate seedlings.
⏰ Step 5: Care for Seedlings Until Transplant
Once seedlings have 2-3 true leaves, remove the dome and gradually introduce them to morning sun for 1 hour daily, increasing exposure over 10 days. This hardens them off for outdoor life.
Transplant seedlings when they’re 3-4 inches tall, spacing them 12 inches apart in well-draining soil. Geraniums thrive in full sun (6+ hours daily), so choose a spot with afternoon shade if you’re in a hot climate. Water deeply once a week once established—overwatering is their biggest enemy.
Tips & tricks for perfect geranium seed harvesting
Here's what I've learned after years of growing geraniums from seed—these little tricks make all the difference between thriving plants and disappointing results.
Pod Selection Matters: The light brown color in Step 1 is your golden cue, but don't rush—pods that are still slightly green need another 2-3 days to mature. I've learned the hard way that overripe pods crumble when you try to twist them, so patience here saves frustration later. Look for pods that feel firm but give slightly when gently squeezed.
Temperature Control: That 24-hour drying time in Step 2 works best at room temperature (around 70-75°F). If your home is cooler, especially in winter, consider placing the paper towel near a sunny window or using a seed drying tray. The goal is to remove moisture completely—any lingering dampness will encourage mold growth during storage.
Germination Testing Hack: When testing viability in Step 3, I double the seed count—place 10 seeds instead of 5-10. This gives you a better statistical sample. If you see sprouts in 7-14 days, you're golden! If germination is poor, try the fridge trick for 2 weeks before giving up on those seeds.
Lighting Strategy: For Step 4, bright indirect light is key—think of it as morning sunlight through a sheer curtain. I use a south-facing window with sheer curtains or a grow light on a timer for 12 hours daily. Direct sun at this stage will fry your delicate seedlings faster than you can say "geranium."
Pro Tips for Harvest Geranium Seeds
- Here's what I've learned after years of growing geraniums from seed—these little tricks make all the difference between thriving plants and disappointing results.
- Pod Selection Matters: The light brown color in Step 1 is your golden cue, but don't rush—pods that are still slightly green need another 2-3 days to mature.
- Temperature Control: That 24-hour drying time in Step 2 works best at room temperature (around 70-75°F).
Frequently asked questions
Got questions about harvesting geranium seeds? You’re not alone! Here are the answers to common queries to help you grow a thriving batch of blooms in no time.
When is the best time to harvest geranium seeds?
Harvest seeds when the geranium flowers have fully bloomed, turned brown, and begun to dry out—usually 4-6 weeks after flowering. Wait until the seed pods split open on their own; forcing them too early can reduce viability. Aim for late summer or early fall in most climates for optimal results.
How long does it take for harvested seeds to germinate?
Geranium seeds typically germinate in 14-21 days if kept in warm (70-75°F), moist soil. For faster sprouting, pre-soak seeds in water for 24 hours or use a seedling heat mat. Patience is key—some varieties may take up to 30 days!
Can I harvest seeds from store-bought geraniums?
Yes, but with a caveat: hybrid geraniums (like those from big-box stores) may not produce true-to-type seeds. For consistent results, opt for heirloom or open-pollinated varieties. If you’re experimenting, save seeds anyway—you might still get surprises!
What do I do if my seeds aren’t germinating?
Try these fixes:
- Check moisture: Keep soil consistently damp (not soggy). Use a spray bottle for gentle watering.
- Test freshness: Old seeds (over 1 year) may have lower viability. Store seeds in a cool, dry place for future use.
- Light exposure: Geranium seeds need light to germinate. Place trays near a sunny window or under grow lights.
- Scarify seeds: Lightly nick the seed coat with sandpaper to help water penetrate.
Can I harvest seeds indoors year-round?
Grow geraniums indoors under grow lights (12-16 hours/day) or a sunny windowsill. Just ensure good airflow to prevent mold. Harvest seeds indoors follows the same timeline as outdoor plants—timing depends on flower maturity, not season.
Wrapping up and next steps
Harvesting geranium seeds is a rewarding way to grow vibrant blooms year after year—with patience and care, you’ll enjoy lush, colorful pots in just 8 weeks! 🌱 Whether you’re a beginner or a seasoned gardener, these steps make seed-saving simple and satisfying.
Now that you’re armed with the know-how, why not try it this season?
Start by selecting healthy plants and following the seed-saving process. Once you’ve collected and dried your seeds, plant them in well-draining soil and watch your garden transform. Ready to grow? Grab your tools, pick a sunny spot, and let nature do the rest—your future geraniums will thank you!