
Propagation
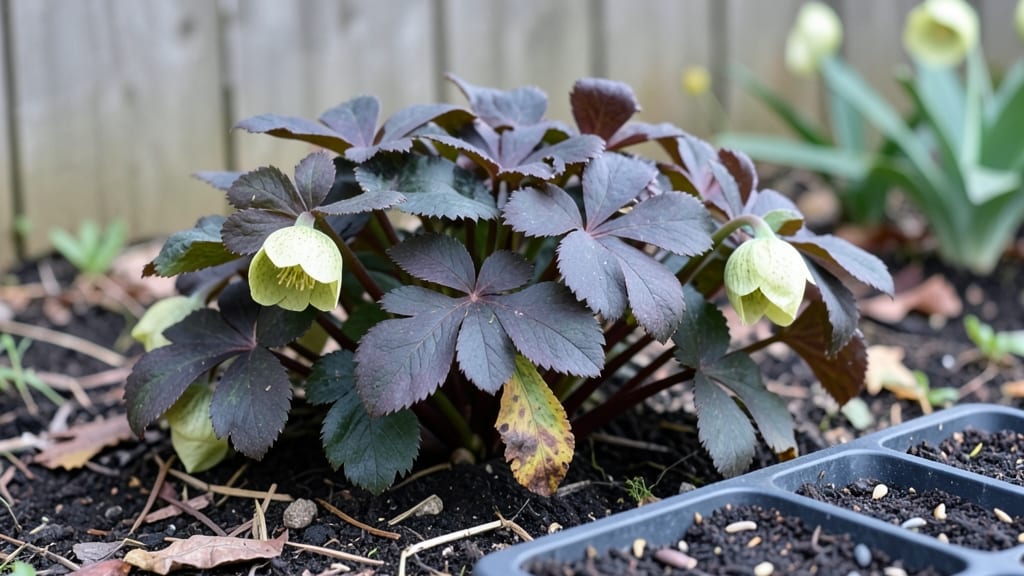
Growing Helleborus orientalis from seeds means waking up to snowdrops in three years instead of three decades—if you know the tricks. 🌱 The key isn’t rushing germination but creating the perfect winter chill followed by steady spring warmth, exactly how these tough perennials would grow in the wild.
You’ll need a shallow tray, sterile seed-starting mix, and patience—no fancy equipment. The real secret is stratification: mix seeds with damp sand, refrigerate for 60 days, then move to a bright, cool spot. Most gardeners skip this step and wait years for blooms, but this method cuts that time dramatically.
By month three, you’ll see tiny leaves unfurling, and by year three, those iconic nodding flowers will appear. The payoff is worth the wait: plants that naturalize beautifully, multiply over time, and bloom reliably through winter’s end.
Perfect for shade gardens, woodland edges, or any spot where early color transforms a dull corner. Here’s how to turn those tiny seeds into a lasting garden showstopper.
📚 In This Guide
- What you need
- Instructions
- Tips and common mistakes
- Wrapping up and next steps
What you need
- ● Helleborus orientalis seeds: Fresh or stored seeds (preferably less than 6 months old for best germination rates). Aim for 10–20 seeds per batch for experimentation.
- ● Sterilized seed-starting mix: A well-draining, peat-based or coco coir blend (avoid garden soil—it’s too dense!). Use 2–3 cups per 6-inch pot or tray.
- ● Seed trays or small pots: 2–4 inch deep with drainage holes (e.g., 6-pack cell trays or 4-inch pots). 1 tray or 4–6 pots should suffice for your batch.
- ● Clear plastic dome or plastic wrap: To create a humidity tent (a 12x12-inch square works for a seed tray).
- ● Spray bottle: With room-temperature water (a 16-ounce misting bottle is ideal).
- ● Grow lights or sunny windowsill: Full-spectrum LED grow lights (if indoors) or a south-facing window (for natural light). Aim for 10–12 hours of light daily.
- ○ Fertilizer (optional but helpful): A balanced, water-soluble fertilizer (e.g., 10-10-10) diluted to ½ strength for seedlings.
- ● Small hand trowel or spoon: For gently pressing seeds into the soil.
- ○ Fine-mesh sieve (optional): To sift soil for a fine, even layer (¼-inch thick) over seeds.
- ● Labeling tags or markers: To track seed varieties and planting dates.
- ● Patience (and a calendar!): Helleborus orientalis seeds can take 3–6 months to germinate—stay consistent with care!
- ○ Heat mat (optional but recommended): A seedling heat mat set to 65–70°F to encourage faster germination.
- ● ✨ Sterilize tools: Wipe trays, trowels, and pots with rubbing alcohol to prevent fungal issues.
- ○ 💡 Pre-chill seeds (optional): Place seeds in a plastic bag in the fridge for 4–6 weeks to mimic winter stratification and boost germination.
- ● 🌡️ Ideal conditions: Keep soil moist but not soggy (think damp sponge) and maintain 60–70°F temperatures.
Step-by-step instructions for growing Helleborus orientalis from seeds
Here’s how to coax these winter-blooming beauties from tiny seeds into sturdy plants.
🌱 Step 1: Stratify Seeds for 3 Months in the Fridge
Helleborus seeds need a cold period to break dormancy—this mimics their natural winter cycle. Place the seeds in a sealed plastic bag with a damp paper towel, then store them in the fridge for 90 days. Check monthly to ensure the towel stays moist; if it dries out, spritz it lightly with water.
I like to label the bag with the date so I don’t forget. After 3 months, the seeds will look plump and ready to sprout. This step is critical—skipping it means waiting years for germination, if it ever happens.
💧 Step 2: Sow Stratified Seeds in Light, Well-Draining Mix
Fill a shallow tray with sterile seed-starting mix (not garden soil—it’s too dense). Scatter the seeds on the surface—don’t bury them. Helleborus seeds need light to germinate, so press them gently into the top layer instead. Mist the tray until the soil feels evenly damp but not soggy.
Cover the tray with clear plastic wrap to retain moisture and warmth. Place it in a bright, indirect-light spot (like a north-facing windowsill). You’ll see tiny sprouts in 4-8 weeks, but don’t rush—patience is key here.
☀️ Step 3: Transplant Seedlings to Individual Pots
Once seedlings have 2-3 true leaves (not just the first tiny cotyledons), carefully transplant them into 3-inch pots filled with a mix of 50% potting soil and 50% perlite. This ensures fast drainage—Helleborus roots rot easily if they sit in wet soil.
Water gently after transplanting, then place the pots in partial shade for the first week. Gradually introduce them to morning sun over the next 2 weeks. Avoid full sun at this stage—young plants can scorch.
🪴 Step 4: Overwinter and Acclimate for Outdoor Planting
Keep seedlings indoors through their first winter, watering sparingly (only when the top inch of soil feels dry). In early spring, move them outside to a shaded, sheltered spot for a few hours daily. After 2-3 weeks, they can handle full outdoor conditions.
Plant them in the garden in fall of their second year—this gives their roots time to establish before winter. Choose a spot with dappled shade and well-draining soil. Mulch lightly to protect roots during cold snaps.
⏰ Step 5: Patience Pays Off—Blooms in 3-5 Years
Helleborus grown from seed take time—3-5 years before their first flowers appear. But once they do, they’ll reward you with stunning winter blooms for decades. Deadhead spent flowers in early spring to encourage new growth.
Here’s the thing—these plants thrive on neglect. Too much water or fertilizer can harm them. Just keep the soil moist (not wet) and give them space to grow. In a few years, you’ll have a drift of evergreen foliage and delicate flowers that brighten the darkest months.
Tips & tricks for growing Helleborus orientalis from seeds
These layered strategies will help you navigate the unique challenges of growing these winter-blooming beauties from seed.
Stratification Success: Don't just store those seeds in the fridge—create the perfect microclimate by placing a damp paper towel in a ziplock bag with the seeds. Seal it loosely to allow minimal airflow, then nestle the bag inside a larger container with a small cup of water at the bottom. This keeps humidity high while preventing mold. After the 90 days, you'll notice the seeds swell noticeably—this is your cue they're ready for planting.
Light Requirements: Helleborus seeds need light to germinate, but they can't handle direct sun. Place your seed tray on a north-facing windowsill or under grow lights set to 12 hours of light per day. If using grow lights, keep them 6-8 inches above the tray. I've found that fluorescent bulbs work better than LEDs for seed starting—they emit less heat that can stress delicate seedlings.
Transplanting Technique: When moving your seedlings to individual pots in Step 3, use a small spoon or chopsticks to gently lift them by their roots rather than pulling. Helleborus roots are fragile, and damage at this stage can set back growth. After transplanting, give the pots a gentle shake to help settle the soil around the roots—this prevents air pockets that can cause rot. Water from the bottom by placing pots in a tray of water for 10 minutes to encourage strong root development.
Overwintering Strategy: During the first winter indoors, place your seedlings near an east-facing window where they'll receive gentle morning light without harsh afternoon sun. Reduce watering to every 3-4 weeks—just enough to keep the top inch of soil from drying completely. I've seen seedlings that got too much water develop fungal issues, so it's better to underwater slightly than overwater. This careful approach builds hardiness for their eventual outdoor planting.
Pro Tips for Helleborus Orientalis Seeds
- These layered strategies will help you navigate the unique challenges of growing these winter-blooming beauties from seed.
- Stratification Success: Don't just store those seeds in the fridge—create the perfect microclimate by placing a damp paper towel in a ziplock bag with the seeds.
- Light Requirements: Helleborus seeds need light to germinate, but they can't handle direct sun.
Frequently asked questions
How long does it take for Helleborus orientalis seeds to germinate?
Patience is key! These seeds often take 3–6 months (or even up to a year) to germinate. Cold stratification (mimicking winter) is critical—plant seeds in fall or refrigerate them for 6–8 weeks before sowing. Pro tip: Keep soil consistently moist but not soggy during this time.
Can I grow Helleborus orientalis from seeds indoors?
Yes, but with caveats! Start seeds in pots with a well-draining mix (like 50% perlite + 50% peat). Place them in a cool (40–50°F) spot with bright, indirect light. Avoid warmth—it speeds germination too fast, weakening seedlings. Transplant outdoors after the last frost.
What’s the best way to stratify Helleborus orientalis seeds?
Stratification breaks dormancy. For natural stratification, sow seeds in fall in a shady, outdoor bed. For artificial stratification, mix seeds with damp sand or peat moss, seal in a bag, and refrigerate for 6–8 weeks. Label your bags—some varieties need longer cold exposure!
Why aren’t my Helleborus orientalis seeds sprouting?
Common culprits: insufficient cold, dry soil, or poor light. Double-check your stratification method and ensure soil stays moist (not waterlogged). If seeds are old (>1 year), viability drops—try fresh seeds or ask growers about pre-stratified options.
Are there easier alternatives to growing Helleborus orientalis from seed?
For faster results, try dividing mature plants (spring or fall) or buying young plants from nurseries. Seeds are rewarding for collectors but slow—ideal if you love the hunt or want rare cultivars. Bonus: Layering (burying stems) is another propagation method for established plants!
Wrapping up and next steps
Growing Helleborus orientalis from seeds is a rewarding journey that brings early spring beauty to your garden—just in three months! 🌱 With patience, the right layering techniques, and a little care, you’ll soon enjoy the delicate blooms of these winter-hardy perennials.
Whether you’re a seasoned gardener or just starting, this method proves that even the coldest months can yield stunning results.
Ready to take the next step? Start your seeds indoors now—your future garden (and pollinators!) will thank you. Happy planting! 🌸