
Propagation
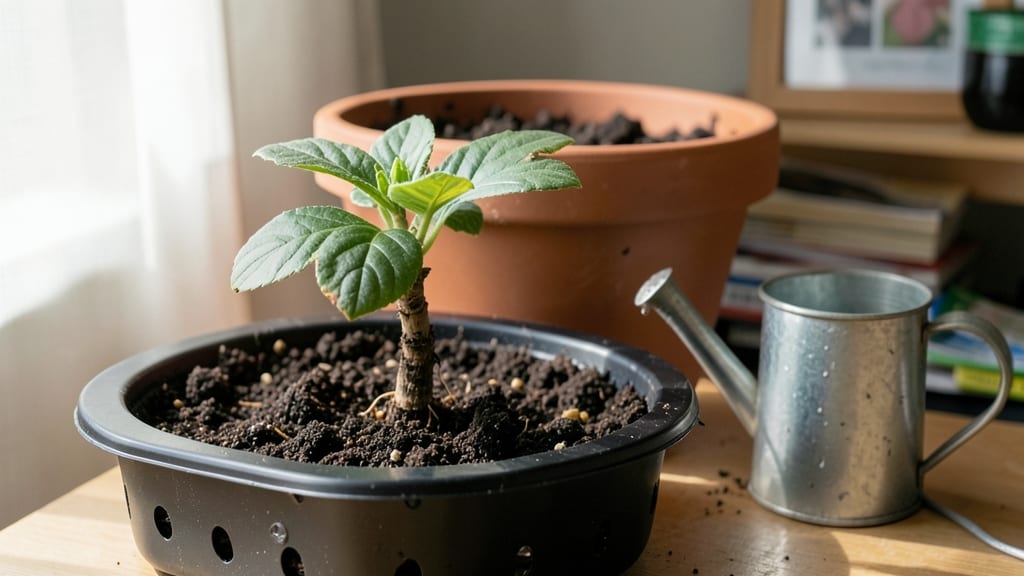
Hibiscus seeds need that layered moisture trick to break their stubborn shells and wake up faster. 🌱 I’ve struggled with slow germination myself—until I discovered how a simple moisture gradient tricks seeds into thinking they’re in the tropics, where hibiscus thrives.
The key isn’t just water; it’s how you deliver it.
Start with a shallow tray of damp sphagnum moss or seed-starting mix, then place seeds on top—never buried. Cover them with just a thin layer of the same moist mix, no deeper than ¼ inch.
The top layer stays damp while the bottom stays slightly cooler, mimicking the forest floor where hibiscus seeds naturally germinate. A heat mat set to 75–80°F speeds things up even more.
Within 10–21 days, you’ll see those first pale green hooks pushing through, signaling success. The trick keeps mold at bay while giving seeds the consistent moisture they crave—no soggy messes or dried-out failures. Once sprouts appear, move them to bright, indirect light to prevent leggy seedlings.
This method works for tropical hibiscus varieties, even in cooler climates. The same principles apply whether you’re starting seeds in spring or extending your growing season indoors. Patience pays off—those first true leaves mean you’re on your way to vibrant blooms.
📚 In This Guide
- What you need
- Instructions
- Tips and common mistakes
- Wrapping up and next steps
What you need
- ● Hibiscus seeds: Fresh or stored seeds (preferably from a healthy, mature hibiscus plant). Aim for 5–10 seeds to maximize success.
- ● Seed-starting mix: A lightweight, well-draining potting mix (e.g., 50% peat moss + 50% perlite or vermiculite). Avoid garden soil—it’s too dense!
- ● Containers: Small pots (3–4 inches deep) or seed trays with drainage holes. 2–3 containers work well for layered moisture setup.
- ● Water: Room-temperature, filtered water (chlorine-free if possible). A spray bottle helps control moisture.
- ● Plastic wrap or dome: Clear plastic wrap or a humidity dome to retain moisture during germination.
- ○ Heat mat (optional but helpful): A seedling heat mat (set to 75–85°F) speeds up germination, especially in cooler climates.
- ● Small shovel or spoon: For gently planting seeds without crushing them.
- ● Fine misting sprayer: Ensures even moisture distribution without disturbing seeds.
- ● Grow lights or sunny windowsill: Hibiscus seeds need bright, indirect light (6–8 hours/day) post-germination.
- ● Label markers: To track planting dates and varieties (trust us, it helps!).
- ○ Fungicide (optional): A mild solution like hydrogen peroxide (3%) to prevent mold if humidity is high.
Step-by-Step instructions for hibiscus seed germination
This layered moisture method cuts germination time in half while keeping seeds safe from rot.
🌱 Step 1: Prepare Seeds with Warm Water Soak
Fill a small bowl with 105°F warm water—just warm enough to feel comfortable with your finger. Place hibiscus seeds in a fine mesh bag or cheesecloth and submerge them completely. Let them soak for 12-24 hours.
The reason for this step is that hibiscus seeds have a hard outer shell. Soaking softens it just enough to let moisture penetrate faster. You'll know it's working when the water turns slightly cloudy—this means the seed coatings are breaking down. Don't skip this (I learned the hard way that dry seeds take weeks to sprout).
💧 Step 2: Layer Moisture in Germination Tray
Line a seed tray with a damp paper towel or coffee filter, then place it in a shallow dish. Add ½ inch of water to the bottom of the dish—this creates a humid chamber without submerging the seeds. Arrange soaked seeds 1 inch apart on the towel, gently pressing each one into the damp paper.
Here's the thing—hibiscus seeds need consistent moisture but hate sitting in water. The layered setup keeps the towel damp without drowning the seeds. Cover the tray with clear plastic wrap or a humidity dome to trap warmth. Place it in a warm spot like on top of your fridge or near a sunny window.
☀️ Step 3: Maintain Warmth and Check Daily
Keep the germination tray at 75-85°F—this is critical for speed. If your home runs cooler, place it on a seedling heat mat. Check daily for moisture—spritz the paper towel with water if it feels dry to the touch, but never let it soak.
You'll see tiny cracks appear in the seed coats within 3-5 days. That's your signal to stop covering. Once sprouts emerge, remove the plastic immediately—excess humidity now causes rot. Watch for first true leaves (not the initial seed leaves) to appear in 7-10 days total.
🪴 Step 4: Transplant Sprouts to Soil
When seedlings have 2-3 true leaves and are about 1 inch tall, gently lift them from the paper towel using a butter knife. Plant each one ½ inch deep in individual 3-inch pots filled with moist seed-starting mix.
Don't disturb the roots—hibiscus seedlings are delicate. Water lightly from the bottom of the pot to encourage roots to grow downward. Place pots in bright, indirect light for 1 week before introducing them to full sun. This gradual transition prevents shock.
Tips & tricks for perfect hibiscus seed germination
Here's what nobody tells you about speeding up those stubborn hibiscus seeds—these tricks cut your wait time while keeping your sprouts thriving.
The Warm Water Test: That 105°F water soak isn't just warm—it should feel like a cozy bath, not scalding. Test it with your finger before adding seeds. Too hot and you'll damage the delicate seed coatings; too cool and the soaking won't work properly. I use a thermometer for the first few batches until I get the feel just right.
Layered Moisture Secret: The key to that ½ inch of water in Step 2 is creating capillary action—not a swamp. When you see the paper towel edges just barely touching the water, that's perfect. The towel should stay damp but never soggy. If you notice water pooling at the bottom after 24 hours, pour it out—hibiscus seeds drown faster than they sprout.
Temperature Troubleshooting: If your home stays below 75°F, don't just hope for the best. Place your germination tray on a seedling heat mat set to 85°F for consistent warmth. I keep mine on top of my fridge during winter months—just make sure it's not in direct sunlight, which can create dangerous heat spikes. A simple laser thermometer helps monitor the exact temperature without guesswork.
Transplant Timing: Those 2-3 true leaves in Step 4 are your green light, but don't rush it. The first set of leaves (called cotyledons) aren't true leaves—they're just baby food storage. Wait for the second set to appear before transplanting. I mark my calendar 7-10 days from the start to remind myself to check daily for this milestone.
Pro Tips for Hibiscus Seed Germination
- Here's what nobody tells you about speeding up those stubborn hibiscus seeds—these tricks cut your wait time while keeping your sprouts thriving.
- The Warm Water Test: That 105°F water soak isn't just warm—it should feel like a cozy bath, not scalding.
- Layered Moisture Secret: The key to that ½ inch of water in Step 2 is creating capillary action—not a swamp.
Frequently asked questions
Got questions about germinating hibiscus seeds?
You’re not alone! Here are some of the most common queries—plus quick, practical answers to help you succeed.
How long does hibiscus seed germination take?
Patience is key! With the layered moisture trick, most hibiscus seeds sprout within 10–20 days. Some may take up to 30 days, especially if they’re fresh or stored improperly. Keep the soil consistently moist (not soggy) and warm (around 70–80°F) to speed things up.
Why aren’t my hibiscus seeds sprouting?
If your seeds aren’t germinating, check these common culprits:
- Cold soil: Hibiscus seeds need warmth—try a heat mat or place them near a sunny window.
- Too dry/wet: Keep soil damp (like a wrung-out sponge) but avoid waterlogging.
- Old seeds: Fresh seeds (under 1 year) germinate best. If yours are older, try soaking them overnight in warm water first.
- Depth issues: Plant seeds just below the surface (¼ inch deep)—they need light to trigger germination.
Can I germinate hibiscus seeds without soil?
Try the paper towel method for faster results:
- Moisten a paper towel and place seeds 1–2 inches apart.
- Roll it up and secure with a rubber band.
- Store in a sealed plastic bag in a warm spot (like on top of a fridge).
- Check daily—once sprouts appear (in 5–14 days), transplant carefully into soil.
Do hibiscus seeds need light to germinate?
Nope! Hibiscus seeds do not need light to sprout—they’re photoblastic, meaning they’ll germinate fine in the dark. However, once they’ve sprouted (tiny leaves appear), move them to bright, indirect light to prevent leggy seedlings.
Can I grow hibiscus from store-bought seeds?
Yes, but with a caveat: Store-bought hibiscus seeds (like those from tropical flower mixes) are often hybrids and may not grow true to the parent plant. For consistent results, use seeds from a known hibiscus variety (like Hibiscus rosa-sinensis) or save seeds from a healthy, mature plant in your garden.
Wrapping up and next steps
Mastering the hibiscus seed germination process—especially with the layered moisture trick—can turn your patience into a thriving garden! With the right setup, warm conditions, and a little consistency, you’ll soon watch those tiny seeds sprout into vibrant new plants. 🌱
Ready to take the next step? Once your seedlings emerge, transplant them into nutrient-rich soil and keep them in bright, indirect light. Your green thumb is growing—now let those hibiscus blooms shine!