
Propagation
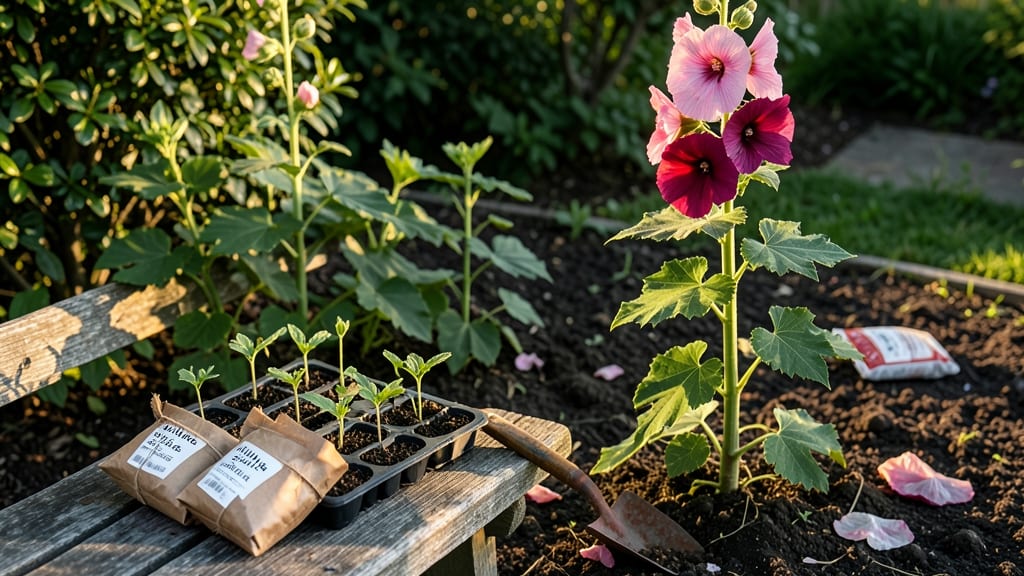
Growing hollyhocks from seeds gives you towering, old-fashioned blooms that store-bought plants can't match. ✨ I've grown them from seed for five summers now, and the first time I saw those tall spikes of ruffled petals rising above my fence, I knew I'd never buy transplants again.
These biennials and short-lived perennials reward patience—your first blooms arrive in year two, but the show gets better every season.
The secret to success starts with the right seeds and timing. Hollyhocks love cool weather, so direct-sow them outdoors in early spring or late summer for fall blooms. If you start indoors, begin seeds 8-10 weeks before your last frost—they germinate slowly, often taking 2-3 weeks to sprout.
The soil mix should be loose and well-draining, or those seedlings will rot before they get a chance to grow.
By year three, you'll have sturdy stems reaching 5-6 feet tall, covered in blooms that last from midsummer to frost. The fragrance alone makes it worth the wait—sweet and honey-like, it draws bees and hummingbirds to your garden.
Just give them full sun and consistent moisture, and they'll thrive with almost no fuss after the initial setup.
Whether you're filling a cottage garden border or adding height to a mixed perennial bed, hollyhocks bring drama and nostalgia. The key is starting right—once you've got those first seedlings up, the rest is just watching them grow.
Here's how to make it happen without the usual struggles most beginners face.
📚 In This Guide
- What you need
- Instructions
- Tips and common mistakes
- Wrapping up and next steps
What you need
- ● Hollyhock seeds: Choose heirloom or hybrid varieties (e.g., Alcea rosea). Start with 5–10 seeds for a small patch or 20+ seeds for a full border.
- ● Seed-starting mix: A lightweight, well-draining potting soil blend (avoid garden soil—it’s too dense). A 10–15 lb bag is ideal for 6–12 seed trays.
- ● Seed trays or small pots: 2–4 inch deep containers with drainage holes. 12–24 cell trays work well for batch planting.
- ○ Grow lights or sunny windowsill: Hollyhocks need 6–8 hours of light daily. A LED grow light (12–15W per tray) is optional but helpful for indoor starts.
- ● Misting bottle or spray nozzle: For gentle watering to keep seeds moist without disturbing them.
- ● Plant labels: Small stakes or biodegradable markers to track varieties (especially if growing multiple types).
- ○ Fertilizer (optional but recommended): A balanced liquid fertilizer (e.g., 10-10-10) diluted to ½ strength for seedlings.
- ● Or slow-release granules mixed into transplant soil.
- ● Tweezers or toothpick: For carefully placing tiny seeds (hollyhock seeds are tiny!).
- ○ Heat mat (optional): Speeds up germination—set to 70–75°F for faster sprouting.
- ● Transplanting tools: Small hand trowel or spoon for moving seedlings.
- ● Garden gloves: Protects hands from prickly stems (especially when transplanting mature plants).
- ● Stakes or trellis: Hollyhocks grow 4–6 feet tall! Use 3–4 ft stakes or a lightweight trellis for support.
- ● Mulch: Organic mulch (e.g., straw or shredded leaves) to retain moisture and suppress weeds.
- ● Patience: Hollyhocks take 2–3 years to bloom from seed—plan ahead!
- ● Sunny spot: Choose a location with full sun (6+ hours daily) for transplants.
- ● Well-draining soil: Amend heavy clay with compost or sand if needed.
- ○ Deadheading tools (optional): Pruners or scissors to remove spent blooms and encourage more flowers.
Step-by-Step instructions for growing hollyhocks from seeds
Hollyhocks reward patience with towering stems of cheerful blooms. Here’s how to grow them from seed with confidence.
🌱 Step 1: Start Seeds Indoors for Strong Starts
Fill a seed tray with the seed-starting mix and moisten it until damp but not soggy. Hollyhock seeds germinate best at 65-75°F, so place the tray on a seedling heat mat if your home runs cooler. Scatter seeds ¼ inch deep—they’re tiny, so I use tweezers to avoid overcrowding.
Cover lightly with more mix and mist gently with water. Keep the tray in a warm, bright spot (a sunny windowsill works) until sprouts appear in 10-14 days. If condensation forms on the tray cover, remove it for a few hours daily to prevent mold.
💧 Step 2: Transplant Seedlings When True Leaves Emerge
Once seedlings show first true leaves (not the initial seed leaves), carefully transplant them into 4-inch pots filled with the potting mix. Use a small spoon to lift each seedling and its roots to avoid damaging them. Hollyhocks dislike root disturbance, so handle them gently.
Water lightly after transplanting and place pots in a spot with bright, indirect light for a week. Gradually introduce them to 4-6 hours of morning sun daily to harden off. Avoid placing them in direct midday sun too soon—their young stems can’t handle the intensity yet.
☀️ Step 3: Acclimate Outdoors Before Final Planting
When nighttime temperatures stay above 50°F, move pots outside during the day and bring them back indoors at night. Start with 2-3 hours of sunlight and increase by 1 hour daily over 10-14 days. This slow transition prevents shock and helps stems strengthen.
Hollyhocks thrive in full sun, so choose a spot with at least 6+ hours of direct light. The soil should drain well—amend heavy clay with compost if needed. Plant them 12-18 inches apart in rows 2-3 feet apart to allow for their mature size.
✂️ Step 4: Support and Prune for Long-Stemmed Blooms
Install sturdy stakes or a trellis at planting time—hollyhocks grow 4-6 feet tall and need support. As stems grow, gently tie them to the stakes with soft twine or plant clips. Avoid wrapping tightly, as it can restrict growth.
Deadhead spent blooms regularly to encourage more flowers. Pinch back the top set of leaves in early summer to promote bushier growth. If stems flop over in wind or rain, add extra support immediately—hollyhocks are top-heavy and can break easily.
🪴 Step 5: Overwinter for Multi-Year Blooms
Hollyhocks are biennial or short-lived perennials, meaning they often bloom best in their second year. After the first year, cut back stems to 6 inches tall in late fall. Mulch heavily with 2-3 inches of straw or shredded leaves to protect roots from freezing.
In early spring, remove the mulch and water lightly to wake dormant roots. New shoots will emerge in 3-4 weeks, signaling it’s time to fertilize lightly with balanced fertilizer. With proper care, your hollyhocks will return year after year, rewarding your patience with vibrant blooms.
Tips & tricks for growing hollyhocks from seeds
Hollyhocks may seem delicate, but with these insider tips, you'll grow them like a pro—even if you're new to gardening.
Temperature Matters: Hollyhock seeds need that 65-75°F range to germinate, but don't worry if your home runs cooler. A simple seedling heat mat solves this—just place it under your seed tray. I've grown them successfully in 60°F homes by using a heat mat, though germination takes 2-3 days longer. If your home is too warm, move the tray to a cooler spot to prevent mold from condensation.
Transplanting Technique: In Step 2, when transplanting those tiny seedlings into 4-inch pots, use a small spoon or butter knife to lift them gently by their roots. Hollyhocks hate root disturbance, so avoid grabbing the stems. I've learned this the hard way—when I pulled them by the leaves, they took weeks to recover. Also, keep the soil around the roots intact to minimize stress on the delicate plants.
Acclimating Outdoors: The 10-14 day outdoor acclimation in Step 3 is crucial, but don't rush it. Start with just 2-3 hours of sunlight and gradually increase. I've seen beginners move them straight to full sun, which causes shock and stunted growth. Watch for leaves that look slightly wilted—they're telling you to slow down. A simple shade cloth over part of the pot can help ease the transition if needed.
Support System: Install those stakes or trellises before planting in Step 4—trust me, you won't want to dig them in later. Hollyhocks grow 4-6 feet tall and are top-heavy, so their stems can break easily in wind or rain. I use bamboo stakes because they're sturdy yet flexible enough to support the natural sway of the plants. For extra security, tie the stems loosely with soft twine every 12 inches up the stalk.
Pro Tips for Hollyhocks From Seeds
- Hollyhocks may seem delicate, but with these insider tips, you'll grow them like a pro—even if you're new to gardening.
- Temperature Matters: Hollyhock seeds need that 65-75°F range to germinate, but don't worry if your home runs cooler.
- Transplanting Technique: In Step 2, when transplanting those tiny seedlings into 4-inch pots, use a small spoon or butter knife to lift them gently by their roots.
Frequently asked questions
Got questions about growing hollyhocks from seeds? You’re not alone! Here are some of the most common queries—and their straightforward answers—to help you cultivate stunning blooms with confidence.
How long does it take for hollyhock seeds to germinate?
Hollyhock seeds typically germinate in 10 to 21 days when planted in warm soil (around 70°F). Keep the soil consistently moist but not soggy, and place the seed tray in a sunny spot. Patience is key—some varieties may take longer, especially in cooler conditions. If you’re impatient, try soaking seeds overnight before planting to speed up the process!
Can I grow hollyhocks from seeds indoors for faster blooms?
Start seeds 6 to 8 weeks before your last frost date indoors under grow lights. Use small pots with well-draining soil, and keep them in a warm spot. Once seedlings have 2-3 sets of leaves, transplant them outdoors after hardening off (acclimating them to outdoor temps over 7-10 days). This method can shave 1-2 years off your wait time for blooms!
What’s the best way to protect hollyhock seedlings from pests?
Hollyhocks are tough, but young seedlings can fall prey to slugs, aphids, or cabbage worms. Here’s how to defend them:
Yes! Hollyhocks are prolific self-seeders, which means you might end up with volunteer plants everywhere. To manage them:
Slow growth is often due to cool soil, poor drainage, or lack of sunlight. Check these fixes:
A little prevention goes a long way!
Do hollyhocks self-seed aggressively? How do I manage it?
Embrace the wild side—or tame it with a little elbow grease!
Why aren’t my hollyhock seedlings growing tall?
With the right conditions, those stems will reach for the sky!
Wrapping up and next steps
Growing hollyhocks from seeds is a rewarding journey that brings bold, cottage-garden charm to your space with minimal effort! 🌸 With patience—just three years to full bloom—you’ll enjoy vibrant flowers while learning the art of organic propagation.
Whether you’re a beginner or a seasoned gardener, these hardy plants thrive with basic care, proving that beauty grows from tiny seeds.
Ready to dive deeper? Start small: Try a single packet of seeds this spring, or explore companion plants like lavender or poppies to create a stunning border. Your future garden awaits—dig in and watch the magic unfold! 🌱