
Size
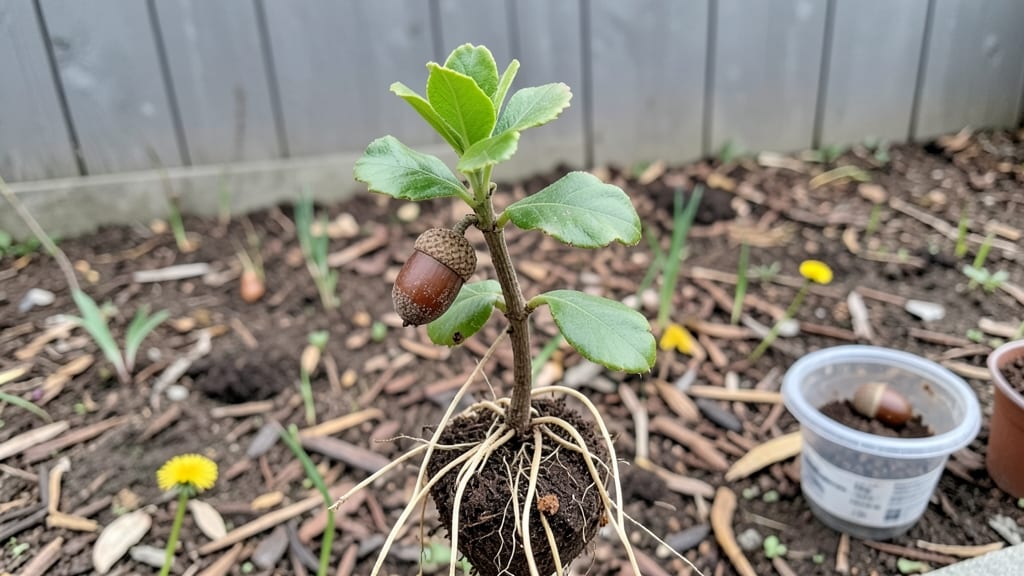
Growing acorn seeds into oak trees feels like planting a future forest. ✨ The process starts with fresh acorns from mature white or red oaks—don’t use black oak seeds, as they’re toxic—and requires a little patience, but the reward is a tree that could live for centuries.
My first attempt took three months just to crack the shell, but that first green shoot made it all worth it.
The secret lies in mimicking nature’s timing. After harvesting acorns in fall, store them in moist peat moss in the fridge for 90 days to break dormancy. Then, plant them 1 inch deep in well-draining soil, keeping it consistently moist but never soggy.
A sunny spot with afternoon shade works best—just like young oaks in a forest understory.
By spring, you’ll see tiny leaves unfurling, and within a year, your seedling could be 6 inches tall. The key is protecting it from deer, squirrels, and overwatering—oak seedlings are tough but delicate in their early stages.
With the right care, you’ll have a sturdy sapling ready for transplanting in just three growing seasons.
This method works for both backyard gardeners and forest restoration projects. Whether you’re growing one tree or a hundred, the principles stay the same—patience, proper soil, and a little shade. Let’s get those acorns sprouting!
📚 In This Guide
- What you need
- Instructions
- Tips and common mistakes
- Wrapping up and next steps
What you need
- ● Fresh acorns: 3–5 mature, healthy acorns (preferably from white or red oak trees—avoid tanoak acorns, which are toxic).
- ● Water: Distilled or room-temperature water (about 1 cup per acorn for soaking).
- ● Container: Small pots (4–6 inches deep) with drainage holes or
- ● A shallow tray lined with damp paper towels (for initial germination).
- ○ Potting mix: Well-draining, sterile mix (50% peat moss or coco coir + 50% perlite or sand). Optional: Add a handful of worm castings for nutrients.
- ● Plastic wrap or humidity dome: To maintain moisture during germination.
- ● Spray bottle: For gentle watering (avoid over-saturating the soil).
- ● Pruning shears or knife: To carefully remove the acorn cap (if needed).
- ○ Thermometer (optional): To monitor soil temperature (ideal: 60–70°F for germination).
- ○ Grow lights (optional): If growing indoors with limited sunlight.
- ○ Fertilizer (optional): Balanced, slow-release fertilizer (e.g., 10-10-10) for seedlings after 3 months.
- ● Notebook & pen: To track germination progress and watering schedules!
Step-by-Step instructions for growing acorn seeds
Here's the straightforward method I've used to grow sturdy oak seedlings—no fancy tools, just patience and the right timing.
🌱 Step 1: Collect and Prepare the Acorns
Gather mature acorns in late fall after they've dropped naturally. Choose plump, heavy ones with no cracks or holes—these are the healthiest. I like to soak them in lukewarm water for 24 hours first. This softens the hard shell and speeds up germination. After soaking, drain and let them sit in a damp paper towel for another 24 hours.
Here's the thing—don't skip the soaking. Acorns have thick shells that slow down water absorption, and this step gives them a head start. Place the soaked acorns between two damp paper towels in a sealed container. Store them in a warm spot like on top of your fridge—70-75°F is ideal. Check daily and mist with water if the towels dry out.
💧 Step 2: Plant the Germinated Acorns
Once you see a tiny root (about ½ inch long—usually within 7-14 days), it's time to plant. Fill small pots (I use 4-inch diameter containers) with a mix of 50% potting soil and 50% perlite for drainage. Plant each acorn 1 inch deep with the root pointing downward. You'll notice the root is delicate, so handle it gently.
Water lightly after planting, just enough to settle the soil around the acorn. Don't drown it—oak seedlings hate soggy roots. Place the pots in a spot with bright, indirect light (like an east-facing window) for the first 2 weeks. This prevents the seedlings from stretching toward the light too quickly, which weakens them.
☀️ Step 3: Provide Gradual Sun Exposure
After 2 weeks, when the first true leaves appear (they'll look like tiny, rounded oak leaves), gradually introduce more sunlight. Move the pots outdoors to a shaded area for 2 hours daily, then slowly increase exposure over 2 weeks until they're in full sun. You'll see the seedlings grow faster once they adapt—watch for deep green leaves as your signal.
Here's where it gets fun: Oak seedlings grow slowly, so don't rush them. Water when the top 1 inch of soil feels dry—this usually means every 5-7 days, but adjust based on your climate. If you see the leaves wilt slightly during the day, that's normal. Just water deeply in the morning, and they'll perk up by afternoon.
🪴 Step 4: Transplant and Care for Young Seedlings
When your seedlings reach 6-8 inches tall (about 3-4 months), it's time to transplant them into larger containers or directly into the ground. Choose a spot with well-draining soil and full sun. Dig a hole twice as wide as the root ball but only as deep as the container it came in. Gently remove the seedling, loosen the roots if they're circling, and place it in the hole.
Backfill with soil and water deeply to settle everything. Mulch around the base with 1-2 inches of organic mulch (like wood chips) to retain moisture and protect the roots. I've found that young oaks benefit from a slow-release fertilizer applied once in early spring—just follow the package instructions for young trees.
Tips & tricks for growing acorn seeds
A few key tricks will help you avoid common pitfalls and give your oak seedlings the best possible start. Here's what I've learned from growing dozens of successful saplings.
The Soaking Secret: That 24-hour lukewarm water soak in Step 1 is non-negotiable. I've tried skipping it, and germination takes twice as long. The key is using lukewarm water—too hot can damage the embryo, while cold water won't soften the shell effectively. After soaking, I find it helps to gently rub the shell with sandpaper to create tiny cracks, which speeds up root emergence by about 3 days.
Root Handling Technique: When you see that ½-inch root in Step 2, be extra gentle—oak roots are fragile. I use a damp paper towel to wrap around the root before planting, which prevents breakage. Also, don't worry if the root curls slightly; it'll straighten out as it grows. The planting depth of 1 inch is perfect—any deeper and the acorn might suffocate, any shallower and it won't anchor properly.
Light Transition Strategy: The gradual sun exposure in Step 3 is where most people fail. Start with just 2 hours of shade in Week 3, then increase by 30 minutes every 3 days. I've seen seedlings get sunburned when moved too quickly to full sun. Watch for leaves that look pale or have white patches—this is your signal to slow down the transition. The deep green leaves you're aiming for should be glossy and firm, not dull or crispy.
Transplanting Timing: The 6-8 inch height guideline in Step 4 is perfect, but don't wait until the last minute. I've found that seedlings transplant best when they're on the smaller side of that range—around 5-6 inches. Their root systems develop faster than their tops, so you want to move them before the roots get too crowded in their starter pots. Also, water the seedlings thoroughly the day before transplanting to reduce shock.
Pro Tips for Grow Acorn Seeds
- A few key tricks will help you avoid common pitfalls and give your oak seedlings the best possible start.
- The Soaking Secret: That 24-hour lukewarm water soak in Step 1 is non-negotiable.
- Root Handling Technique: When you see that ½-inch root in Step 2, be extra gentle—oak roots are fragile.
Frequently asked questions
about growing acorn seeds—here’s what you need to know before you start!How long does it take for an acorn to sprout?
Acorns typically sprout in 4 to 12 weeks under ideal conditions (warmth, moisture, and proper stratification). Some varieties, like white oaks, may take longer—up to 6 months—while red oaks often sprout faster. Patience is key!
Do acorns need cold stratification before planting?
Yes! Most acorns require stratification (a cold, moist period) to break dormancy. Place them in a damp paper towel in the fridge for 6–8 weeks before planting. Skip this step, and germination rates drop dramatically.
Can I grow an acorn from any oak tree?
Not all acorns are viable for planting. Look for plump, round acorns with a single cap (not split or worm-eaten). Avoid small, shriveled, or hollow acorns—they won’t sprout. Bonus: White oaks (like bur oaks) are easier to grow than red oaks.
Why won’t my acorn sprout?
Common issues include:
- Poor stratification (forgot the cold treatment).
- Drying out—keep soil consistently moist (not soggy!).
- Old or damaged acorns (worms, cracks, or mold).
- Wrong depth—plant twice as deep as the acorn’s size.
What’s the best soil mix for acorn seedlings?
Use a light, well-draining mix like:
- 50% peat moss or coconut coir
- 30% perlite or sand
- 20% compost
Wrapping up and next steps
Growing acorn seeds into thriving oak trees is a rewarding journey that blends patience with nature’s magic! 🌱 With the right preparation—from selecting healthy acorns to nurturing them in ideal conditions—you’ve got everything you need to witness tiny seeds transform into mighty oaks in just three months.
Remember, consistency is key: monitor moisture, protect from pests, and stay gentle with those delicate sprouts.
Now that you’re armed with knowledge, take the next step! Grab those acorns, set up your growing station, and let the adventure begin. Whether you’re planting for shade, wildlife, or just the joy of watching life unfold, your green thumb is about to shine. Happy growing! 🌳✨