
Picking
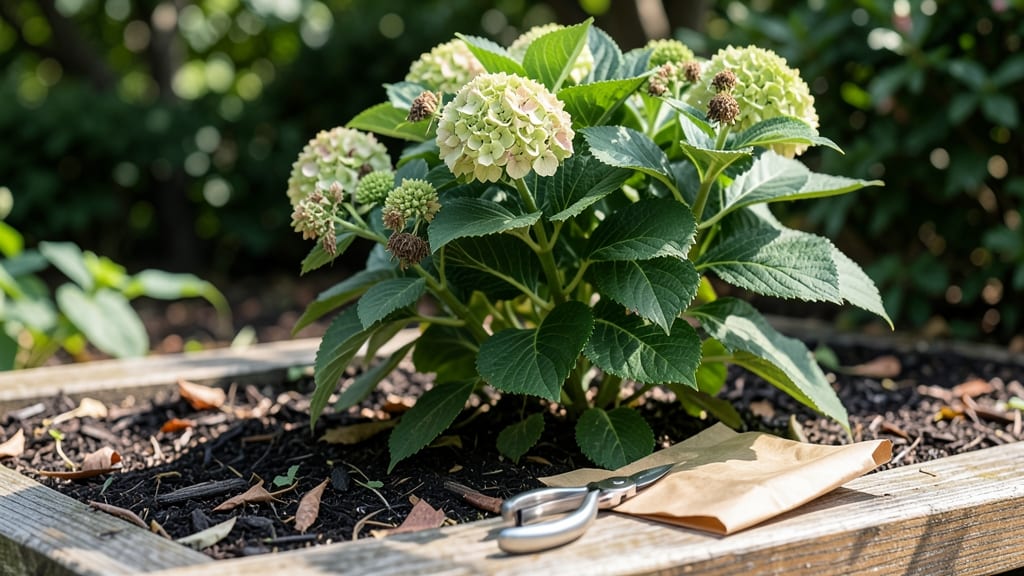
Harvesting hydrangea seeds isn’t just about saving money—it’s about unlocking next year’s blooms before they even appear. 🌿 The key moment arrives in late fall when those once-showy seedheads turn from brown to a papery, almost skeletal dryness.
I’ve learned that waiting too long means seeds scatter in the wind, while harvesting too early leaves them underdeveloped and nonviable.
You’ll need just three things: sharp pruning shears, a paper bag for collection, and a patient eye for timing. The seedheads should crumble easily when gently squeezed—this is your cue.
I’ve found that harvesting on a dry, still day prevents seeds from flying away mid-cut, and storing them in a cool, dark place (like a seed envelope) keeps them viable for up to two years.
What you’ll end up with is a head start on next season’s plants, plus the satisfaction of growing hydrangeas from seed instead of buying them. The seedlings take longer to mature than cuttings, but they develop stronger roots and often produce more vibrant blooms.
Plus, you’ll have a backup plan if your main plants get hit by frost or pests.
Here’s the thing—most hydrangeas produce seeds reluctantly, so encourage them by leaving a few seedheads on the plant each year. Avoid over-pruning in fall, and make sure your plants get enough sunlight and water.
The payoff? A garden full of hydrangeas that thrive because you grew them from the ground up.
📚 In This Guide
- What you need
- Instructions
- Tips and common mistakes
- Wrapping up and next steps
What you need
- ● Sharp pruning shears or scissors – Clean, sterilized (to avoid disease transfer). A bypass pruner (3–6" blades) works best.
- ● Paper bags or breathable seed envelopes – Brown kraft paper or mesh bags (avoid plastic—it traps moisture). Aim for 1–2 bags per 5–10 seedheads.
- ● Rubbing alcohol (70% isopropyl) and cotton swabs – For sterilizing tools before cutting.
- ● Small paintbrush or tweezers – Helps gently separate seeds from dried flower heads.
- ● Drying tray or screen – A wire mesh screen or baking sheet to air-dry seeds (place in a cool, dry, shaded spot).
- ● Air-tight storage container or seed packets – Label with the hydrangea variety and harvest date. Use paper envelopes or glass jars with silica gel for long-term storage.
- ● Hand lens or magnifying glass – For inspecting seed viability (look for plump, firm seeds).
- ● Spray bottle with water – Lightly moisten stubborn seedheads if they’re too dry to open.
- ● Notebook or plant journal – Track harvest dates, seed sources, and germination notes for future reference.
- ● Humidity pack or desiccant – Adds an extra layer of moisture protection in storage.
Step-by-Step guide to harvesting hydrangea seeds
Here's how to collect and store hydrangea seeds for next year's thriving plants.
🌿 Step 1: Identify Mature Seedheads
Wait until late fall or early winter when seedheads turn a papery brown and begin crumbling easily in your fingers. These are your signal that seeds are fully mature. Avoid harvesting when seedheads are still green or partially dried—they won't contain viable seeds. I like to check them every few days in October, as conditions vary by climate.
Gently squeeze a seedhead between your fingers. If it breaks apart with light pressure, revealing small brown seeds inside, it's ready. The seeds themselves should be firm and dark brown, not shriveled or dusty. If you find any mold or soft spots, discard that seedhead immediately—it's past its prime.
⏰ Step 2: Collect Seeds at the Right Time
Harvest seeds on a dry, sunny morning when humidity is low. This prevents mold growth during collection. I use clean, sharp pruning shears to snip entire seedheads from the stem, leaving about 1 inch of stem attached. This makes handling easier and reduces damage to the seeds.
Place the collected seedheads in a paper bag (not plastic—it traps moisture) and store them in a cool, dry place indoors. Avoid direct sunlight, which can over-dry the seeds. I keep mine in a mesh bag hanging in my garage until I'm ready to process them, usually within 1-2 weeks.
💧 Step 3: Dry and Separate the Seeds
Spread the seedheads on a clean, dry towel in a single layer. Let them air-dry for 3-5 days in a well-ventilated area. Stir them gently once daily to ensure even drying. Over-drying can make seeds brittle, while under-drying invites mold. You'll know they're ready when the seedheads crumble completely when rubbed between your fingers.
Once dry, place the seedheads in a clean bowl and gently crush them with your fingers or a rolling pin. The seeds will separate from the chaff. Sift the mixture through a fine-mesh strainer to remove debris. Store the clean seeds in a labeled paper envelope in a cool, dark place until spring planting.
🌱 Step 4: Store Seeds Properly for Next Season
Seeds remain viable for up to 2 years if stored correctly. Place them in a sealed envelope with a moisture absorber like silica gel or a few grains of rice. Label the envelope with the hydrangea variety and the harvest date. I keep mine in the refrigerator's crisper drawer, where temperatures stay consistently cool.
When planting next spring, sow seeds directly in well-draining soil outdoors or in pots. Hydrangeas grown from seed take 2-3 years to flower, so be patient. If you're eager for blooms, consider layering or grafting for faster results.
✂️ Step 5: Prepare for Spring Planting
In early spring, soak the seeds in warm water for 12-24 hours to soften the seed coat and encourage faster germination. Plant them ¼ inch deep in a mix of 50% potting soil and 50% perlite for optimal drainage. Keep the soil consistently moist but not soggy until germination, which typically occurs in 2-4 weeks.
Once seedlings emerge, provide bright, indirect light and gradually introduce them to outdoor conditions over 2-3 weeks before transplanting. This hardening-off process strengthens young plants and prepares them for the garden.
Tips & tricks for perfect hydrangea seed harvesting
Here's what I've learned after perfecting my hydrangea seed collection over several seasons—these small details make all the difference in seed viability and next year's plants.
Timing Secret: In Step 1, don't rush to harvest just because the seedheads look dry. The key is that papery brown color combined with the crumbling test—this usually happens in late October or November, depending on your climate zone. I've found that waiting until the first frost actually helps the seedheads mature fully. If you harvest too early, the seeds won't be fully developed, and if you wait too late, they might be damaged by winter weather. Check your seedheads every few days during this window to catch them at peak readiness.
Collection Technique: When you're ready to collect in Step 2, use clean pruning shears to avoid crushing the seedheads. I've learned that leaving about 1 inch of stem attached creates a natural handle that makes processing easier later. Also, collect on dry mornings—this prevents moisture buildup that can lead to mold during storage. I always wear gloves when handling seedheads because some varieties can cause skin irritation, and I don't want to accidentally transfer any contaminants to my seeds.
Drying Strategy: For Step 3, the 3-5 day drying period is crucial but often overlooked. I've found that placing seedheads on a screen instead of a towel allows better airflow underneath, which speeds up drying while preventing mold. Stir them gently once daily to ensure even drying—this is where most people go wrong by either over-drying (making seeds brittle) or under-drying (inviting mold). You'll know they're ready when they crumble completely between your fingers, revealing the dark brown seeds inside.
Storage Wisdom: When storing seeds in Step 4, I've discovered that adding a small packet of silica gel to the envelope extends viability beyond the standard 2 years. I also like to include a tiny piece of paper with the harvest date and variety name—this becomes invaluable when you have multiple seed collections. The refrigerator's crisper drawer is ideal because it maintains consistent cool temperatures without freezing, which can damage seeds.
Pro Tips for Harvest Hydrangea Seeds
- Here's what I've learned after perfecting my hydrangea seed collection over several seasons—these small details make all the difference in seed viability and next year's plants.
- Timing Secret: In Step 1, don't rush to harvest just because the seedheads look dry.
- Collection Technique: When you're ready to collect in Step 2, use clean pruning shears to avoid crushing the seedheads.
Frequently asked questions
about harvesting hydrangea seeds—because even gardeners need a little extra guidance! Here are answers to the most common questions to help you master the process.When are hydrangea seeds truly ripe for harvesting?
Hydrangea seeds are ready when the seedheads turn a light brown or tan and feel dry to the touch. If they still feel papery or slightly green, give them another 1-2 weeks. Overripe seeds (crispy or falling apart) may not germinate well—aim for that perfect "dry but intact" stage!
How long does it take for hydrangea seeds to germinate?
Germination can take anywhere from 4 to 12 weeks, depending on the variety and conditions. Cold stratification (mimicking winter) often speeds this up. Plant seeds in a well-draining mix, keep them moist but not soggy, and be patient—some may surprise you with early sprouts!
Can I harvest seeds from store-bought hydrangeas?
Yes, but with a caveat! Store-bought hydrangeas (especially those labeled as "sterile" or "infertile") may not produce viable seeds. For the best results, harvest seeds from wild or heirloom varieties grown in your garden. If you’re unsure, test a few seeds—you might get lucky!
What if my seedheads mold or get eaten by pests?
Don’t panic! If seedheads develop mold, harvest them immediately and dry them in a well-ventilated area (like a paper bag with holes). To deter pests, remove damaged seedheads promptly and consider spraying neem oil as a preventive measure. Healthy seedheads are your best bet for successful harvests!
Do I need to save seeds from every hydrangea type?
Not all hydrangeas produce seeds worth saving. Mophead and lacecap varieties often yield viable seeds, while sterile hybrids (like some Endless Summer types) won’t. Focus on native or open-pollinated varieties for reliable seed production. Check your plant tags or ask local nurseries for seed-bearing recommendations!
Wrapping up and next steps
Harvesting hydrangea seeds is a rewarding way to grow new plants for next season—just remember to patience and timing are key! 🌱 By waiting for seedheads to fully dry and turn brown, you’ll ensure viable seeds ready for sowing.
Whether you’re saving seeds for sentimental reasons or expanding your garden, this simple process opens doors to endless possibilities.
Now that you’re equipped with the know-how, why not give it a try? Grab your pruners, pick a sunny spot, and start your hydrangea seed adventure today—your future blooms will thank you!