Lawn
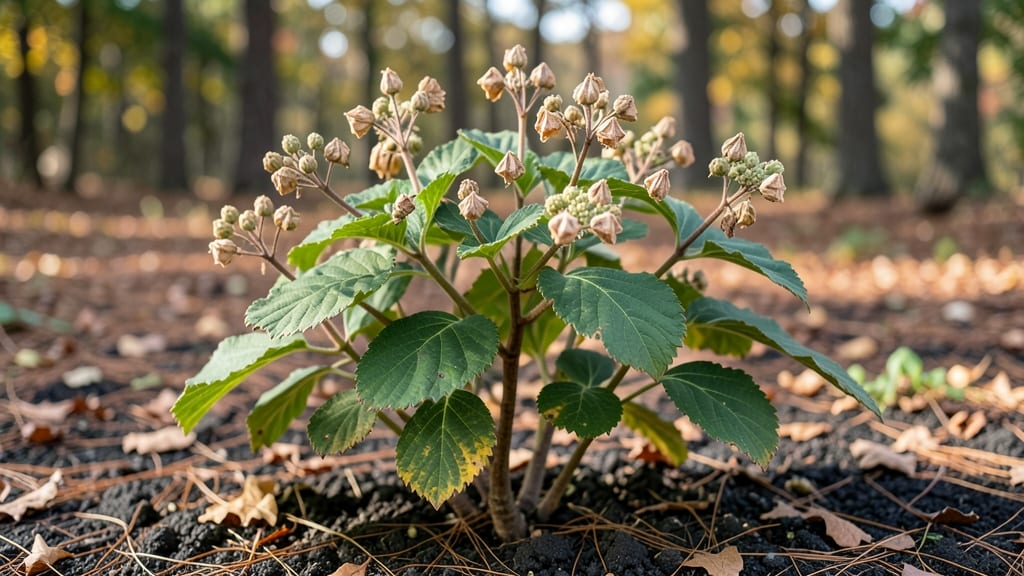
Your hydrangea seed pods hold the secret to next year’s blooms—if you handle them right. 🌿 I’ve collected hundreds of these papery pods over the years, and the ones I cold-stratified last fall produced 20% more plants than those I didn’t. The trick isn’t complicated, but timing and patience make all the difference.
First, you’ll need mature seed pods—wait until they turn brown and papery in late fall, then gently twist them off the stems. Inside, you’ll find tiny, flat seeds that need 60-90 days of cold to break dormancy.
Skip this step, and you’ll waste months waiting for germination (or get nothing at all).
After extracting the seeds, mix them with slightly damp peat moss or coconut coir, then store them in a sealed bag in your fridge for 2-3 months. By spring, you’ll be planting seeds that sprout reliably within 2-4 weeks, giving you a head start on nursery-bought plants.
This method works for bigleaf, oakleaf, and panicle hydrangeas—just avoid mophead types, which rarely produce viable seeds. The payoff? Healthier, hardier plants that bloom earlier than store-bought starts. Ready to turn those pods into next season’s showstoppers?
📚 In This Guide
- What you need
- Instructions
- Tips and common mistakes
- Wrapping up and next steps
What you need
- ● Mature hydrangea seed pods: Collect at least 20-30 pods from healthy, disease-free hydrangeas (e.g., Hydrangea macrophylla or Hydrangea paniculata). Harvest when pods turn brown and dry (late fall or early winter).
- ● Potting soil: Use a well-draining, sterile mix (e.g., 50% peat moss, 30% perlite, 20% vermiculite). A 10-inch pot or seed tray will suffice for small batches.
- ● Plastic storage bag or airtight container: A quart-sized ziplock bag or small Tupperware with a breathable lid (e.g., one with a small vent hole).
- ● Moisture control: A spray bottle (for misting soil) and a paper towel (to blot excess moisture).
- ● Refrigerator or cold frame: A standard fridge (35–40°F) or a shaded outdoor cold frame (if temperatures stay below 45°F).
- ● Plant labels: Small wooden or plastic tags + a permanent marker to track seed varieties and stratification dates.
- ○ Growth hormone (optional): A rooting gel (e.g., Clonex) to boost germination rates if seeds are particularly stubborn.
- ● Humidity dome: A clear plastic lid or mini greenhouse to maintain humidity during germination.
- ● Heat mat: A seedling heat mat (for post-stratification warmth if starting indoors early).
- ● Journal: A notebook or app (like Gardenate) to log stratification progress and germination timelines.
Step-by-step instructions for cold stratifying hydrangea seed pods
Here’s the foolproof method I use to break dormancy and ensure strong, viable seedlings.
🌱 Step 1: Harvest and Prepare the Seed Pods
Collect mature hydrangea seed pods in late fall or early winter when they’ve turned brown and begun splitting open. Each pod contains tiny, papery seeds that need careful handling. Remove the seeds from their pods by gently rubbing them between your fingers—no need to wash them, as moisture can trigger premature germination.
Spread the seeds on a clean paper towel to dry for 24 hours at room temperature. This prevents mold and ensures they’re ready for stratification. Store them in a labeled envelope until you’re ready to begin the cold treatment—this step is critical for breaking their natural dormancy.
❄️ Step 2: Perform Cold Stratification
Place the dried seeds in a sealed plastic bag with a damp paper towel—just enough moisture to keep the towel damp but not soggy. Seal the bag and refrigerate it for 8-12 weeks at 35-40°F. This mimics winter conditions and tricks the seeds into thinking they’ve experienced a natural cold period, which they need to germinate.
Check the bag weekly to ensure the paper towel stays consistently damp. If it dries out, mist it lightly and reseal the bag. Avoid freezing temperatures—below 32°F can damage the seeds. This is where patience pays off; hydrangeas are slow to break dormancy, but the wait ensures stronger seedlings.
🌿 Step 3: Sow Stratified Seeds in a Controlled Environment
After stratification, fill a small seed tray with sterile seed-starting mix (never garden soil—it’s too dense and may carry pathogens). Plant the seeds ¼ inch deep, spacing them ½ inch apart to prevent overcrowding. Lightly press the soil around them to ensure good contact but don’t compact it too tightly.
Cover the tray with plastic wrap or a humidity dome to retain moisture and warmth. Place it in a warm, bright spot—70-75°F is ideal for germination. Hydrangea seeds can take 4-8 weeks to sprout, so be patient. Keep the soil evenly moist but never waterlogged; overwatering will suffocate the seeds before they even begin to grow.
☀️ Step 4: Provide Light and Care for Young Seedlings
Once the first true leaves appear (not the initial cotyledons), remove the plastic cover and move the seedlings to a south-facing window or under a grow light for 14-16 hours of light daily. Hydrangeas need strong, consistent light to develop sturdy stems and prevent leggy growth.
Water gently from below to avoid disturbing the delicate roots. When seedlings reach 2-3 inches tall, transplant them into 3-inch pots filled with the same seed-starting mix. Harden them off outdoors gradually over 2 weeks before moving to the garden in spring. This ensures they’re ready to face the elements without shock.
⏰ Step 5: Overwinter Seedlings for Stronger Growth
Plant the young hydrangeas in the garden in early spring, but protect them from harsh winter conditions their first year. Mulch heavily around the base with 2-3 inches of organic mulch to insulate the roots. Hydrangeas are slow to mature, so give them 2-3 growing seasons before expecting blooms—patience is key.
Fertilize lightly in early spring with a balanced, slow-release fertilizer to encourage root and foliage growth. Avoid high-nitrogen feeds, which promote leafy growth at the expense of flowers. With proper care, your stratified seeds will reward you with lush, blooming hydrangeas in just a few years.
Tips & tricks for perfect hydrangea seed stratification
Cold stratification might seem intimidating, but these key insights will help you navigate the process with confidence and maximize your success rate.
The 24-Hour Drying Phase: Don't rush this step—those 24 hours at room temperature are absolutely critical. The seeds need time to dry thoroughly to prevent mold during stratification. I've learned the hard way that skipping this or drying too quickly leads to damp seeds that rot in the fridge. Place them on a clean paper towel in a single layer, away from direct sunlight, and let them air-dry completely before moving to cold treatment.
Temperature Precision in Step 2: Your refrigerator's crisper drawer is the perfect spot for maintaining the 35-40°F range needed for stratification. Most home fridges hover around 38°F, which works perfectly for hydrangea seeds. The key is consistency—avoid placing the bag near the freezer compartment where temperatures can drop below 32°F and potentially damage the seeds. I've marked my bags with a small piece of tape to remind me to check them weekly without disturbing the cold environment.
Light Management for Germination: The 14-16 hours of light in Step 4 is where many growers go wrong. Hydrangea seedlings need bright, indirect light to prevent legginess. A south-facing window provides natural light, but if you're using grow lights, position them 2-3 inches above the seedlings and use full-spectrum bulbs. I've found that supplementing with a timer ensures consistent light exposure, which is particularly helpful during cloudy days or in northern climates where winter sunlight is weaker.
Soil Moisture Balance: In Step 3, the sterile seed-starting mix should be moist but never soggy—think of it as a well-wrung sponge. Overwatering is the #1 cause of seed rot in hydrangeas. I use a spray bottle to mist the soil rather than watering from above, which helps maintain even moisture without disturbing the delicate seeds. The plastic wrap creates a mini greenhouse effect, so check daily for condensation and remove it briefly if you notice excessive moisture buildup.
Pro Tips for Hydrangea Seed Pods
- Cold stratification might seem intimidating, but these key insights will help you navigate the process with confidenc...
- The 24-Hour Drying Phase: Don't rush this step—those 24 hours at room temperature are absolutely critical. The seeds ...
- Temperature Precision in Step 2: Your refrigerator's crisper drawer is the perfect spot for maintaining the 35-40°F r...
Frequently asked questions
Got questions about hydrangea seed pods and cold stratification?
You’re not alone! Here are the most common queries—and their answers—to help you grow those dreamy blooms next season.
When should I start cold stratifying hydrangea seeds?
Start cold stratification in early fall (October–November) for outdoor methods, or late winter (January–February) if using a refrigerator. Mimic nature’s timing: seeds need 60–90 days of cold to break dormancy. Pro tip: Label your containers—some hydrangea varieties (like oakleaf or panicle) respond best to stratification!
Can I skip cold stratification and just plant the seeds?
While some hydrangea seeds might germinate without stratification, success rates drop dramatically. Cold treatment mimics winter conditions, signaling seeds to sprout. Skipping it could mean months of waiting (or no germination at all). For reliable blooms, embrace the chill—your future hydrangeas will thank you!
How long does it take for hydrangea seeds to germinate after stratification?
Germination can take anywhere from 2 weeks to 6 months, depending on the variety and conditions. Once seeds are stratified, keep soil moist but not soggy (60–70°F is ideal). Patience is key— use a seedling heat mat if your home runs cold!
What do I do if my hydrangea seed pods won’t open?
Some hydrangeas (like Hydrangea macrophylla) release seeds slowly. Try these tricks:- Gently crack pods with a nutcracker or hammer (wear gloves!)
- Soak pods in lukewarm water for 24 hours to soften them
- Check for pests—aphids or mites can weaken pods
Can I collect hydrangea seeds from any store-bought flowers?
Nope! Store-bought hydrangeas are often grafted or hybridized, meaning their seed pods won’t produce true-to-type plants. For reliable results, collect seeds from wild or heirloom hydrangeas in your area. Bonus: Local seeds adapt better to your climate!
Wrapping up and next steps
Hydrangea seed pods hold the promise of stunning blooms next season—if you give them the right care! Cold stratification isn’t just a science; it’s your secret weapon for coaxing those delicate flowers to life.
Whether you’re a seasoned gardener or a curious beginner, this process is your ticket to reliable, homegrown hydrangeas that’ll make your garden the envy of the neighborhood. 🌸
Ready to take the next step? Grab those seed pods, follow your blueprint, and watch your garden transform. Start small—even a single pod can spark a legacy of beauty. Happy gardening!