Vegetables
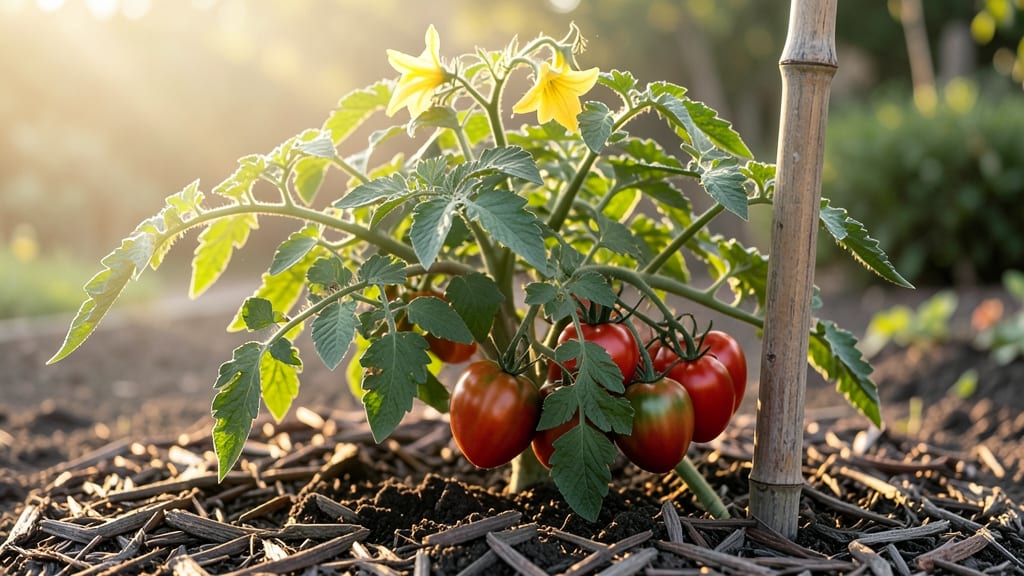
Growing steakhouse tomato seeds lets you turn your garden into a gourmet kitchen—juicy, meaty slices with zero seed spitting. 🌱 I’ve grown these behemoths for years, and they’re the only tomato that actually lives up to the "steakhouse" name: thick walls, rich flavor, and that perfect balance of sweet and tart.
The catch? These aren’t your average tomatoes. They need deep, fertile soil, full sun (6-8 hours daily), and strong support—think 6-foot cages or sturdy stakes.
Start seeds indoors 8-10 weeks before last frost (or direct-sow in warmer zones), and plant them 1-1.5 inches deep, 24-36 inches apart. Water consistently but avoid soggy soil—they crack if thirsty one day and drenched the next.
By midsummer, you’ll be harvesting pounders that rival restaurant-quality tomatoes. The flavor deepens as they ripen, and the texture? Firm enough to slice thick without falling apart. Just watch for early blight (remove infected leaves fast) and blossom-end rot (keep calcium levels steady).
Perfect for gardeners who love a challenge—and a reward. These tomatoes are worth the extra care, especially if you’ve ever paid $10 for a single slice at a steakhouse. Let’s get those seeds started!
📚 In This Guide
- What you need
- Instructions
- Tips and common mistakes
- Wrapping up and next steps
What you need
- ● Steakhouse tomato seeds – 1 packet (contains ~50-100 seeds). Look for heirloom varieties like Brandywine, Cherokee Purple, or San Marzano for that rich, meaty flavor.
- ● Seed-starting mix – 10-15 lbs of sterile, well-draining potting soil (avoid garden soil—it’s too dense!)
- ● Biodegradable seed pots or peat pellets – 6-12 units (3-4 inches deep) to prevent root disturbance during transplanting.
- ● Grow lights or sunny windowsill – A full-spectrum LED grow light (12-16 hours/day) or a south-facing window with 6+ hours of sunlight.
- ● Watering can or spray bottle – With a fine rose attachment to keep seeds moist without overwatering.
- ● Plastic wrap or humidity dome – To create a mini greenhouse effect until germination.
- ● Small trowel or spoon – For gently planting seeds (no deep burial needed—just press them lightly into the soil).
- ● Labels & marker – To track planting dates and varieties (trust us, you’ll forget!).
- ○ Fertilizer – A balanced, water-soluble fertilizer (5-5-5 or 10-10-10) for seedlings, or optional: compost tea for organic growth.
- ● Support system – Cages, stakes, or trellis (6+ feet tall) for indeterminate varieties to climb and thrive.
- ● Patience – Steakhouse tomatoes take 80-90 days to mature from seed (yes, it’s a marathon!).
- ○ Warmth – Seeds germinate best in 70-85°F soil. Use a heat mat (optional but helpful) if your home is chilly.
- ● Space – A sunny spot with 8+ hours of light daily (or grow lights) and room for vines to sprawl.
- ● Knowledge (or willingness to learn!) – Basic pruning skills to encourage bushier growth and larger fruit.
Step-by-step instructions for growing steakhouse tomatoes
Here's how to cultivate those prized, seedless beefsteak tomatoes with restaurant-quality heft.
🌱 Step 1: Prepare the Seed Starting Mix and Containers
Fill your 2-3 inch deep seedling trays with sterile seed-starting mix—never garden soil, which can harbor diseases that devastate young tomato plants. I press the mix down lightly with my fingers until it's firm but not compacted, creating a solid foundation for those delicate roots. This ensures even moisture distribution and prevents air pockets that can stunt germination.
Moisten the mix thoroughly with lukewarm water until it's damp to the touch but not soggy. Think of it like wringing out a damp sponge—just enough moisture to hold together when squeezed, but with no excess pooling. This step is critical because tomatoes are sensitive to both over- and under-watering at this early stage.
🌱 Step 2: Sow Seeds at Proper Depth and Spacing
Plant 2-3 seeds per cell at a depth of about ¼ inch, which is roughly the diameter of a pencil eraser. Sowing too deep forces seedlings to work harder to reach light, delaying growth. I use a toothpick to create small holes and gently place the seeds inside, then cover them with a fine sprinkle of additional mix.
After planting, mist the surface with a spray bottle until evenly moist. Avoid using a watering can—it can dislodge seeds or bury them too deeply. Once the seeds are planted, place the tray in a warm location with a clear humidity dome to retain moisture and warmth. This creates the ideal environment for germination, which typically occurs within 7-10 days at 75-85°F.
☀️ Step 3: Provide Optimal Light and Prevent Leggy Growth
The moment those first green sprouts appear, move them to a location with 14-16 hours of bright light daily. A south-facing window rarely provides enough intensity, so I use a full-spectrum LED grow light positioned 2-4 inches above the seedlings. Raise the light as the plants grow to maintain that distance—this prevents them from stretching toward the light, which weakens stems and reduces vigor.
Watch for signs of legginess: thin, pale stems with leaves spaced far apart. If you see this, your light is either too far away or not intense enough. Strong seedlings should have thick stems, deep green color, and leaves spaced closely together. Rotate the tray a quarter turn daily to ensure even growth toward the light source.
🌿 Step 4: Thin Seedlings and Harden Off Before Transplanting
Once seedlings develop their first true leaves (the second set after the initial cotyledons), thin to the strongest seedling per cell. Use scissors to snip the weaker stems at soil level—this prevents disturbing the roots of the remaining plant. I always keep the one with the thickest stem and most vibrant leaves, as these traits indicate a healthier, more robust plant.
Two weeks before your last frost date, begin the hardening-off process. Start by placing the seedlings outside in a sheltered, shaded spot for 1-2 hours on the first day. Gradually increase their outdoor time by 1 hour daily over 10-14 days, slowly introducing them to more sun and wind. This acclimation period is crucial—skipping it can shock the plants and lead to stunted growth or even death.
🪴 Step 5: Transplant to the Garden and Support for Growth
Transplant the hardened-off seedlings into the garden on an overcast day or in the late afternoon to reduce stress. Bury them slightly deeper than they were in their trays—this encourages stronger root development. Place a sturdy tomato cage or bamboo stakes at the time of transplanting to support the plants as they grow. Tomatoes can get quite heavy, and proper support prevents broken stems and improves air circulation.
Water deeply at the base of each plant after transplanting to help settle the soil and encourage root growth. Avoid wetting the leaves, as this can promote fungal diseases. Mulch around the base with 2-3 inches of organic mulch to retain moisture, suppress weeds, and regulate soil temperature. This step is often overlooked but makes a significant difference in plant health and yield.
Tips & tricks for cultivating seedless beefsteak tomatoes
A few critical techniques will help you grow those restaurant-quality tomatoes with the perfect texture and bold flavor—without the seeds.
Germination Environment: The 75-85°F temperature range for germination is non-negotiable—any cooler and you'll see delayed sprouting, while hotter temps can cause uneven growth. I place my seed trays on top of my refrigerator (not the heating element) to maintain consistent warmth without overheating. The clear humidity dome is your secret weapon here—it creates that tropical greenhouse effect that seedlings crave. Just remember to remove it once sprouts appear to prevent fungal issues.
Light Management: Those 14-16 hours of daily light are essential for preventing leggy seedlings, but intensity matters just as much as duration. I've found that positioning my LED grow light 2-4 inches above the plants creates the perfect balance—close enough for strong growth but far enough to prevent scorching. Watch for that telltale sign of legginess: stems that look like toothpicks with leaves spaced far apart. This means your light is too distant or not intense enough. Rotate your trays daily to ensure even growth toward the light source.
Transplanting Technique: Burying seedlings slightly deeper than their original depth might seem counterintuitive, but it's a game-changer for beefsteak tomatoes. Those extra buried stems will develop additional roots, creating a more robust plant capable of supporting those heavy fruits. I always transplant on overcast days or in late afternoon to minimize stress—think of it as giving your plants a gentle introduction to their new home. And don't forget the support system: sturdy cages or bamboo stakes prevent broken stems when those tomatoes reach their full weight.
Harden-Off Gradually: The 1-2 hour to 10-14 days hardening-off schedule might seem tedious, but it's absolutely crucial. I start with just 1-2 hours of shade protection on day one, then gradually increase exposure. This slow acclimation prevents transplant shock that can stunt growth or even kill seedlings. By the final week, your plants should be ready for full sun exposure. Watch for any signs of stress like wilting or yellowing leaves—these are your cues to slow down the process.
Pro Tips for Steakhouse Tomato Seeds
- A few critical techniques will help you grow those restaurant-quality tomatoes with the perfect texture and bold flav...
- Germination Environment: The 75-85°F temperature range for germination is non-negotiable—any cooler and you'll see de...
- Light Management: Those 14-16 hours of daily light are essential for preventing leggy seedlings, but intensity matter...
Frequently asked questions
Got questions about growing steakhouse tomato seeds? You’re not alone! Here are some of the most common queries—plus straightforward answers to help you grow like a pro.
How long does it take for steakhouse tomato seeds to germinate?
Steakhouse tomato seeds typically germinate in 7–14 days when kept in warm (70–85°F), moist soil. For faster results, soak seeds overnight before planting and use a heat mat. Patience is key—don’t disturb the soil until sprouts appear!
When is the best time to plant steakhouse tomato seeds indoors vs. outdoors?
Start seeds indoors 6–8 weeks before your last frost date (use grow lights if natural light is weak). Transplant seedlings outdoors after soil warms to 55°F+ and nighttime temps stay above 50°F—usually late spring. Steakhouse tomatoes thrive in heat, so avoid early planting!
Can I grow steakhouse tomatoes in containers? What size pot do I need?
These beefsteak varieties do well in 5-gallon+ containers with drainage holes. Use a high-quality potting mix with added compost, and stake or cage plants early—they get heavy! Place pots in full sun (6+ hours daily) for maximum flavor.
Why aren’t my steakhouse tomato seeds sprouting? Troubleshooting tips.
Check these common culprits:
- Cold soil: Use a seedling heat mat (70°F+ is ideal).
- Dry soil: Keep soil consistently moist (not soggy) with a spray bottle.
- Old seeds: Steakhouse seeds last 2–3 years; test viability by soaking in water (floating = dead).
- Depth issues: Plant seeds ¼ inch deep—too deep = slow germination.
Are steakhouse tomatoes good for sauces? How do they compare to other heirlooms?
Yes! Their thick flesh and low seed count make them perfect for sauces, salsas, and fresh slicing. Unlike Roma (meaty but seedy) or beefsteak (juicier but larger), steakhouse tomatoes offer a balance of texture and flavor—great for both raw and cooked dishes. Try them in homemade marinara!
Wrapping up and next steps
Growing steakhouse tomato seeds is your ticket to a juicy, seed-free, restaurant-quality tomato right in your backyard! 🍅✨ Whether you're a seasoned gardener or just starting out, these flavor-packed tomatoes are worth the effort.
Now that you’ve got the know-how—from seed starting to harvesting—it’s time to roll up your sleeves and plant those seeds.
Ready to take the next step? Start small—try a few plants in pots or a small garden bed—and let your taste buds (and neighbors!) thank you later. Happy growing! 🌱💚