
Propagation
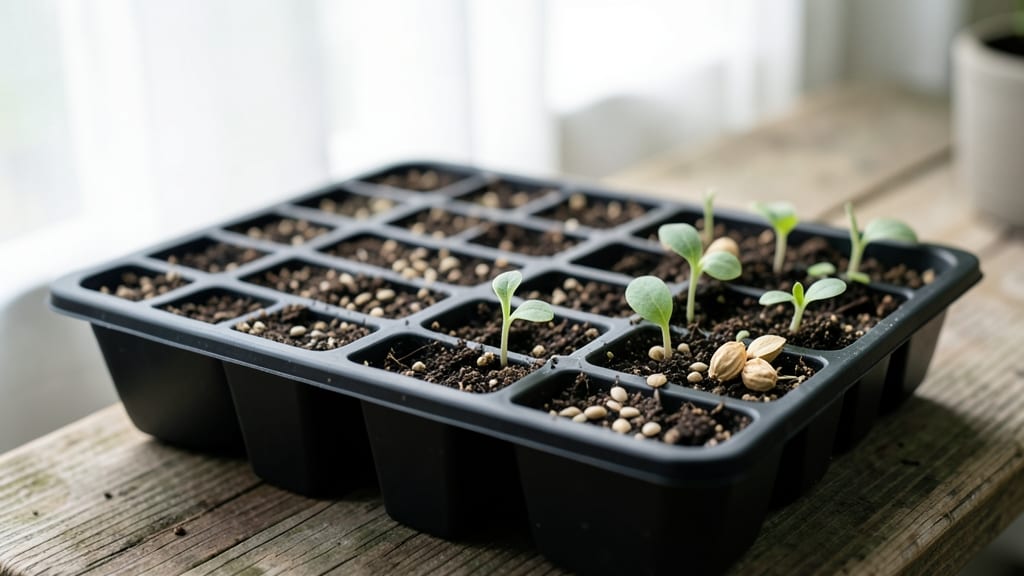
Hydrangea seeds picture isn’t just a snapshot—it’s your roadmap to growing these stunning shrubs from scratch. 🌿 I’ve struggled with fluffy seed heads that never sprouted until I learned to spot the tiny, papery seeds hiding inside, and now I’m sharing exactly what to look for so you don’t waste time on empty pods.
The secret starts with patience and the right conditions. You’ll need a warm spot, moist seed-starting mix, and a clear container to watch those first green shoots push through—it’s like witnessing a tiny miracle unfold.
Most people give up here because germination takes 3-6 weeks, but stick with it, and you’ll see those delicate seedlings emerge.
By the time you’re pinching off the first true leaves, you’ll have a head start on nursery plants that cost $10+ each. The blooms won’t appear for years, but the satisfaction of growing hydrangeas from seed—especially rare varieties—makes every slow step worth it.
Works for both mophead and lacecap types, though some hybrids may not produce true seeds. Here’s how to avoid the most common pitfalls and set your seedlings up for success from day one.
📚 In This Guide
- What you need
- Instructions
- Tips and common mistakes
- Wrapping up and next steps
What you need
- ● Hydrangea seeds: Fresh, viable seeds (preferably from a mature, healthy plant). Pro tip: 💡 Collect seeds from panicle, oakleaf, or smooth hydrangeas (they’re easier to germinate than mophead varieties).
- ● Seed-starting mix: A sterilized, well-draining blend (e.g., 50% peat moss + 50% perlite or vermiculite). Skip garden soil—it’s too dense!
- ● Small seed trays or pots: 2–3 inch deep containers with drainage holes (or a seedling flat with cell inserts).
- ● Spray bottle: For gentle watering (avoid drowning seeds!).
- ● Plastic wrap or dome lid: To create a humidity tent (critical for germination!).
- ● Grow lights or sunny windowsill: Seeds need 12–16 hours of light daily (a south-facing window or LED grow light works best).
- ○ Heat mat (optional but helpful): Maintains 70–75°F (21–24°C) soil temps to speed up germination.
- ● Fungicide: A mild solution (like hydrogen peroxide or neem oil) to prevent mold in humid conditions.
- ● Label markers: To track seed varieties if testing multiple types.
- ● Fertilizer (low-dose): A balanced 10-10-10 or fish emulsion (once seedlings sprout, not before!).
- ● Humidity monitor: Ensures your humidity tent stays at 70–80%—too dry = failed germination!
- ● Camera or phone: For documenting progress (because hydrangea seeds picture milestones are adorable!).
Step-by-Step guide to germinating hydrangea seeds
Growing hydrangeas from seed is a rewarding challenge—here's how to get those tiny seeds sprouting strong.
🌱 Step 1: Stratify the Seeds for Better Germination
Hydrangea seeds need a cold period to break dormancy. Place the seeds in a sealed plastic bag with a damp paper towel, then refrigerate for 6-8 weeks. Check weekly to ensure the towel stays moist but not soggy—wrinkled paper means it's dry.
This cold treatment mimics winter conditions and tricks seeds into thinking spring has arrived. I like to label the bag with the date so I don't forget. Once the stratification period ends, you'll be ready to plant.
💧 Step 2: Prepare Containers and Planting Medium
Use a shallow tray with drainage holes and fill it with a mix of 50% peat moss and 50% perlite. Hydrangea seeds need loose, airy soil to prevent rot. Moisten the mix until it feels like a damp sponge—not dripping, but holding moisture.
Sprinkle seeds ¼ inch deep across the surface, spacing them ½ inch apart. A light dusting of additional perlite on top helps keep seeds in place while allowing light to reach them. Cover the tray with plastic wrap to create a mini greenhouse effect.
☀️ Step 3: Provide Warmth and Light for Sprouting
Keep the tray in a warm spot with bright, indirect light—a sunny windowsill works well. Hydrangea seeds germinate best at 65-75°F. Remove the plastic wrap daily to check moisture and air out the seeds for 10 minutes to prevent mold.
Germination can take 4-12 weeks, so patience is key. You'll see tiny green sprouts pushing through the soil first—this is your signal to keep conditions consistent. If condensation forms on the plastic, it's too humid; lift the wrap to let excess moisture escape.
🌿 Step 4: Thin Seedlings and Transition to Individual Pots
Once seedlings reach 1 inch tall, thin them to 2 inches apart to give roots room to grow. Use a small spoon to carefully lift and remove weaker sprouts, leaving the strongest ones. Transplant them into 3-inch pots filled with the same peat-perlite mix.
Water gently at the base to avoid disturbing the roots. Keep the soil lightly moist but never soggy. At this stage, seedlings need 6-8 hours of light daily. If they stretch toward the light, they're not getting enough—consider adding a grow light.
⏰ Step 5: Harden Off Before Outdoor Planting
After 4-6 weeks in pots, acclimate seedlings to outdoor conditions. Start by placing them outside in a shaded spot for 1 hour daily, gradually increasing time over 2 weeks. This process, called hardening off, helps them adjust to wind and sun.
Once seedlings can handle a full day outside without wilting, transplant them into the garden in partial shade. Hydrangeas thrive in moist, well-draining soil, so mulch around the base to retain moisture. With care, you'll have mature plants in 3-5 years—worth the wait!
Tips & tricks for perfect hydrangea seed germination
Here's what I've learned after watching dozens of hydrangea seeds transform from tiny specks to thriving seedlings.
The Stratification Secret: That 6-8 week cold treatment in Step 1 is non-negotiable—it mimics winter conditions that trigger germination. I've tried skipping it, and seeds either took months longer or never sprouted. Place the bag on a middle fridge shelf where temps stay consistently around 35-40°F. If your fridge runs warmer, extend the time by a week or two.
Soil Mix Matters: The 50/50 peat moss and perlite mix in Step 2 is crucial for aeration. Too much peat can compact and suffocate roots, while too much perlite drains too quickly. Test your mix by squeezing a handful—it should hold moisture but not drip. For extra insurance, add a handful of coarse sand to improve drainage.
Light and Temperature Balance: Maintaining 65-75°F during germination (Step 3) is key—too cold and they stall, too hot and they rot. If your home runs cooler, consider using a seedling heat mat under the tray. For light, bright indirect is best: place near a south-facing window or use a grow light 10-12 inches above the tray for 12-14 hours daily.
Thinning Strategy: When seedlings hit 1 inch tall (Step 4), don't rush the thinning process. Use a small spoon to gently lift weaker sprouts rather than pulling—this protects the roots of the plants you keep. Space remaining seedlings 2 inches apart to prevent competition for nutrients. The strongest seedlings will have vibrant green leaves and sturdy stems.
Pro Tips for Hydrangea Seeds Picture
- Here's what I've learned after watching dozens of hydrangea seeds transform from tiny specks to thriving seedlings.
- The Stratification Secret: That 6-8 week cold treatment in Step 1 is non-negotiable—it mimics winter conditions that trigger germination.
- Soil Mix Matters: The 50/50 peat moss and perlite mix in Step 2 is crucial for aeration.
Frequently asked questions
Got questions about growing hydrangeas from seeds? You’re not alone! Here are some of the most common queries—and their answers—to help you succeed with your hydrangea seeds picture project.
How long does it take for hydrangea seeds to germinate?
Patience is key! Hydrangea seeds typically take 4 to 8 weeks to germinate, depending on temperature, moisture, and seed freshness. Keep the soil consistently moist and warm (around 65–75°F) to speed up the process. Some varieties may take even longer—don’t give up if sprouts don’t appear right away!
Do hydrangea seeds need light to germinate?
Nope! In fact, hydrangea seeds need darkness to germinate. Plant them just below the soil surface (about ¼ inch deep) and avoid exposing them to light until sprouts emerge. Once they’ve broken through, move them to a bright, indirect spot for healthy growth.
Can I grow hydrangeas from store-bought seeds or cuttings?
Store-bought seeds are a great budget-friendly option, but results vary by variety. For consistent blooms, consider grafted plants or cuttings from a trusted source. If using seeds, check the packet for specific care instructions—some hydrangeas (like Hydrangea macrophylla) are easier to grow from cuttings than seeds.
When is the best time to plant hydrangea seeds outdoors?
Wait until after the last frost in spring (or early fall in mild climates) to plant seeds outdoors. Hydrangeas thrive in well-draining soil with partial shade. If starting seeds indoors, transplant seedlings outdoors once they’ve developed 2–3 sets of true leaves and nighttime temps stay above 50°F.
Why aren’t my hydrangea seeds sprouting?
Several factors could hold them back: old seeds (viability drops after 1–2 years), dry soil, or poor temperature control. Try stratifying seeds (mimicking winter cold) by refrigerating them for 4–6 weeks before planting. If all else fails, test a few seeds in a damp paper towel to check for mold or rot.
How do I take good pictures of hydrangea seed germination?
For clear hydrangea seeds picture documentation, use natural light and a macro lens (or your phone’s closest zoom setting). Place a ruler or coin beside the seeds for scale, and snap photos weekly to track progress. A white background or shallow tray helps highlight details—just avoid direct sunlight to prevent glare!
Wrapping up and next steps
Growing hydrangeas from seeds is a rewarding journey that combines patience with the joy of nurturing life! With the right hydrangea seeds picture as your guide and the steps outlined above, you’re well on your way to cultivating stunning blooms.
Remember, consistency is key—whether it’s maintaining moisture, providing warmth, or protecting your seedlings from pests.
Now that you’re armed with knowledge, why not take the next step? Start small with a few seeds in a sunny windowsill or a cozy greenhouse setup. Before you know it, you’ll be admiring lush hydrangeas thriving in your garden—all from a tiny seed! 🌱✨