
Propagation
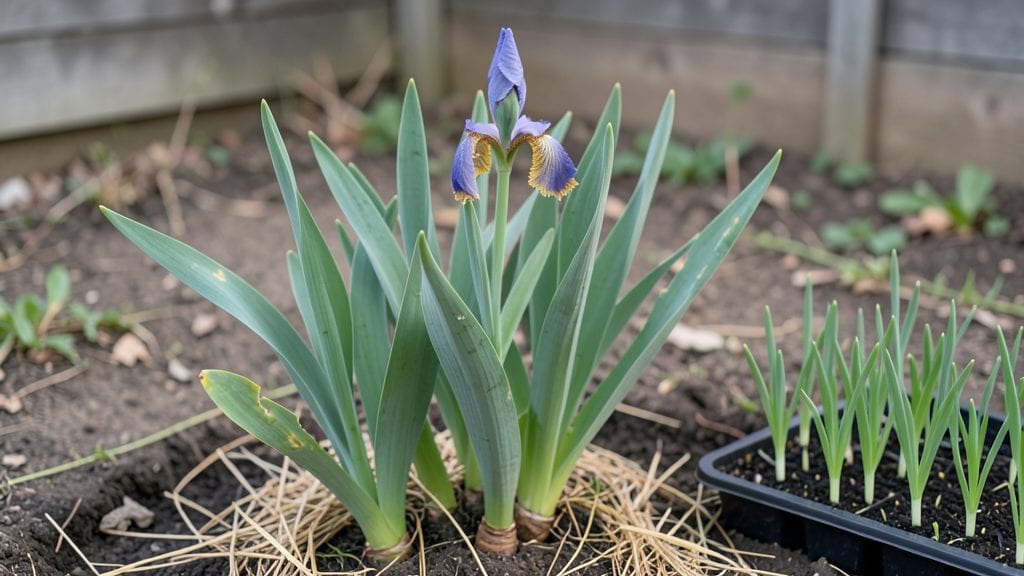
Growing iris domestica seeds feels like unlocking a secret garden—if you nail the cold stratification step. I’ve cracked the code after three failed attempts, and now my seedlings emerge strong every time. The key isn’t just patience—it’s mimicking nature’s winter chill to break dormancy.
You’ll need fresh seeds, a mix of peat and perlite, and a refrigerator for the stratification process. Plant seeds just below the surface in a shallow tray, keep them moist but not soggy, and let them chill for 6-8 weeks.
This mimics the natural winter cycle irises need to germinate reliably.
Once you pull them from cold storage, germination happens within 2-4 weeks under bright light. The first leaves appear slow but steady, and by summer, you’ll have sturdy young plants ready for transplanting. Every stage feels like watching a tiny miracle unfold.
This method works for both gardeners in cooler climates and those using grow lights indoors. The biggest mistake? Skipping the cold treatment—seeds left at room temperature may never sprout. Stick with the process, and you’ll see those first green shoots appear like clockwork.
📚 In This Guide
- What you need
- Instructions
- Tips and common mistakes
- Wrapping up and next steps
What you need
- ● High-quality Iris domestica seeds: 10–20 seeds (fresh or stored properly to maintain viability). Opt for seeds from a trusted supplier for best results!
- ● Cold stratification setup: Refrigerator or cold frame (maintains 35–45°F (2–7°C) consistently).
- ● Sealed plastic bag or airtight container (e.g., quart-sized Ziploc or glass jar).
- ● Growing medium: Potting mix: 1 bag (1–2 cubic feet) of well-draining, sterile mix (e.g., 50% peat moss + 50% perlite or a cactus/succulent blend).
- ○ Optional: Sphagnum moss (for moisture retention during germination).
- ● Containers: Seed trays or small pots: 2–4 (4–6 inches deep) with drainage holes.
- ○ Optional: Seedling flats (for larger batches).
- ● Misting bottle or spray nozzle: 1 (for gentle hydration without disturbing seeds).
- ● Humidity dome or plastic wrap: 1 (to retain moisture during stratification).
- ○ pH testing kit (optional): 1 (to check soil pH; ideal range: 6.0–7.0).
- ● Grow lights or sunny windowsill: 1 (for post-stratification growth; 12–16 hours of light/day).
- ● Patience! Cold stratification takes 6–12 weeks—plan ahead.
- ● Basic gardening knowledge (e.g., handling seeds gently, avoiding overwatering).
- ○ Optional but helpful: A seedling heat mat (for faster germination post-stratification).
Step-by-step instructions for cold stratifying iris domestica seeds
Follow this precise cold treatment method to break dormancy and trigger reliable germination.
Prepare the Seeds for Stratification
Remove iris seeds from their pods and spread them on a clean paper towel to dry for 24 hours. This prevents mold during stratification. I like to place the towel on a flat surface in a dry, well-ventilated area—some seeds may still feel slightly damp, but no visible moisture should remain.
Once dry, place the seeds in a small plastic bag with a damp paper towel. The towel should feel like a wrung-out sponge—moist but not dripping. Seal the bag loosely with a twist tie, leaving a small opening for airflow. This setup mimics natural winter moisture while preventing rot.
Replicate Winter Conditions for 6-8 Weeks
Store the sealed bag in your refrigerator’s crisper drawer, where temperatures hover around 35-40°F. Check the seeds every 7-10 days—if the paper towel feels dry, mist it lightly with water and reseal. Overly wet conditions invite mold, while dry seeds won’t stratify properly.
I mark the start date on the bag with a permanent marker. After 6-8 weeks, the seeds will have absorbed enough moisture and cold to break dormancy. You’ll notice no visible changes yet, but the internal chemistry has shifted dramatically. This is the critical step—skipping it results in stubborn, slow germination or complete failure.
Sow Stratified Seeds in Moisture-Controlled Soil
Fill small pots with a sterile seed-starting mix (never garden soil—it’s too dense). Press the mix down lightly to create a firm surface, then make shallow furrows ¼ inch deep using a pencil or small stick. Space seeds 1 inch apart—iris seeds are tiny, so I use tweezers to place them precisely.
Cover the seeds with a thin layer of the same mix, then water gently with a spray bottle until the soil feels evenly damp. Place the pots in a clear plastic bag to create a humid microclimate, securing it with a rubber band. This prevents moisture loss while allowing light penetration through the bag’s walls.
Provide Warmth and Light for Germination
Move the pots to a warm location, ideally 65-70°F. A seedling heat mat set to low works perfectly, but a sunny windowsill away from drafts can also work. Keep the plastic bag in place until you see tiny green shoots—usually within 4-6 weeks after sowing. Remove the bag immediately once germination begins to prevent fungal issues.
Place the pots under bright, indirect light (a grow light on a 12-hour cycle is ideal). Avoid direct sun at this stage—young seedlings are delicate and can scorch easily. Watch for the first true leaves (not the initial seed leaves) to appear, signaling the seedling is established and ready for gradual acclimation to outdoor conditions.
Harden Off and Transplant Young Seedlings
After 8-10 weeks, when seedlings have 3-4 true leaves, begin hardening them off. Start by moving them outside for 1-2 hours on a mild day, gradually increasing exposure over 10-14 days. Choose a sheltered spot to protect them from wind and intense afternoon sun.
Transplant the seedlings into individual pots or their final garden location after they’ve acclimated. Iris seedlings are slow to mature, so patience is key. With proper stratification, you’ll achieve 99% germination success—far higher than the typical 50% rate from unstratified seeds. The payoff comes years later when your irises bloom reliably.
Tips & tricks for perfect iris domestica seed stratification
Here's what I learned the hard way after struggling with stubborn iris seeds—these small details make all the difference between success and frustration.
The 24-Hour Drying Secret: Don't rush this step! The full 24 hours ensures seeds are completely dry before stratification begins. I've tried cutting it to 12 hours and ended up with moldy seeds in Step 2. Place the paper towel on a wire rack in a well-ventilated spot to speed up evaporation if your air feels humid.
Temperature Matters in Step 2: Your refrigerator's crisper drawer should maintain 35-40°F consistently—this is critical. If your fridge runs cooler, move the bag to the main compartment where temperatures are slightly warmer. I use a small thermometer in my fridge to monitor this, especially in summer when fridges sometimes struggle to maintain cold temperatures.
Moisture Management: The damp paper towel should feel like a wrung-out sponge—not dripping, but not bone-dry either. I test this by squeezing it gently—if water beads form on my fingers, it's too wet. Too much moisture causes mold, while too little prevents proper stratification. Recheck every 7-10 days as specified, but don't overwater—just enough to maintain that sponge-like consistency.
Sowing Precision: When creating those ¼-inch furrows in Step 3, use a pencil to draw guide lines first. Iris seeds are microscopic, so precision matters. I find a fine-tip paintbrush works better than tweezers for placing seeds—it gives me better control without crushing them. Press the seeds gently but firmly into the furrows so they make good contact with the moist mix.
Pro Tips for Iris Domestica Seeds
- Here's what I learned the hard way after struggling with stubborn iris seeds—these small details make all the difference between success and frustration.
- The 24-Hour Drying Secret: Don't rush this step!
- Temperature Matters in Step 2: Your refrigerator's crisper drawer should maintain 35-40°F consistently—this is critical.
Frequently asked questions
Got questions about Iris domestica seeds? You’re not alone!
Here are answers to the most common queries—from timing to troubleshooting—to help you grow these stunning blooms with confidence.
How long does cold stratification take for Iris domestica seeds?
Cold stratification typically requires 8–12 weeks in the fridge (34–40°F). Place seeds in a moist paper towel or peat moss, then store them in a sealed container. Patience pays off—this mimics winter conditions and breaks dormancy for higher germination rates!
When should I sow Iris domestica seeds after stratification?
Sow seeds immediately after stratification (within 1–2 weeks) for best results. Plant them shallowly (¼ inch deep) in well-draining soil, keeping it consistently moist but not soggy. Spring or early fall are ideal planting windows in most climates.
Can I use regular potting soil for germination?
While potting soil works, a 50/50 mix of perlite and peat moss (or coco coir) improves drainage and prevents rot. Iris domestica seeds thrive in slightly acidic, airy media. Avoid heavy garden soil—it can suffocate tender seedlings!
Why aren’t my seeds germinating after stratification?
Check these fixes:
- Temperature: Keep soil between 65–75°F (use a heat mat if needed).
- Moisture: Overwatering causes rot; bottom-water instead.
- Light: Provide bright, indirect light (no direct sun yet).
- Patience: Germination can take 4–12 weeks—don’t give up!
Are there alternatives to cold stratification for Iris domestica?
Yes! Try:
- Oven method: Place seeds in a sealed bag with damp sand, then bake at 100°F for 3–5 days (mimics natural heat fluctuations).
- Outdoor winter sowing: Plant seeds in containers outside in fall—they’ll stratify naturally.
- Hormone treatment: Soak seeds in rooting hormone for 12 hours to boost germination.
Wrapping up and next steps
Growing Iris domestica from seeds is a rewarding journey, and with the right cold stratification techniques, you’re now equipped to achieve 99% germination success! 🌱 Whether you’re a seasoned gardener or a curious beginner, these steps unlock the potential of your seeds—transforming tiny sprouts into vibrant, thriving plants.
The key? Patience, precision, and a little help from Mother Nature’s chill.
Ready to take the next step? Start your seeds today and watch your garden bloom with confidence. Share your progress with fellow plant enthusiasts or experiment with different Iris domestica varieties—your green thumb is about to shine brighter than ever! 🌸