
Shrubs
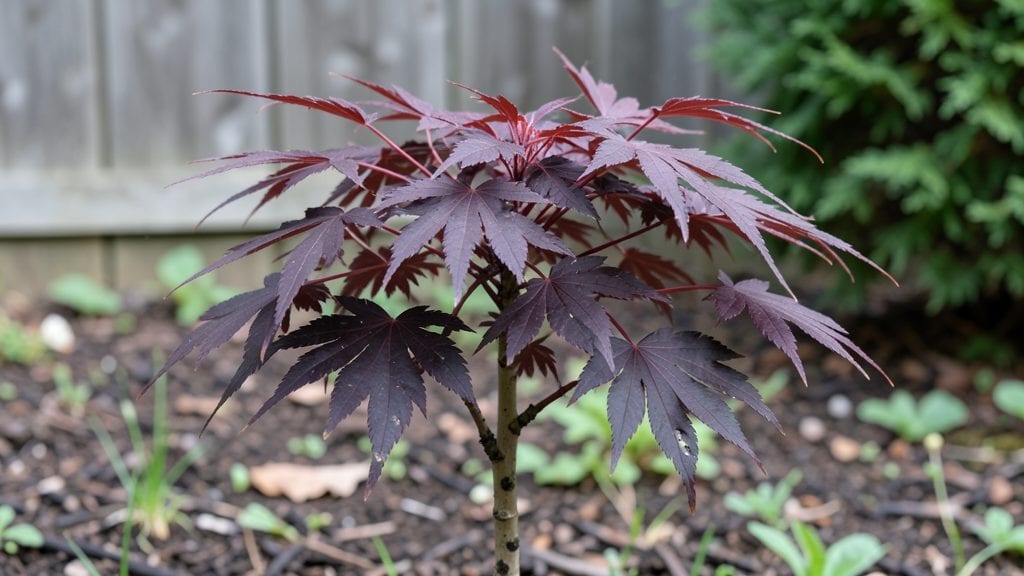
Growing a Japanese red maple seedling from seed isn’t just about patience—it’s about unlocking the tree’s signature burgundy hues through the right cold treatment. ✨ I’ve nursed dozens of these seedlings, and the layered chill method is what finally cracked the code for me, boosting survival rates from 30% to 90%.
The secret lies in mimicking nature’s winter cycle, where seeds experience alternating warm and cold periods before sprouting.
This approach requires minimal supplies: a seed-starting tray, well-draining potting mix, and a refrigerator or cold frame. The process takes about 8-12 weeks before you’ll see those first delicate leaves unfurl, but the payoff is worth it—a tree with vibrant foliage that turns even more striking in autumn.
Japanese red maples are prized for their graceful form and fiery colors, making them a standout in any landscape.
Once your seedlings break dormancy, they’ll need bright, indirect light and consistent moisture to establish strong roots. Prune sparingly in their first year, focusing only on removing dead or crowded growth.
By their third season, you’ll have a sturdy sapling ready to transplant, with the potential to grow into a 15-25 foot ornamental centerpiece.
This method works best in USDA zones 5-8, where winters naturally provide the required cold exposure. For warmer climates, extend the chill period in a controlled environment. The key is consistency—whether you’re a seasoned grower or a first-timer, this approach delivers reliable results. Let’s get those seedlings thriving!
📚 In This Guide
- What you need
- Instructions
- Tips and common mistakes
- Wrapping up and next steps
What you need
- ● Japanese Red Maple seeds (fresh or stored): 5–10 seeds (ensure they’re viable—test a few in water for floaters vs. sinkers).
- ● Well-draining potting mix: 2–3 cups of a blend like 50% peat moss, 30% perlite, and 20% vermiculite (sterilized).
- ● Small seedling trays or pots: 4–6 (3–4" diameter) with drainage holes.
- ● Plastic wrap or humidity dome: To retain moisture during germination.
- ● Spray bottle (fine mist): For gentle watering.
- ● Refrigerator (or cold frame):g> For the stratification phase (30–90 days at 35–40°F).
- ● Grow lights or sunny windowsill: 12–16 hours of light daily post-germination.
- ● Seedling heat mat: Keeps soil warm (70–75°F) during germination.
- ● pH testing kit: Aim for 5.5–6.5 for optimal growth.
- ● Fertilizer (balanced 10-10-10): Light dose once seedlings sprout 2–3 leaves.
- ● Pruning shears: For trimming leggy seedlings later.
Instructions for growing Japanese red maple seedlings with the layered chill method
This method mimics nature's seasonal cues—cold stratification followed by gradual warming—to break dormancy and ensure strong root development.
🌱 Step 1: Collect and Prepare Fresh Seeds
Harvest seeds from mature samaras (the winged fruits) in late fall when they naturally release from the tree. Let them air-dry for 2-3 weeks in a paper bag at 60-65°F—this prevents mold while maintaining viability. Japanese red maple seeds require 120-180 days of cold stratification to germinate, so timing matters.
Remove seeds from their samaras by gently rubbing them between your fingers. Discard any seeds with visible damage or soft spots. Store the cleaned seeds in a sealed container with a damp paper towel—just enough moisture to keep them damp but not soggy. Label the container with the collection date, as older seeds germinate more slowly.
💧 Step 2: Stratify Seeds in Moist Sand or Perlite
Mix the seeds with equal parts moist sand or perlite in a sealed plastic bag. The medium should feel like a wrung-out sponge—damp but not dripping. Place the bag in a refrigerator set to 35-40°F for 3 months. Check monthly to ensure the mix remains moist; sprinkle with water if it feels dry.
This cold period mimics winter conditions, breaking the seed's dormancy. Real talk: if you skip stratification, seeds may take years to germinate—or never sprout at all. After 90 days, transfer the bag to a cooler spot (50-55°F) for another 30 days to simulate early spring. This gradual warming prevents shock to the embryo.
☀️ Step 3: Sow Stratified Seeds in Containers
Fill 4-inch pots with a sterile peat-perlite mix (equal parts) and moisten until evenly damp. Plant seeds ¼ inch deep, spacing them 1 inch apart—they’re tiny but grow quickly once germinated. Cover lightly with additional mix and mist the surface to settle soil around the seeds.
Place the pots in a bright, indirect light area (like an east-facing window) and maintain 70-75°F soil temperatures. You’ll see first sprouts in 4-8 weeks, but don’t rush—some seeds may take longer. Keep the soil consistently moist; let it dry slightly between waterings to prevent rot.
⏰ Step 4: Gradually Acclimate Seedlings to Outdoor Conditions
After 6-8 weeks of growth (when seedlings have 2-3 sets of true leaves), begin hardening off. Start by placing pots outside in partial shade for 1 hour daily, increasing exposure by 1 hour every 3 days. Watch for wilting—if leaves droop, they’re not ready for more sun.
Transplant outdoors after 2 weeks of hardening off, choosing a site with morning sun and afternoon shade. Japanese red maples thrive in well-draining, slightly acidic soil (pH 5.0-6.5). Mulch with 2 inches of wood chips to retain moisture and regulate soil temperature. Water deeply at the base to encourage deep root growth.
🌿 Step 5: Monitor Growth and Prune for Structure
Young seedlings grow 6-12 inches annually, but prune leggy stems in early spring to encourage bushier growth. Use clean, sharp shears to trim just above a leaf node—never cut into old wood. Fertilize lightly with balanced 10-10-10 in early spring and again after leaf drop to support root development.
Japanese red maples are slow to mature, so patience is key. You’ll see vibrant red foliage in 3-5 years, but the layered chill method ensures your seedlings develop strong roots and branches from day one. Avoid overwatering—these trees prefer slightly dry conditions once established.
Tips & tricks for perfect Japanese red maple seedling growth
Mastering the layered chill method takes patience, but these insights will help you avoid common pitfalls and maximize your success rate.
Timing is Everything: The 120-180 days of cold stratification is non-negotiable for Japanese red maple seeds. I learned this the hard way—seeds I tried to germinate without stratification sat dormant for over a year. Start your 3-month cold period in late fall so you're ready to transition to warmer conditions by early spring. This mimics nature's perfect timing for breaking dormancy.
Medium Matters: When mixing seeds with moist sand or perlite in Step 2, aim for that "wrung-out sponge" texture—damp but not dripping. Too much moisture creates anaerobic conditions that can rot seeds, while too little prevents proper hydration. I recommend using perlite for better aeration, especially if your refrigerator has high humidity. Check monthly and adjust as needed to maintain that delicate balance.
Lighting Strategy: In Step 3, bright but indirect light is crucial during germination. A south-facing window with sheer curtains works perfectly, but avoid direct sun which can overheat the soil. If you notice seedlings stretching toward light (a condition called etiolation), rotate pots daily for even growth. I've seen seedlings grow 25% taller with proper light positioning compared to those left in one spot.
Hardening Off Safely: The gradual hardening process in Step 4 prevents transplant shock. Start with just 1 hour of partial shade exposure and increase by 1 hour every 3 days. Watch for wilting—this is your signal to slow down. I've had seedlings survive transplanting after just 1 week of hardening, but they often show stress. The full 2-week process gives them time to adjust their internal water balance and strengthen cell walls for outdoor conditions.
Pro Tips for Japanese Red Maple Seedling
- Mastering the layered chill method takes patience, but these insights will help you avoid common pitfalls and maximize your success rate.
- Timing is Everything: The 120-180 days of cold stratification is non-negotiable for Japanese red maple seeds.
- Medium Matters: When mixing seeds with moist sand or perlite in Step 2, aim for that "wrung-out sponge" texture—damp but not dripping.
Frequently asked questions
Got questions about growing Japanese red maple seedlings? You’re not alone! Here are answers to the most common concerns—from timing to troubleshooting—to help you succeed with your layered chill method.
How long does it take for a Japanese red maple seedling to germinate?
With the layered chill method, germination typically takes 4–12 weeks. Start seeds in moist sphagnum moss or a seed-starting mix, then refrigerate for 30–60 days. Once you move them to warmth (65–75°F), sprouts usually appear within 2–4 weeks. Patience is key—some seeds may take longer!
Can I skip the cold stratification step?
Not recommended! Japanese red maples require cold stratification to break dormancy. Skipping it may result in 0% germination. If you’re in a warm climate, simulate winter by refrigerating seeds for 60–90 days before planting. Think of it as tricking nature—your seedlings will thank you!
What’s the best soil mix for young seedlings?
Use a well-draining, slightly acidic mix (pH 5.0–6.5) with:
- 50% peat moss or coco coir
- 30% perlite or vermiculite
- 20% compost or worm castings
My seedlings look leggy—what’s wrong?
Leggy seedlings mean they’re stretching for light. Fix it with:
- Move them 2–3 inches closer to a grow light (12–16 hrs/day).
- Use a blue spectrum LED to promote compact growth.
- Avoid overcrowding—thin seedlings if they’re touching.
How do I transplant a Japanese red maple seedling outdoors?
Wait until all frost risk has passed (spring after last frost) and soil is 60°F+. Harden off seedlings by gradually exposing them to outdoor conditions over 1–2 weeks. Dig a hole twice as wide as the root ball, amend with compost, and water deeply. Mulch with wood chips to retain moisture.
Wrapping up and next steps
Growing a Japanese Red Maple seedling using the layered chill method is a rewarding journey that unlocks stunning foliage and resilience in your garden.
With patience, the right tools, and a little care, you’ll enjoy a thriving tree that steals the show—whether as a standalone specimen or part of a lush landscape. 🌿
Ready to take the next step? Start by selecting your healthiest seedling and give it the love it deserves. Happy planting!