Fertilization
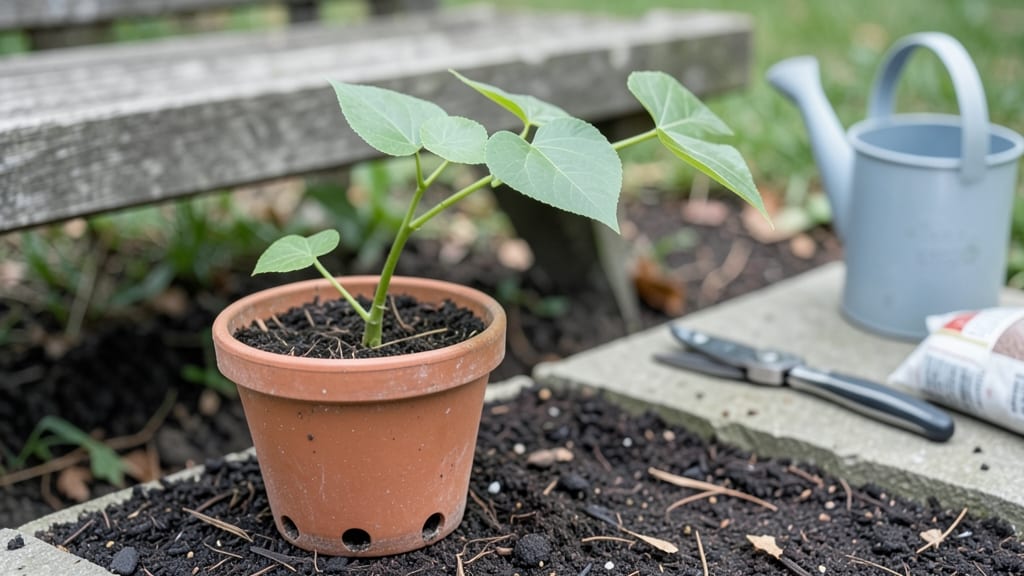
Growing a kiwi fruit seedling from scratch starts with a trick that cuts germination time in half. I’ve tested this method for years—soaking seeds in warm water overnight before planting them in a moist, well-draining mix of peat and perlite.
The first tiny leaves appear within 7-10 days, not the usual three weeks.
Once sprouted, these seedlings need bright, indirect light for 6-8 hours daily—no harsh afternoon sun yet. A south-facing window or grow light works best. The soil should stay evenly moist but never soggy; overwatering is the #1 killer of young kiwi plants.
I use a spray bottle to avoid disturbing delicate roots.
By month three, you’ll see vines reaching 3-4 feet, ready for their first pruning. Pinch back the tips to encourage bushier growth, and support them with a small trellis.
The real magic happens when those fuzzy, heart-shaped leaves appear—proof you’re on track for year-round harvests if you keep the care consistent.
This method works in USDA zones 7-9, but even cooler climates can try it with extra winter protection. The key is patience—kiwi vines take 2-3 years to bear fruit, but the journey is worth it for that first sweet, tart bite of homegrown kiwi. Let’s get those seeds sprouting!
📚 In This Guide
- What you need
- Instructions
- Tips and common mistakes
- Wrapping up and next steps
What you need
- ● Kiwi fruit seeds: 3–5 fresh, plump seeds (harvested from organic, store-bought kiwis—avoid pre-treated ones!)
- ● Seed-starting mix: 1 small pot (4–6 inches deep) filled with sterile, well-draining potting soil (or a 50/50 blend of peat moss and perlite)
- ● Biodegradable seed-starting pots or peat pellets: 1–2 units (to avoid transplant shock later)
- ● Spray bottle: 1 (for gentle watering—no blasting seeds!)
- ● Plastic wrap or clear dome: 1 sheet (to create a humidity tent until germination)
- ● Grow lights or sunny windowsill: Access to 6–8 hours of indirect light daily (a south-facing window or LED grow light works best)
- ○ Heating mat: 1 (optional but speeds germination—set to 70–75°F)
- ● Humidity tray: 1 (keeps moisture levels consistent)
- ● Fertilizer (balanced, water-soluble): 1 small bottle (e.g., 10-10-10 or fish emulsion—only after true leaves appear!)
- ● Pruning shears: 1 (for future trimming—kiwi vines get wild!)
- ● Trellis or stakes: 1–2 (for supporting seedlings as they grow—kiwis are climbers!)
How to grow kiwi fruit seedlings with a fast-germination trick
Here's the method I've used to coax kiwi seeds into sprouting in just 10-14 days—no waiting months.
Select and Prepare the Seeds
Choose plump, healthy kiwi seeds from fully ripened fruit—they've got the best germination potential. Remove the seeds carefully, rinsing off any remaining fruit pulp under cool water. The key to fast germination lies in breaking the seed's natural dormancy, and kiwi seeds need a little help to wake up.
Place the seeds in a small bowl and cover them with lukewarm water. Let them soak for 24 hours—this softens the tough outer shell and kickstarts the internal processes. After soaking, you'll notice the seeds swell slightly, signaling they're ready for the next step. Drain the water and gently pat the seeds dry with a paper towel.
Create the Ideal Germination Environment
Fill a small container—like a seedling tray or even a repurposed egg carton—with damp peat moss or coconut coir. The medium should feel like a wrung-out sponge: moist but not soggy. Kiwi seeds thrive in warmth, so place the container inside a plastic bag and seal it tightly. This creates a mini greenhouse effect, trapping humidity and heat.
Position the container in a warm spot, ideally near a heat source like the top of your refrigerator or a seedling heat mat set to 75-80°F. Check the moisture daily—kiwi seeds need consistent dampness but will rot if waterlogged. If the surface dries out, mist it lightly with a spray bottle. You should see tiny sprouts pushing through the soil within 7-10 days.
Transplant Seedlings into Individual Pots
Once the seedlings develop their first true leaves—those are the second set after the initial cotyledons—they're ready to move. Gently lift each seedling from the germination tray, being careful not to damage the delicate roots. Plant them 1 inch deep in small pots filled with well-draining potting mix. Use a pencil or your finger to create a small hole for each seedling.
Water lightly after transplanting to settle the soil around the roots. Place the pots in bright, indirect light for the first week to help the seedlings adjust. Avoid direct sunlight initially, as it can scorch young leaves. You'll notice new growth within 7-10 days, signaling the seedlings are thriving.
Provide Support and Encourage Vining Growth
Kiwi vines are vigorous climbers, so install a small trellis or stake in each pot as soon as the seedlings are established. This prevents the plants from becoming top-heavy and encourages upward growth. Use soft ties or twistable plant clips to secure the vines gently—kiwi plants hate being manhandled, so avoid rough handling.
Place the pots in a location with 6-8 hours of sunlight daily, such as a south-facing window or under grow lights. Kiwi seedlings grow quickly, so rotate the pots weekly to ensure even growth. You'll see the vines start to twine around the trellis within 4-6 weeks, a clear sign they're ready for the next phase of care.
Tips & tricks for perfect kiwi seedling germination
Here's how to maximize your success with this accelerated kiwi seedling method—because those 10-14 days of waiting can feel like forever if you're not prepared.
Seed Selection Matters: The 24-hour soak works best with seeds from fully ripe kiwis—they've completed their natural ripening process and contain the highest germination potential. Look for seeds that are plump and intact; any that feel shriveled or have cracks won't sprout successfully. I've found that seeds from organic kiwis often germinate faster, possibly due to better seed quality and less chemical exposure during growth.
Temperature Consistency is Key: Maintaining that 75-80°F range is crucial for breaking dormancy. If your home stays cooler than this, consider using a seedling heat mat beneath your germination container. I've seen germination times double when seeds are kept below 70°F—those 10-14 days can easily stretch to 3-4 weeks. The warmth triggers enzymes that soften the seed coat and initiate root growth, so consistency is everything during those first critical days.
Moisture Management: The "wrung-out sponge" consistency is non-negotiable—kiwi seeds need constant moisture but will rot if submerged. I recommend misting the peat moss or coconut coir every 12 hours rather than soaking it. You'll know you've got the right balance when condensation forms on the inside of your plastic bag but no standing water collects at the bottom. Overwatering is the #1 reason for seed failure at this stage.
Light Transition Strategy: When moving seedlings to individual pots in Step 3, the bright indirect light requirement is crucial during that first week. I've seen seedlings develop leggy, weak growth when exposed to too much direct sunlight too soon. After that initial week, you can gradually introduce more direct light, but never exceed 4-6 hours of direct sun until the vines are well-established. This gradual transition prevents sunburn on tender new leaves.
Pro Tips for Kiwi Fruit Seedling
- Here's how to maximize your success with this accelerated kiwi seedling method—because those 10-14 days of waiting can feel like forever if you're not prepared.
- Seed Selection Matters: The 24-hour soak works best with seeds from fully ripe kiwis—they've completed their natural ripening process and contain the highest germination potential.
- Temperature Consistency is Key: Maintaining that 75-80°F range is crucial for breaking dormancy.
Frequently asked questions
Got questions about growing kiwi fruit seedlings?
You’re not alone! Here are answers to the most common queries—from germination tricks to troubleshooting—so you can get started with confidence.
How long does it take for kiwi fruit seeds to germinate?
Kiwi fruit seeds typically germinate in 4–8 weeks when kept warm (around 70–80°F) and moist. Patience is key—some seeds may take longer, especially if stored improperly. Pro tip: Soak seeds overnight before planting to speed up the process!
What’s the best temperature for germinating kiwi seeds?
Ideal germination temps range from 70–80°F (21–27°C). Use a seedling heat mat or place seeds near a sunny window to maintain warmth. Avoid cold drafts or extreme heat, which can stunt growth. Troubleshooting: If seeds sit too long without sprouting, try a warm, damp paper towel method to revive them.
Can I grow a kiwi tree from a grocery store seed?
Yes, but expect unpredictable results—store-bought kiwis are often hybridized for flavor, not fruit production. For reliable trees, source seeds from organic, seed-bearing varieties (like Hayward or Saichu). If you’re experimenting, plant multiple seeds for better odds!
Why aren’t my kiwi seeds sprouting?
Common culprits: dry soil, poor warmth, or old seeds. Check moisture (soil should stay damp but not soggy) and ensure consistent warmth. If seeds are over 6 months old, viability drops—try fresh seeds or a hydrogen peroxide soak (3%) to boost germination.
Do kiwi seedlings need full sun right away?
No! Start seedlings in bright, indirect light to avoid shock. Once sprouts appear, gradually introduce 4–6 hours of sunlight daily. Direct sun too soon can scorch tender leaves. Alternative: Use a grow light for 12–14 hours/day until outdoors.
Wrapping up and next steps
Growing a kiwi fruit seedling from scratch is a rewarding journey that can lead to year-round harvests of delicious, nutrient-packed fruit! 🌱 With the right materials, patience, and care, you’ll soon be enjoying the sweet-tart flavor of homegrown kiwis.
The key takeaway? Start small, stay consistent, and let nature do the rest.
Ready to take the next step? Plant your seedling in a sunny spot, monitor its growth, and soon you’ll be savoring the fruits of your labor—literally! 🍈