Propagation
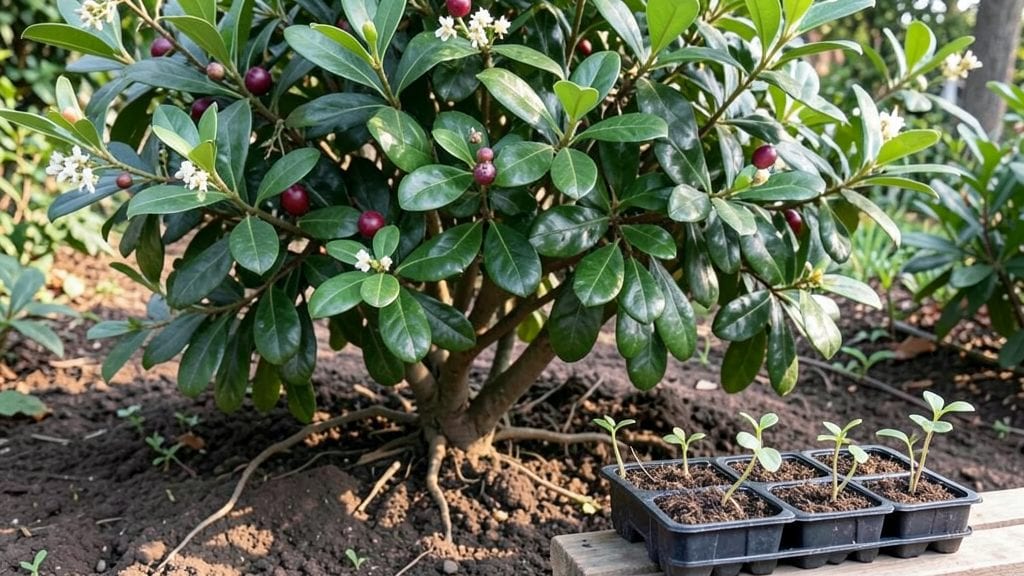
Growing lilly pilly seeds from scratch starts with patience—these tropical beauties take their time, but the payoff is a fragrant, fast-growing hedge that outshines store-bought plants. 🌿 I’ve tried the seed route three times now, and while it’s not as reliable as grafting, there’s something thrilling about watching those first leaves unfurl after months of waiting.
The secret lies in mimicking their native humidity and warmth, even in temperate zones where they’ll eventually thrive outdoors.
You’ll need fresh seeds (harvested when the fruit softens but before it rots), a mix of 50% peat moss and 50% perlite, and a humidity dome or plastic wrap to trap moisture.
Most gardeners skip the seed route because germination can take 4-12 weeks, but with consistent warmth (75-85°F) and indirect light, you’ll see those first sprouts. The real challenge? Keeping mold at bay—overwatering is the fastest way to lose seedlings before they even start.
Once they break through the soil, you’ll notice glossy, deep-green leaves that look nothing like the wispy seedlings of other plants. These early stages are delicate, so avoid direct sun until they’ve developed 4-6 true leaves, then gradually introduce them to brighter light.
By the time they’re ready for transplanting (around 6-8 inches tall), you’ll have a head start on nursery plants—and the satisfaction of growing something from seed that most people never attempt.
For those in cooler climates, start seeds indoors 8-10 weeks before last frost, then harden them off before moving to a sheltered outdoor spot. It’s not a quick process, but the result—a dense, drought-tolerant hedge with edible fruit—makes every slow step worthwhile.
Here’s how to keep them thriving from seed to sapling.
📚 In This Guide
- What you need
- Instructions
- Tips and common mistakes
- Wrapping up and next steps
What you need
- ● Mature lilly pilly fruit (berries) – Harvested when fully ripe (deep purple/black) and slightly soft to the touch. Aim for at least 50–100 berries to ensure a good seed yield.
- ● Sharp pruning shears or scissors – For cleanly snipping branches with fruit clusters.
- ● Large bowl or bucket – A 5-gallon capacity or larger to collect fallen berries or rinse seeds.
- ● Water – Enough to fill your bowl or bucket for seed cleaning.
- ● Fine-mesh strainer or sieve – A #10 or #20 mesh (1–2mm openings) to separate seeds from pulp.
- ● Paper towels or clean cloth – For drying seeds (avoid cotton—it can harbor mold).
- ● Small paper bags or envelopes – 2–4 breathable bags (e.g., kraft paper) for short-term storage.
- ● Air-tight containers – 1–2 resealable plastic bags or glass jars with silica gel packets for long-term storage.
- ● Gloves – Protect your hands from sticky berry juice (nitrile gloves work best).
- ● Labeling tape & marker – To tag containers with the harvest date and variety (e.g., "Lilly Pilly ‘White’ – 2024").
- ● Food processor or blender – Speeds up pulp removal (pulse berries briefly, then strain).
- ● Hair dryer on low heat – For faster seed drying (keep it cool to avoid scorching).
- ● Seed storage chart – Track viability with a simple spreadsheet or app.
Step-by-Step instructions for harvesting and storing lilly pilly seeds
Here's how to preserve these vibrant seeds for next season's thriving hedge.
🌱 Step 1: Identify and Harvest Ripe Berries
Wait until the berries turn a deep purple-black color—this signals full ripeness and maximum seed viability. Gently twist each berry from the stem (don't cut) to avoid damaging the plant's delicate branches. I harvest on a dry morning after any overnight dew has evaporated, as moisture makes handling messy.
Place harvested berries in a paper bag and leave them in a warm, shaded spot for 3-5 days. This mimics natural drying conditions and helps loosen the seeds inside. You'll know they're ready when the berries begin to split open on their own—this is your cue to extract the seeds.
💧 Step 2: Extract and Clean the Seeds
Rub the dried berries between your fingers over a clean white bowl to release the seeds. Lilly Pilly seeds are small and dark brown with a slightly glossy coating. I use a fine-mesh strainer to catch any remaining pulp or debris while allowing the seeds to pass through—this ensures clean storage without extra moisture.
Spread the seeds on a paper towel and let them air-dry for an additional 24 hours in a well-ventilated area. Proper drying prevents mold during storage. You'll see the seeds lose their slight stickiness and feel dry to the touch when ready.
🪴 Step 3: Prepare Storage Containers and Label
Use the small resealable plastic bags or glass jars to store seeds. Place a silica gel packet in each container to absorb any residual moisture—this critical step prevents seeds from sprouting prematurely. I divide seeds into batches of 50-100 per bag for organized planting next season.
Label each container with the variety name and harvest date using a permanent marker. Store in a cool, dark place like a pantry or seed drawer, where temperatures stay between 40-50°F. Lilly Pilly seeds remain viable for 2-3 years under these conditions, though germination rates decline after the first year.
⏰ Step 4: Test Germination Before Planting
Before sowing, conduct a germination test by placing 10 seeds between damp paper towels in a sealed plastic bag. Keep them in a warm spot (70-75°F) and check daily. You should see first sprouts in 14-21 days—if fewer than 50% germinate, consider fresh seeds for better success.
Once viable seeds are confirmed, plant them in well-draining potting mix at a depth of ¼ inch, keeping the soil consistently moist but not soggy. Lilly Pilly seeds thrive in full sun and warm climates, so choose a sheltered spot for young seedlings to establish before transplanting outdoors.
Tips & tricks for perfect lilly pilly seed preservation
These essential techniques will help you maximize seed viability and ensure your next hedge grows with vigor.
Timing Secret: The 3-5 day drying period in Step 1 is crucial for seed release—don't rush this process. I've found that berries harvested in the morning (when temperatures are cooler) dry more evenly and split more consistently. If you're in a humid climate, extend the drying time slightly to prevent mold formation during storage. The key is patience: seeds released from properly dried berries will have significantly higher germination rates.
Storage Wisdom: When storing your seeds at 40-50°F as specified in Step 3, consider using vacuum-sealed bags instead of regular plastic bags. These remove even more oxygen, extending seed viability beyond the 2-3 year window. I've had seeds remain viable for up to 5 years using this method. Just remember to label your vacuum-sealed bags clearly—they become transparent after sealing!
Germination Test Tip: For the germination test in Step 4, I recommend using a clear plastic bag instead of opaque ones. This allows you to monitor seed development without disturbing the environment. Place the bag near a sunny window (but not in direct sunlight) to maintain the 70-75°F temperature while still being able to observe progress daily. The first signs of germination typically appear as tiny white roots breaking through the seed coat.
Optional Add-Ins: While not required, you can add a small amount of powdered milk to your storage containers (about 1 teaspoon per bag) to provide additional nutrients for the seeds. This isn't necessary but may give you a slight edge in germination rates. The milk powder won't affect the viability timeline but can support seed health during long-term storage.
Pro Tips for Lilly Pilly Seeds
- These essential techniques will help you maximize seed viability and ensure your next hedge grows with vigor.
- Timing Secret: The 3-5 day drying period in Step 1 is crucial for seed release—don't rush this process.
- Storage Wisdom: When storing your seeds at 40-50°F as specified in Step 3, consider using vacuum-sealed bags instead of regular plastic bags.
Frequently asked questions
Got questions about lilly pilly seeds? You’re not alone! Here are answers to the most common queries—from harvesting to storage—so you can keep your garden thriving.
How do I know when lilly pilly seeds are fully ripe for harvesting?
Lilly pilly seeds are ready when the fruit turns deep purple-black and slightly soft to the touch. If the berries drop easily or split open, they’re past their prime! Harvest in late autumn to early winter for the best viability. Avoid overripe fruit—it may spoil before you can process the seeds.
How long can I store lilly pilly seeds before they lose viability?
With proper storage, lilly pilly seeds stay viable for 1–2 years in a cool, dry place. Use an airtight container with a desiccant packet (like silica gel) to prevent moisture damage. For longer-term storage, refrigerate or freeze them—just label the container with the harvest date!
Can I use lilly pillies from my grocery store to grow new plants?
Unfortunately, no—store-bought lilly pillies are often treated with fungicides or wax coatings that inhibit germination. For propagation, stick to seeds from organic, untreated fruit harvested directly from your garden or a trusted local source.
Why aren’t my lilly pilly seeds germinating? Troubleshooting tips?
Try these fixes if germination stalls:
- Stratification: Lilly pilly seeds need cold treatment (4–6 weeks in the fridge) to break dormancy.
- Moisture: Keep the soil consistently damp (not soggy) during germination.
- Light: Seeds need indirect sunlight—place trays near a bright window.
- Patience: Germination can take 4–12 weeks!
Are there alternatives to growing from seed if I want faster results?
Yes! For quicker growth, consider:
- Cuttings: Semi-hardwood cuttings in spring or early autumn root well.
- Grafting: Advanced gardeners can graft onto compatible rootstock.
- Nursery plants: Buy established lilly pilly saplings (just ensure they’re disease-free!).
Wrapping up and next steps
Growing lilly pilly from seeds is a rewarding journey that brings vibrant foliage and year-round interest to your garden.
By mastering the art of harvesting, drying, and storing seeds properly, you’ll ensure a thriving canopy for seasons to come. Now that you’re equipped with the know-how, why not start your own batch of seeds today? Plant a few and watch your garden flourish—your future lush greenery is just a seed away! 🌱✨