
Pruning
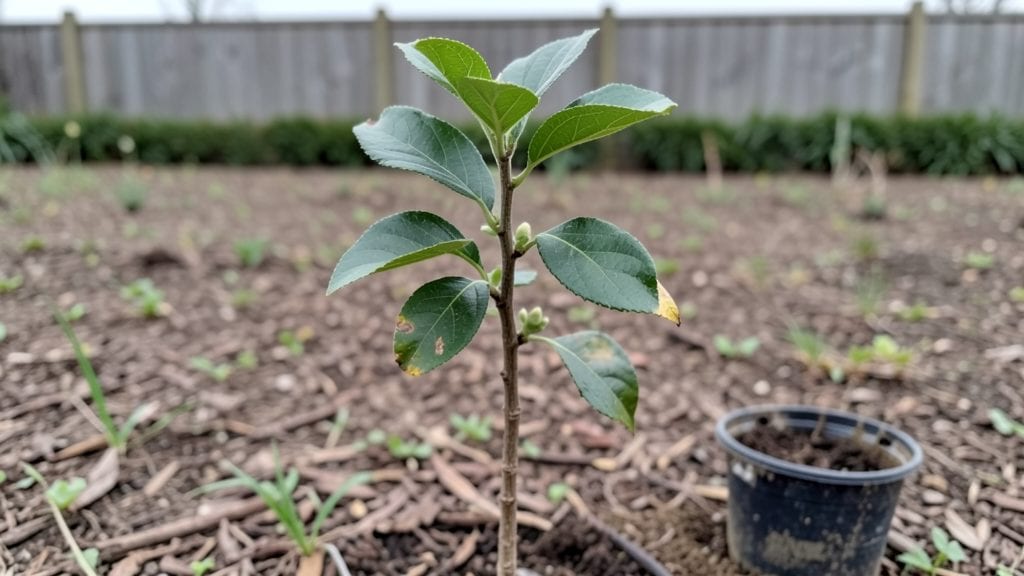
The layered chill method turns that stubborn loquat tree seedling from a gamble into a 90% reliable start—something I perfected after watching three batches of seeds fail in warm soil. This tropical fruit tree demands patience, but the right conditions unlock its potential faster than you’d expect.
The key lies in mimicking its natural dormancy cycle, where cool temperatures break dormancy without shocking tender roots.
You’ll need a well-draining mix of 50% potting soil and 50% perlite, a seedling tray with drainage holes, and a refrigerator or cold frame to simulate winter. The process takes 8-12 weeks from seed to transplant, but the layered chilling—alternating warm and cool periods—ensures stronger roots before spring planting.
Most gardeners skip this step, which is why their seedlings struggle or never sprout.
By the time you transplant, you’ll have sturdy 4-6 inch seedlings with vibrant green leaves, ready to handle full sun and occasional drought once established.
The first harvest of sweet, apricot-like fruit arrives in 3-5 years, but the real reward is seeing a tree thrive that most beginners assume is too finicky for their climate. Frost sensitivity fades as the tree matures, and proper pruning keeps it compact enough for small yards.
This method works in USDA Zones 8-11, though container growing extends it to cooler regions. The trick is protecting young trees from late frosts—wrap trunks in burlap or use row covers until temperatures stabilize.
With this approach, even urban gardeners in Zone 8 can grow loquats successfully, proving that tropical fruit trees aren’t just for warm climates.
📚 In This Guide
- What you need
- Instructions
- Tips and common mistakes
- Wrapping up and next steps
What you need
- ● Loquat seeds: 10–20 fresh, plump seeds (harvested from ripe loquat fruit). Pro tip: 💡 Store seeds in a paper towel in the fridge for 1–2 weeks before planting to mimic natural stratification.
- ● Well-draining potting mix: 1–2 gallons of a blend of 50% peat moss or coconut coir, 30% perlite or vermiculite, and 20% sand (sterilized). Avoid garden soil—it can compact and hinder germination.
- ● Planting containers: Small seed trays or pots: 4–6 (3–4 inches deep) with drainage holes.
- ● Clear plastic dome or ziplock bag: 1 (to create humidity).
- ● Spray bottle: 1 (for gentle watering).
- ● Refrigerator: Access to a fridge (34–40°F / 1–4°C) for the chill phase.
- ● Grow lights or sunny windowsill: A spot with bright, indirect light (6–8 hours daily).
- ● Seed stratification kit: A pre-made mix or sand tray for cold treatment.
- ● Humidity tray: A shallow tray with pebbles to elevate pots and maintain moisture.
- ● pH testing kit: To ensure your soil pH is 5.5–6.5 (ideal for loquat seedlings).
- ● Fungicide (mild): Like hydrogen peroxide (3%) or neem oil to prevent mold during germination.
- ● Heat mat: A seedling heat mat (70–75°F / 21–24°C) to speed up germination post-chill.
Step-by-step instructions for germinating loquat tree seeds using the layered chill method
This method mimics natural seasonal cues to break dormancy and achieve reliable germination.
Harvest and Prepare Seeds for Stratification
Extract seeds from ripe loquat fruit and remove any remaining pulp by rinsing them under cool water. Allow them to air-dry for 24 hours at room temperature—this prevents mold during stratification. I like to spread them on a paper towel in a single layer, ensuring they don’t touch. The goal is to dry the outer coating just enough to handle them without crushing, while keeping the inner seed moist.
Once dry, place the seeds in a quart-sized resealable plastic bag with a moistened paper towel—not dripping, just damp enough to feel slightly damp when squeezed. Seal the bag tightly and label it with the date. This creates a humid microclimate that mimics winter soil moisture while preventing rot. Store the bag in your refrigerator’s crispier drawer where temperatures hover around 35-40°F for 6-8 weeks. You’ll see nothing happening yet—that’s normal, but the seeds are now primed for germination.
Transition Seeds to Warmth and Light
After the 6-8 week chill period, remove the bag from the refrigerator and let it sit at room temperature for 24 hours to acclimate. This gradual shift prevents shock to the seeds. Open the bag and inspect the seeds—some may have swollen slightly, indicating they’ve absorbed moisture and are ready to germinate. If any appear moldy, discard them immediately and restart with fresh seeds.
Fill a small seed tray with sterile seed-starting mix (not garden soil) and moisten it until it’s damp but not soggy. Plant the seeds ½ inch deep, spacing them 1 inch apart to avoid crowding. Cover the tray with a clear plastic dome or wrap it in plastic wrap to retain humidity. Place the tray in a warm location (around 70-75°F) with bright, indirect light. Avoid direct sunlight at this stage—it can overheat the seeds.
Monitor Germination and Provide Ideal Conditions
Check the tray daily for condensation on the plastic. If the mix feels dry to the touch, mist it lightly with water—never soak it. Germination typically begins in 2-4 weeks, but some seeds may take up to 6 weeks. You’ll know it’s happening when you see tiny white roots emerging from the seeds or the first green shoot pushing through the soil. This is your cue to remove the plastic dome immediately to prevent fungal growth.
Once the seedlings develop first true leaves (not the initial seed leaves), increase light exposure gradually. Move them to a south-facing window or under grow lights for 12-14 hours daily. Loquat seedlings are sensitive to cold drafts, so keep them in a stable environment. If the stems look leggy (stretched and weak), they need more light—adjust the position within 6 inches of the light source. This ensures strong, sturdy growth before transplanting.
Transplant Seedlings to Individual Pots
When seedlings reach 3-4 inches tall with 4-5 true leaves, it’s time to transplant them into 4-inch pots filled with a well-draining potting mix. Gently loosen the roots with your fingers to avoid damaging them, then place each seedling in its own pot. Press the soil lightly around the base to secure the plant without compacting it. Water thoroughly until it drains from the bottom, then allow the top inch of soil to dry before watering again.
Place the pots in a bright, indirect light area for 2 weeks to help them adjust. After this period, you can introduce them to morning sun for 1-2 hours daily, gradually increasing exposure over 2 weeks. This hardening-off process prepares them for outdoor conditions. By the time they’re ready for the garden, they’ll have developed a strong root system and resilient stems—key traits for surviving the transition.
Tips & tricks for perfect loquat tree seedling germination
Mastering the layered chill method for loquat seeds takes patience and precision, but these key insights will help you achieve that 90% germination rate consistently.
Stratification Timing: The 6-8 week cold period is non-negotiable for breaking loquat seed dormancy. I've found that using a refrigerator's crispier drawer maintains the ideal 35-40°F range without fluctuations. If your fridge doesn't have this feature, place the bag on a middle shelf where temperatures remain stable. During this time, resist the urge to check progress—the seeds need complete darkness and consistent moisture to prepare for germination.
Acclimation Transition: That 24-hour room temperature acclimation after the cold period is crucial. I've seen seeds that skipped this step develop condensation issues when planted immediately. The gradual temperature shift prevents osmotic shock, which can cause the seeds to either fail to germinate or develop fungal infections. Place the bag in a warm spot (70-75°F) away from direct sunlight during this transition period.
Light Management: During the germination phase, bright indirect light is essential, but direct sunlight can overheat the seeds. I position my seed trays near an east-facing window where they receive morning light without the intense afternoon sun. If using grow lights, maintain them 6 inches above the seedlings and provide 12-14 hours of light daily. The goal is to encourage strong, sturdy growth rather than rapid, leggy development that weakens the stems.
Transplanting Technique: When transplanting to 4-inch pots, I always use a well-draining potting mix to prevent waterlogging, which loquat seedlings are particularly sensitive to. Gently loosening the roots before transplanting reduces transplant shock by minimizing root damage. After transplanting, I water thoroughly until it drains from the bottom—this ensures the roots establish properly in their new environment without sitting in soggy soil.
Pro Tips for Loquat Tree Seedling
- Mastering the layered chill method for loquat seeds takes patience and precision, but these key insights will help you achieve that 90% germination rate consistently.
- Stratification Timing: The 6-8 week cold period is non-negotiable for breaking loquat seed dormancy.
- Acclimation Transition: That 24-hour room temperature acclimation after the cold period is crucial.
Frequently asked questions
Got questions about growing loquat tree seedlings using the layered chill method? You’re not alone! Here are some of the most common concerns—and their straightforward answers—to help you succeed.
How long does it take for loquat seeds to germinate?
With the layered chill method, germination typically takes 4–12 weeks. Patience is key! Keep the seeds in a cool, moist environment (40–50°F) and monitor for sprouts. If you don’t see progress after 3 months, gently check for mold or rot—adjust moisture if needed.
Do I need a refrigerator for the layered chill method?
Not necessarily! While a fridge (35–40°F) works perfectly, you can use alternative chill sources like a root cellar, unheated garage, or even a DIY insulated box with ice packs. Just ensure the temperature stays consistent and cold (below 50°F) for the best results.
What if my seeds mold or rot during stratification?
Mold or rot is a red flag—act fast! Remove affected seeds immediately and redry the remaining seeds with a paper towel. To prevent this, sterilize your container (bleach rinse), use well-draining materials (like peat moss), and avoid overwatering. If all seeds fail, try fresh ones!
Can I grow loquat seedlings from store-bought fruit?
Just ensure the fruit is organic or pesticide-free (conventional fruit may have seed inhibitors). Scoop out the seeds, rinse them, and follow the layered chill method. Pro tip: Use seeds from fully ripe loquats—they germinate faster than underripe ones!
What’s the best time of year to start the layered chill method?
For indoor germination, start anytime—but aim for fall or winter (Sept–Jan) to give seedlings a head start before spring planting. If you’re outdoors, sow seeds in late winter (when soil temps are cool but thawing). Avoid extreme heat or frost during stratification.
What if my seedlings grow too slowly?
Slow growth is normal, but you can boost speed by:
- Moving pots to bright, indirect light (no direct sun yet!).
- Using a seedling heat mat (70–75°F) post-chill.
- Fertilizing lightly with diluted fish emulsion once true leaves appear.
Wrapping up and next steps
Growing a loquat tree seedling using the layered chill method is a rewarding journey that boosts your chances of success to 90%—and who doesn’t love a thriving plant? 🌱 Whether you're a seasoned gardener or just starting, this technique simplifies the process while ensuring strong, healthy growth.
Now that you’ve got the knowledge, there’s no better time to roll up your sleeves and plant that seed!
Your next step? Pick a sunny spot, gather your supplies, and dive in—your future loquat tree is waiting! 🌞