
Fertilization
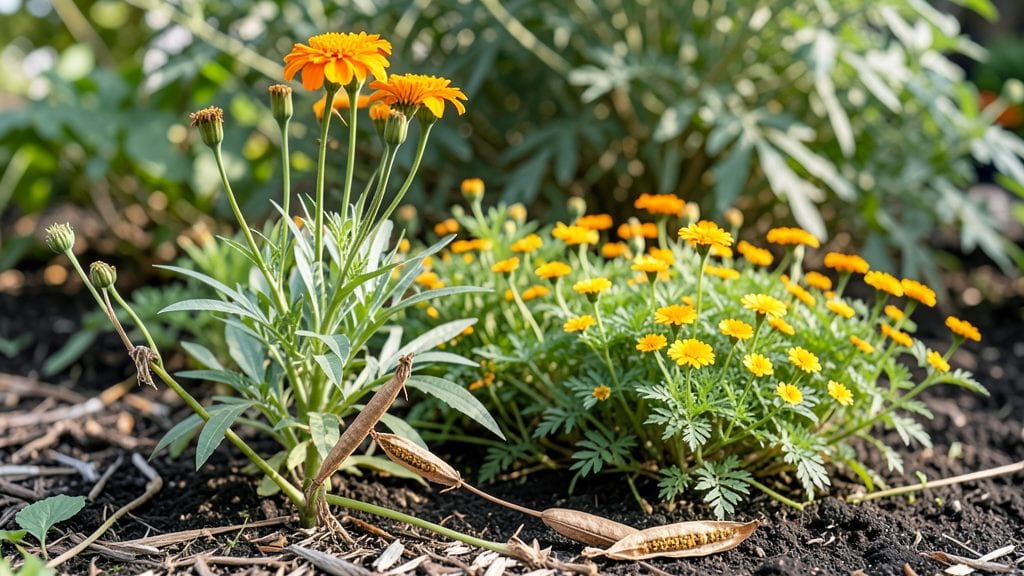
Marigold self-seeding is nature’s way of ensuring your garden stays bright—those "weeds" are just baby marigolds plotting their own takeover. 🌻 Now I let them grow wild in one corner, and by late summer, I’ve got a fresh crop of bright blooms without buying a single seed.
The magic happens when you let the flowers fade naturally on the plant. Those dried seed heads contain hundreds of tiny marigold babies just waiting for spring to sprout. The best part? These seedlings are tougher than store-bought starts—they’ve already proven they can survive in your soil.
Just give them a little space, and they’ll reward you with bold orange and gold blooms all season long.
If you’re worried about overcrowding, harvest the seeds early and store them in a paper bag until planting time. Or let nature take its course: self-seeded marigolds often bloom earlier than transplanted ones, giving you months of continuous color with almost no effort.
The only real mistake? Pulling them up before you know what they are.
Works in any sunny spot, from garden beds to containers. Once you see how easy this is, you’ll never buy marigold seeds again—and your neighbors might just start asking where you get all those free plants. Let’s get those seed heads drying!
📚 In This Guide
- What you need
- Instructions
- Tips and common mistakes
- Wrapping up and next steps
What you need
- ● Marigold Seeds: 1–2 packets of Tagetes spp. seeds (French, African, or Mexican marigolds work best). Choose heirloom or open-pollinated varieties for true self-seeding.
- ● Pro Tip: Save seeds from your healthiest blooms for next year’s garden! 🌼💡
- ● Growing Medium: Well-draining potting mix (sterile, seed-starting blend preferred). Quantity: Enough to fill 2–4" deep trays or individual pots.
- ○ Optional: Perlite or vermiculite (10–20% by volume) to improve aeration.
- ● Containers: Seed trays with drainage holes (10–20 cells) OR small pots (3–4" diameter).
- ● Quantity: 1 tray or 6–10 pots per packet of seeds.
- ● Watering Supplies: Spray bottle OR a gentle watering can with a fine rose attachment.
- ● Pro Tip: Use room-temperature water to avoid shocking seeds! 💧🌡️
- ● Light Source: Grow lights (LED or fluorescent, 12–16 hours/day) OR a sunny windowsill (south-facing preferred).
- ○ Optional: Heat mat (70–75°F) for faster germination in cool climates.
- ● Patience! Germination takes 7–21 days depending on temperature and variety.
- ● Consistent moisture (keep soil evenly damp, not soggy).
- ● Access to full sun (6+ hours/day) once seedlings are 2–3" tall.
- ○ Optional but Helpful: Fertilizer (balanced 10-10-10 or fish emulsion) for transplanting.
- ● Mulch (straw or shredded leaves) to retain moisture in outdoor beds.
Step-by-Step guide to encouraging marigold self-seeding
Let’s turn those spent marigold blooms into next year’s garden stars—naturally.
🌱 Step 1: Choose the Right Varieties for Self-Seeding
Not all marigolds play nice with self-seeding. French marigolds (like 'Bonanza' or 'Janie') are your best bet—they produce plenty of seeds and drop them readily. African marigolds (like 'Tangerine' or 'Goldfinger') are less reliable because they often drop seeds too late in the season or produce fewer.
Look for varieties labeled "self-seeding" or "prolific bloomers." If you’re unsure, just observe: plants with lots of seed heads (those dry, papery pods) are your winners. I’ve found that French marigolds left undisturbed will self-sow aggressively, while African types might need a little help.
🌿 Step 2: Let Seed Heads Mature Naturally
Once your marigolds finish blooming, resist the urge to cut them back. Leave the spent flowers on the plant—they’ll develop into seed heads over 2-3 weeks. These heads are the pods that contain the tiny, black seeds you’ll want to spread.
Watch for the seed heads to turn brown and dry out completely. They’ll look like little paper lanterns. If you snip them too early, the seeds won’t mature, and you’ll miss your chance. I like to wait until at least 80% of the flowers have turned into these dry pods before taking action.
💧 Step 3: Disturb the Soil Gently for Natural Scatter
Once the seed heads are fully dry, give the soil around the plants a light raking with a garden fork or hoe. This loosens the top inch of soil just enough to let the seeds fall naturally. Don’t dig too deep—you’re not trying to till, just create little pockets for the seeds to nestle into.
Here’s the thing—marigolds need well-draining soil to germinate. If your garden is heavy clay, mix in a little compost or sand where the seeds will land. I’ve seen marigolds pop up in the most unexpected spots after a light disturbance, so don’t stress about precision.
☀️ Step 4: Wait for Germination and Thin Naturally
Marigold seeds germinate best in warm soil (65-75°F) and will sprout in 7-14 days if conditions are right. You’ll see tiny green leaves pushing through the soil—this is your cue that the self-seeding worked! Let them grow for a few weeks before thinning.
Once seedlings are 2-3 inches tall, use scissors to snip the weakest ones at soil level. This prevents overcrowding and gives the strongest plants room to thrive. I’ve found that marigolds left to self-seed often produce more vibrant blooms than store-bought starts because they’re already adapted to your soil and climate.
⏰ Step 5: Protect and Repeat for Year-Round Blooms
To keep the cycle going, avoid heavy mulching or deep tilling in the fall—this can bury seeds too deep for them to sprout. Instead, add a light layer of straw mulch (1-2 inches) to protect seedlings from frost while letting them overwinter.
By next spring, you’ll likely see new marigold volunteers popping up around your garden. The key is patience: self-seeding marigolds may take 2-3 years to reach their full, showy potential, but once they do, they’ll naturalize beautifully. I’ve had the same patch of marigolds blooming for five years now—just by doing nothing!
Tips & tricks for perfect marigold self-seeding
Here’s what I’ve learned after years of watching marigolds naturalize in my garden—these tricks will help you get the best results with minimal effort.
Variety Matters: If you’re starting from scratch, prioritize French marigolds like 'Bonanza' or 'Janie' for self-seeding success. These varieties produce abundant seed heads that release seeds readily. I’ve noticed that African marigolds often disappoint—their seeds mature too late in the season or don’t drop as easily. For best results, look for plants labeled "self-seeding" or "prolific bloomers" at your local nursery.
Timing is Everything: The 2-3 week window in Step 2 is crucial—don’t rush it! Those seed heads need time to fully mature and dry out completely. I’ve made the mistake of harvesting too early, only to find the seeds weren’t viable. Wait until at least 80% of the flowers have transformed into those papery brown pods before disturbing them. This ensures you’ll have plenty of healthy seeds ready to scatter.
Soil Prep Secret: Marigolds thrive in well-draining soil, but if your garden has heavy clay, take an extra step in Step 3. Mix a handful of compost or coarse sand into the top inch of soil where you’ll be scattering seeds. This improves drainage without requiring heavy tilling, which could bury seeds too deep. I’ve seen marigolds pop up in the most unexpected spots after this simple soil amendment—even in areas I didn’t intentionally plant them!
Germination Conditions: Pay attention to soil temperature when waiting for germination in Step 4. Marigolds need warm soil between 65-75°F to sprout reliably. If your spring is cool, consider using a cold frame or planting in a slightly sheltered spot. I’ve found that seedlings appear much more consistently when soil temps are in this ideal range. Once they’re 2-3 inches tall, thinning with scissors gives you the cleanest results—just snip at soil level to avoid disturbing the roots of the plants you’re keeping.
Pro Tips for Marigold Self Seeding
- Here’s what I’ve learned after years of watching marigolds naturalize in my garden—these tricks will help you get the best results with minimal effort.
- Variety Matters: If you’re starting from scratch, prioritize French marigolds like 'Bonanza' or 'Janie' for self-seeding success.
- Timing is Everything: The 2-3 week window in Step 2 is crucial—don’t rush it!
Frequently asked questions
Got questions about marigold self-seeding? You’re not alone!
Here are answers to the most common queries—so you can keep those vibrant blooms popping up without the fuss.
How do I encourage marigolds to self-seed reliably?
Let spent blooms stay on the plant until they dry and split open (). Deadhead after seeds form but before they scatter—this ensures they drop near the parent plant. Mulch lightly around the base to retain moisture for seedlings. Pro tip: Avoid aggressive pruning in late summer to maximize seed production!
When is the best time to let marigolds self-seed?
Wait until late summer or early fall (after the first frost risk passes). Seeds need warm soil to germinate, so timing them right ensures they sprout in spring. Bonus: Fall-seeded marigolds often bloom earlier the next year!
What should I do if my marigolds aren’t self-seeding at all?
Check for these issues:
- No seed heads: Some varieties (like ‘Bonanza’ or ‘Jumbo’) produce fewer seeds. Opt for French marigolds for better self-seeding.
- Dry soil: Keep plants watered but not soggy—seeds need moisture to mature.
- Pests: Slugs or birds may snack on seed pods. Use row covers or netting if needed.
Can I transplant self-seeded marigolds, or should I leave them?
You can thin seedlings to 6–12 inches apart for stronger plants, but leaving extras is fine—they’ll self-thin naturally. Warning: Avoid overcrowding, or blooms may shrink. Transplant extras to borders or containers if you love ‘em!
What’s the fastest way to get marigolds to self-seed everywhere?
Strategically place seed traps—let a few plants go to seed in isolated spots (like garden edges or pots). Over time, marigolds will spread organically. Pro move: Mix in a little compost around seed traps to boost germination!
Are there any downsides to marigold self-seeding?
Only if you’re picky about placement! Self-seeded marigolds may pop up in unwanted spots (like cracks in pavement). To control them:
- Pull extras before they flower.
- Use a hula hoop or shallow tray to corral seeds.
- Save seeds for next year and store them in a cool, dry place.
Wrapping up and next steps
Marigold self-seeding is your secret weapon for effortless, vibrant blooms year after year! By understanding the process—whether you’re letting nature take its course or giving seeds a little help—you’ll enjoy low-maintenance, high-reward gardening. The key? Patience and observation—watch those tiny volunteers pop up and nurture them into stunning flowers.
Ready to turn your garden into a self-sustaining marigold paradise? Start by marking a few spots this season to let seeds scatter naturally, or collect and replant them strategically. Your future self (and pollinators!) will thank you. 🌻✨